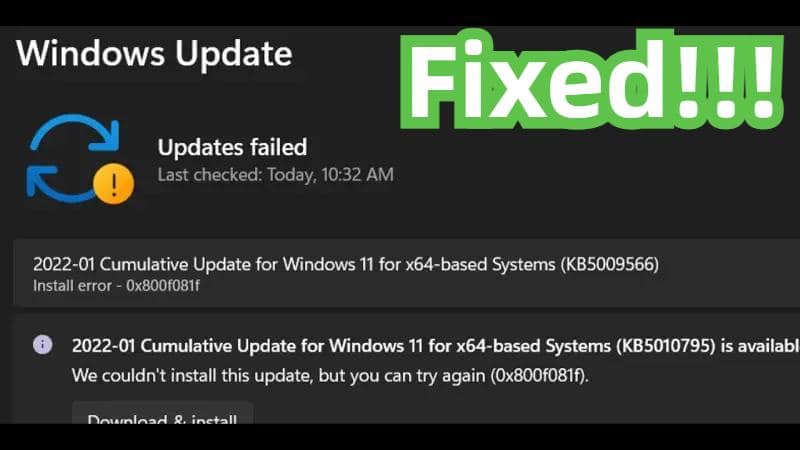
“I’ve been continuously stuck with this error 0x800f081f while trying to update my Windows 11 system. It’s getting frustrating as I’ve tried everything I could think of, even resorting to installing updates manually (which just fails). I’m at my wit’s end and don’t want to reset Windows unless it’s the only option. Any help?”
—A Question from Reddit.
Dealing with the ‘install error – 0x800f081f' on Windows 11 updates? This error happens when Windows can’t download necessary update files. But don’t worry. It’s a common issue but entirely fixable.
In this blog, we have 7 effective methods to fix this problem and get your system back on track fast. Plus, we’ll explain why this error happens so you can avoid it in the future and some preventative measures to take before fixing this error. Let’s dive in!
Part 1: Reasons Behind Install Error – 0x800f081f
While the error 0x800f081f can be a real headache, there’s no single reason behind it happening. However, some common culprits include:
- Missing Microsoft .NET Framework 3.5.
- Group policy settings being set wrong.
- Certain system files required for the installation are corrupted or missing.
- The Windows 11 installation files are not downloaded completely or are damaged during the download process.
- Your computer does not meet the minimum requirements for the update.
- Third-party software or antivirus programs may interfere with the installation process.
Part 2: Things to Do Before Fixing Error 0x800f081f Windows 11
Fixing the 0x800f081f Windows Update error manually can be tricky and risky for your data. To play it safe and not lose important stuff, we strongly advise you to back up your data and operating system before attempting any fixes.
You can use the 4DDiG Partition Manager in that regard, as it makes data backup and system preservation convenient to avoid data loss. Here’s what this tool can provide:
- Adjust partitions as needed—create, split, extend, format, or delete them with ease to optimize your disk space.
- Backup by cloning your entire hard drive to protect your valuable data.
- Easily move your Windows OS to an SSD without reinstalling the whole system.
- Upgrade to a bigger hard drive smoothly while keeping your data intact.
Now you know what this tool offers, here are the steps to cloning your hard disk:
Step 1: Download and install the 4DDiG Partition Manager tool on your PC. Connect an external storage to your computer.
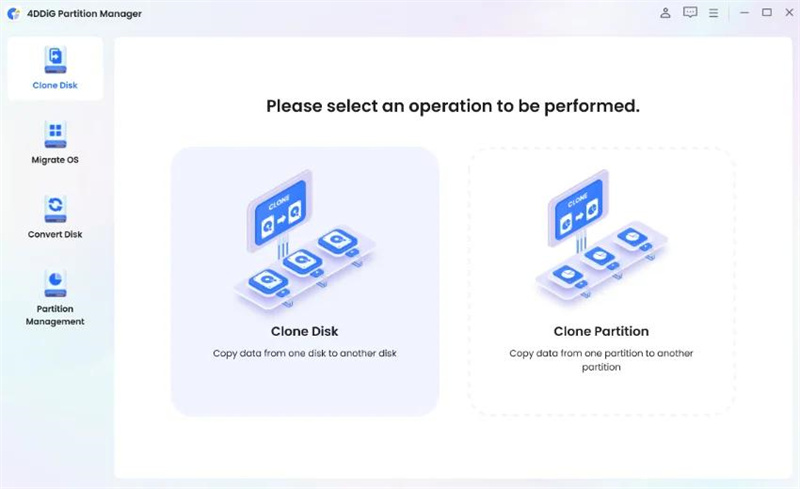
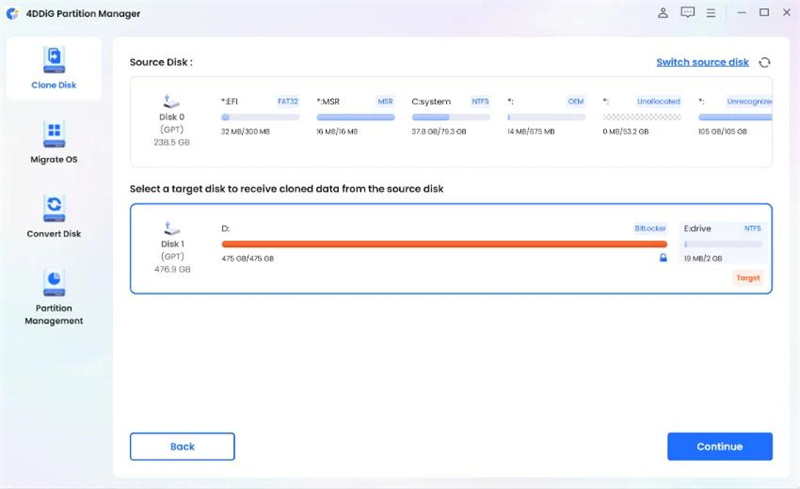
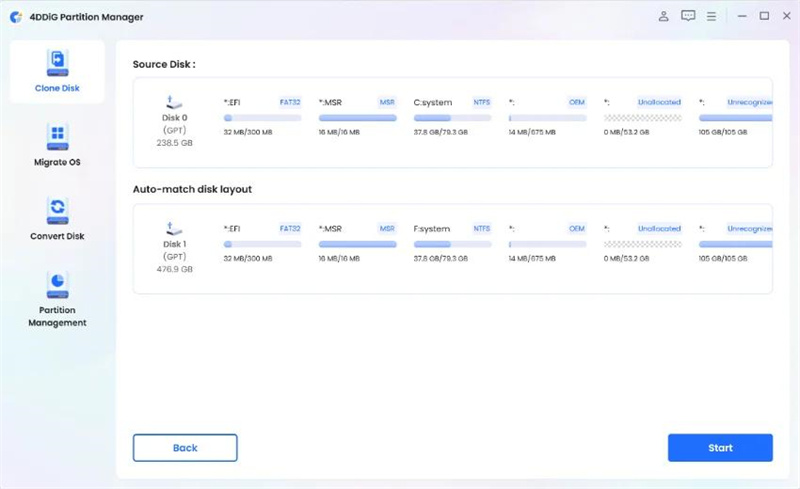
Step 2: Open the tool and go to the main menu. Choose “Clone Disk.” Pick the external storage where you want to copy the data. Click “Continue.”
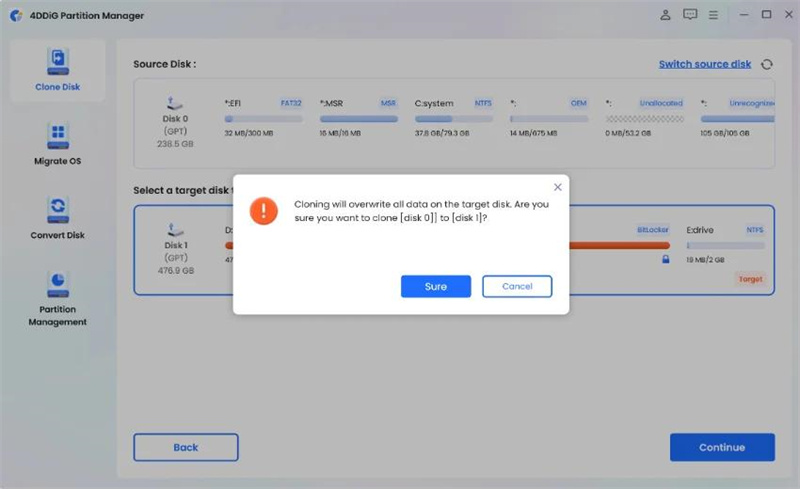
Step 3: Confirm everything is correct and hit “Sure.” Preview the process and double-check.
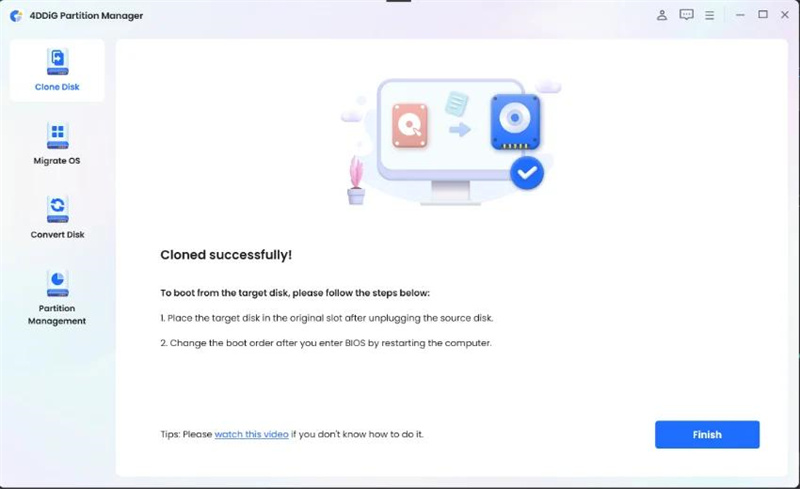
Step 4: Start the cloning process by clicking “Start” and wait patiently. When it’s done, click “Finish.”
Now, you can easily resolve the 0x800f081f Windows 11 error without losing any data.
Part 3: How to Fix Install Error – 0x800f081f Windows 11?
Once you’ve cloned your system, it’s time to fix the install error – 0x800f081f. Here, we’ve listed seven methods to try:
Solution 1: Check Windows 11 Compatibility
If you’re getting the error 0x800f081f in Windows 11, the first thing to check is whether your Windows supports the 22H2 update. This issue may also happen if your system requirements are incompatible with Windows 11. Here’s how to check your Windows 11 compatibility with the 22H2 update:
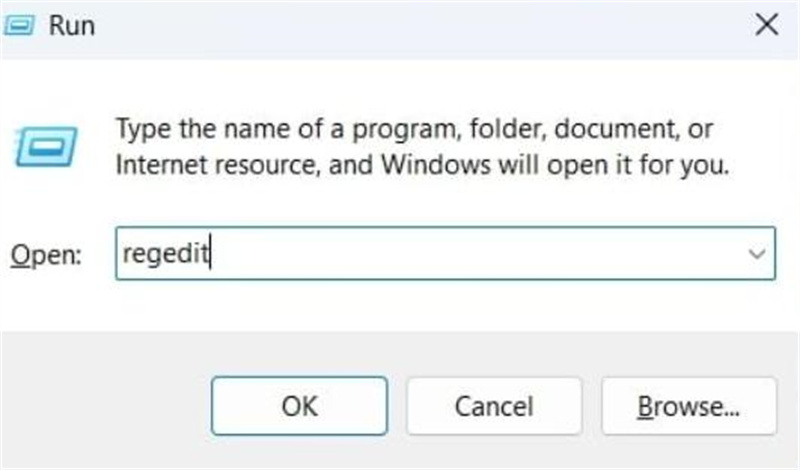
Step 1: Press the “Windows + R” keys and enter the “regedit” command in the Run dialog box that appears. Hit “Enter.”
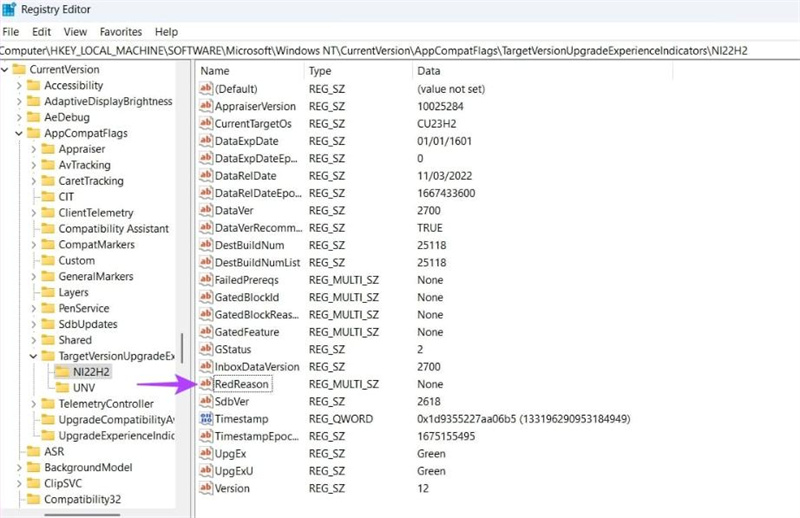
Step 2: The Registry Editor will open. Go to:
“Computer\HKEY_LOCAL_MACHINE\SOFTWARE\Microsoft\Windows NT\CurrentVersion\AppCompatFlags\TargetVersionUpgradeExperienceIndicators\NI22H2.”
Step 3: Double-click “RedReason” in the right pane. If it says “None,” your system is compatible with the 22H2 update. But if it says “TPM UEFISecureBoot,” you can’t install the update on your computer.
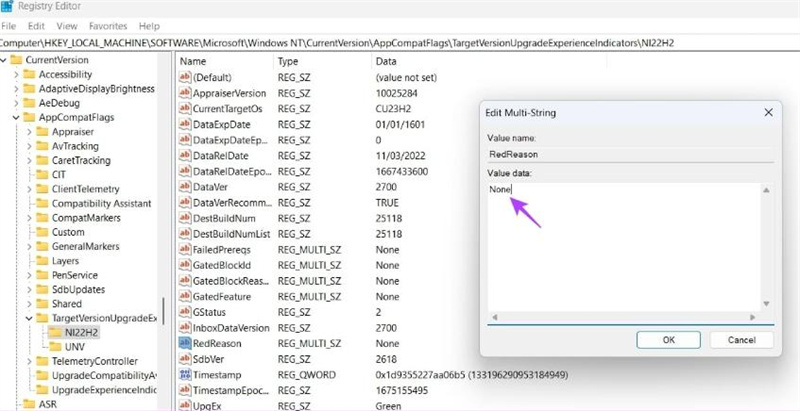
In such a case, uninstall Windows 11 and replace it with a version that is compatible with your system.
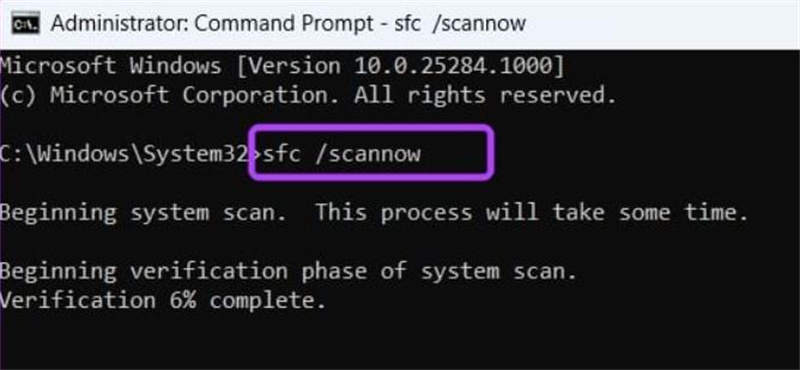
Solution 2: SFC Scan to Repair OS
If your PC can handle the 22H2 Windows 11 update but still faces the install error – 0x800f081f, it’s probably due to corrupted Windows files. You can fix these by running a built-in Windows tool called SFC scan. This built-in tool can repair corrupted system files and find the missing ones from the local cache. Here’s how to use it:
- Open Command Prompt as an admin. Type “sfc /scannow” and hit “Enter.” Once the scan finishes, restart your computer and see if the problem's gone.
Solution 3: DISM Scan to Repair OS Images and Files
If the 0x800f081f Windows 11 error sticks around, you can give the DISM scan a shot. It is a more powerful tool than the SFC, which can fix system images and files on your PC. Moreover, it can even download files from the internet to repair the system images. Here’s how to use it:
Step 1: Open Command Prompt as an admin once more.
Step 2: Type these commands one by one, and after each command, hit “Enter:”
DISM /Online /Cleanup-Image /CheckHealth
DISM /Online /Cleanup-Image /ScanHealth
DISM /Online /Cleanup-Image /RestoreHealth

Solution 4: Rename Windows Update Folders
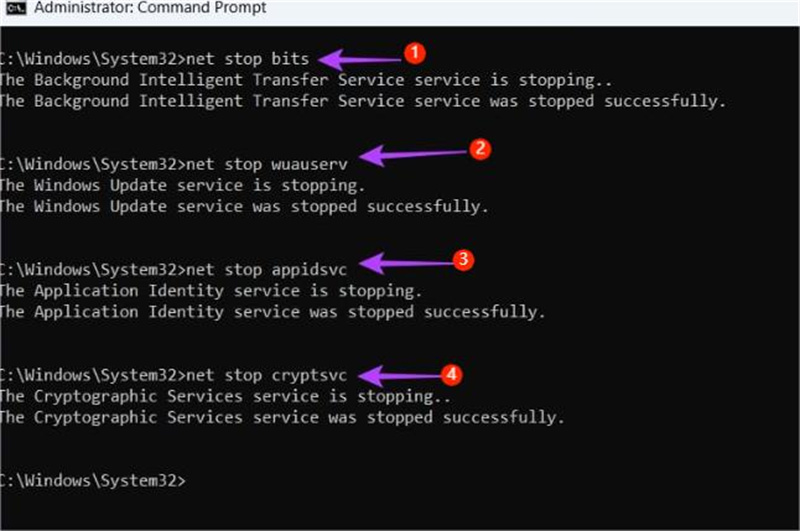
Corrupted Windows 11 update files can also cause the error 0x800f081f. You can fix this issue by renaming the “SoftwareDistribution” and “Catroot2” folders in which those files are present. Here’s how to do that:
Step 1: Press the “Windows + S” keys to open “Command Prompt.” Run it as an admin. Type these four commands to stop the Windows Update services for renaming purposes and hit “Enter” after each one:
net stop bits
net stop wuauserv
net stop appidsvc
net stop cryptsvc
Step 2: Enter “Ren %systemroot%\SoftwareDistribution SoftwareDistribution.old” to rename the “SoftwareDistribution” folder.
Step 3: Then, enter “Ren %systemroot%\Catroot2 Catroot2.old” to rename the “Catroot2” folder.

Step 4: Once you’ve renamed both folders, type these four commands to start the services again, hitting “Enter” after each command:
net start bits
net start wuauserv
net start appidsvc
net start cryptsvc
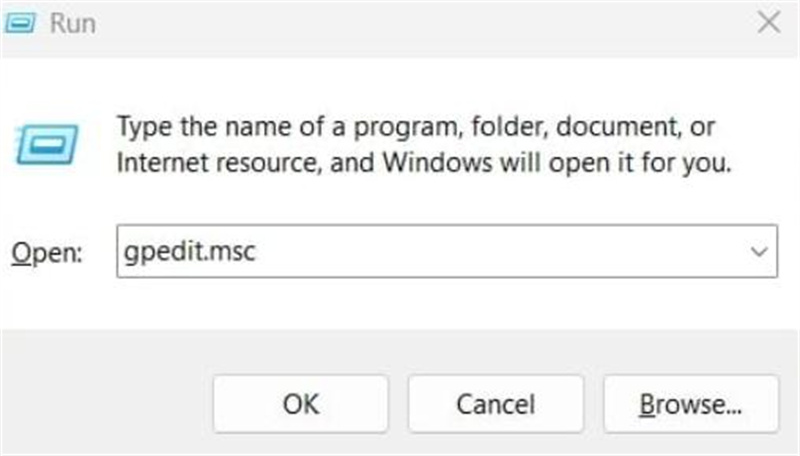
Solution 5: Enable Optional Updates
You might need to enable optional updates to fix the 0x800f081f Windows update error. When you turn off optional updates, Windows might miss out on some non-essential but useful updates. These updates can include extra features and security enhancements.
Disabling them could lead to Windows not getting all the required updates to tackle the 0x800f081f error. Here’s how to enable optional updates, but keep in mind this option isn’t available in Windows 11 Home:
Step 1: Press the “Windows + R” keys together, enter “gpedit.msc” in the Run dialogue box, and hit “Enter” to open the “Local Group Policy Editor.”
Step 2: Head over to “Computer Configuration” and click on “Administrative Templates.” Then, choose “System.”
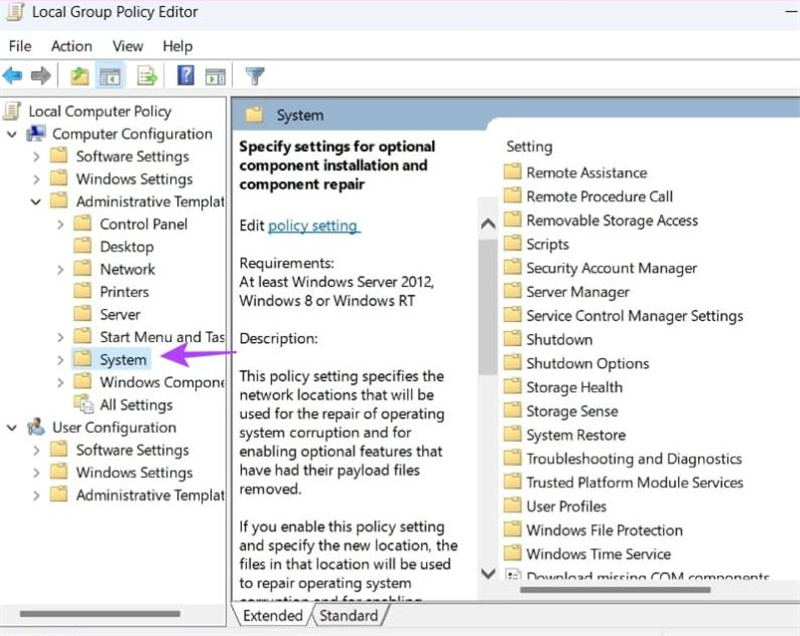
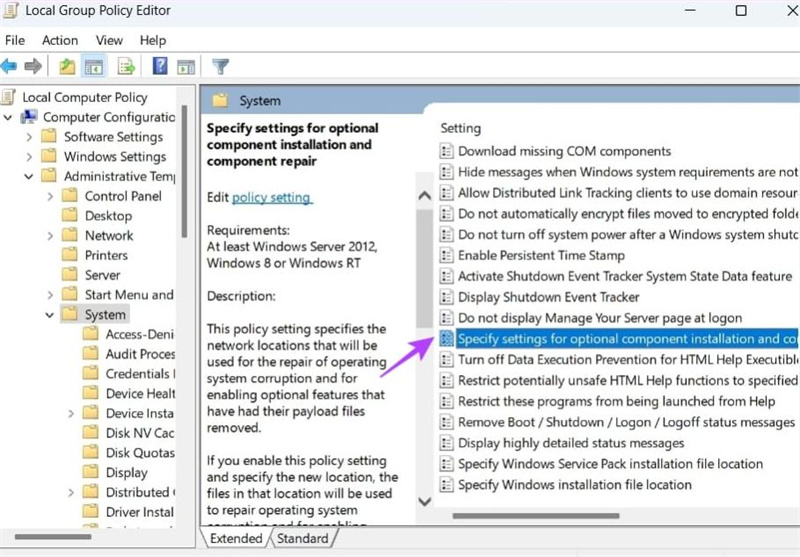
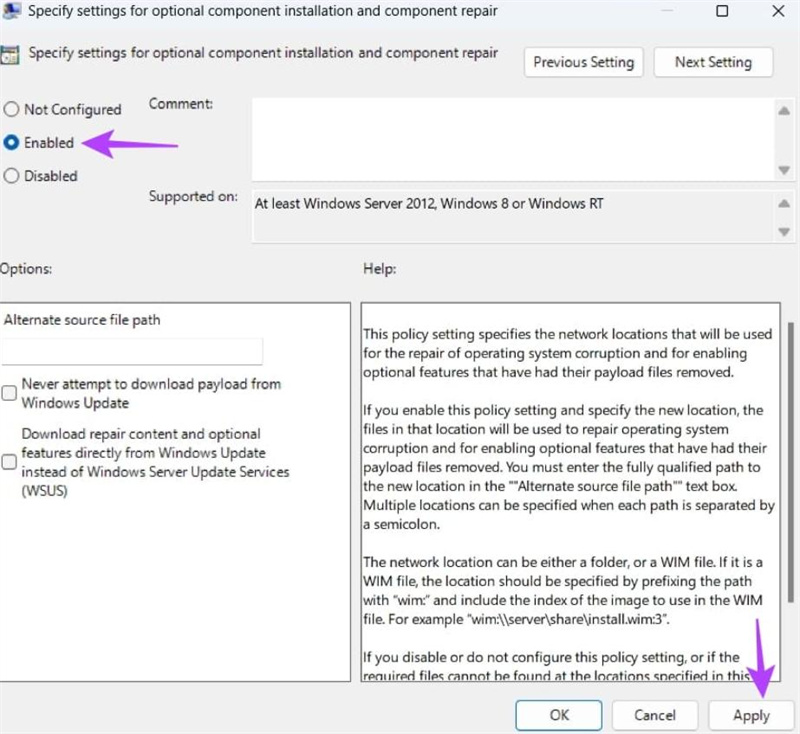
Step 3: Double-click on “Specify settings for optional component installation and component repair.” Choose “Enabled” and hit “Apply.”
Solution 6: Reinstall Microsoft .NET Framework 3.5
Reinstalling .NET Framework 3.5 can also solve the install error – 0x800f081f error by fixing any corrupted or missing files in the .NET Framework. This framework is essential for running Windows applications and some updates.
If it’s damaged or gone, it can mess with Windows updates. Reinstalling it helps by replacing the bad or missing parts. Here’s how to reinstall it:
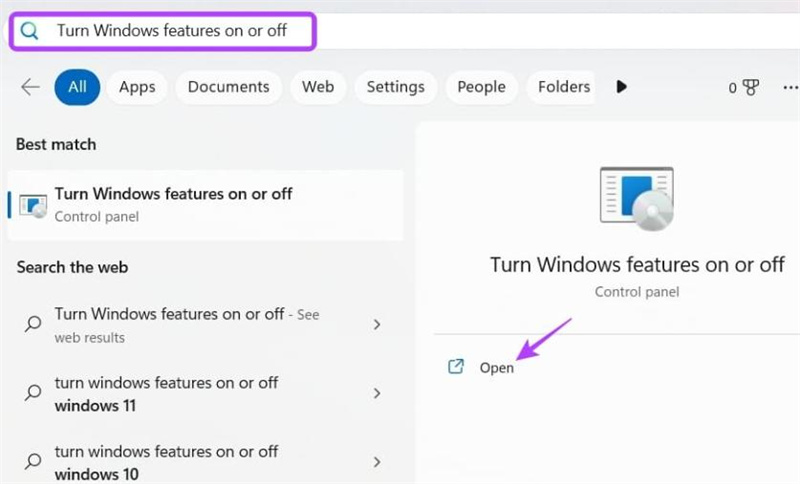
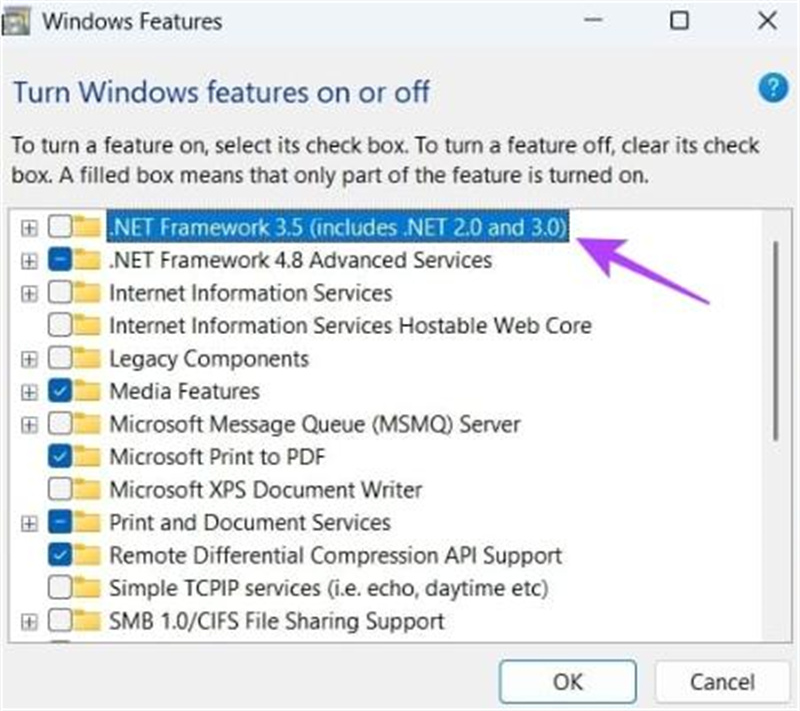
Step 1: Press the “Windows + S” keys to open “Windows Search.” Look for “Turn Windows features on or off” and open it.
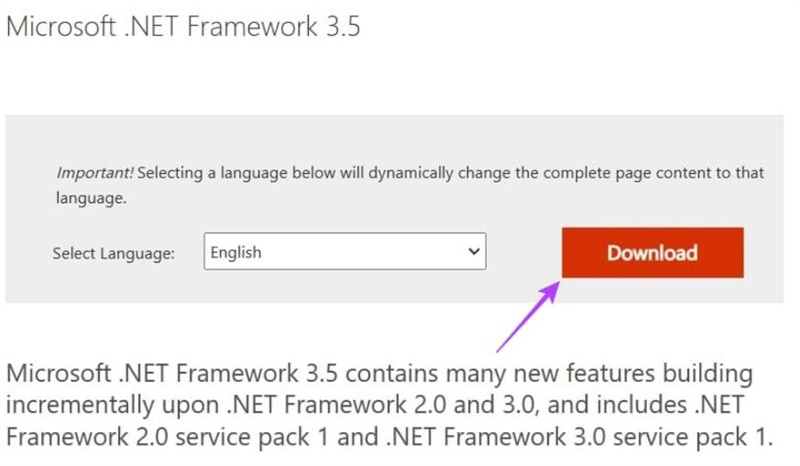
Step 2: Uncheck “.NET Framework 3.5 (includes 2.0 and 3.0)” and click “OK.” Wait for it to uninstall. Go to the .NET Framework 3.5 download site and click “Download.”
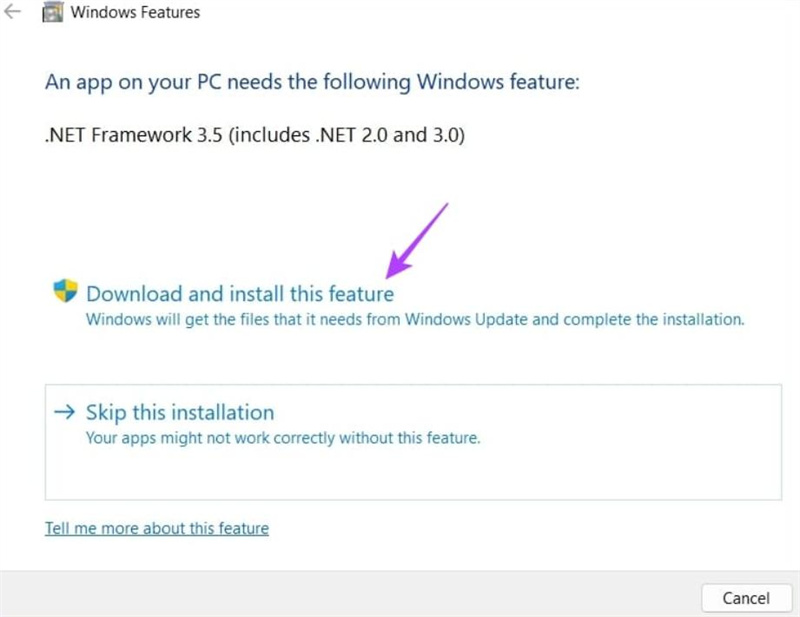
Step 3: Run the downloaded file and choose “Download and install this feature.” Windows will handle the rest. Check if the Windows Update error pops up again.
Solution 7: Enable Windows Update Services Manually
The final solution to fix the 0x800f081f Windows 11 error is to manually enable Windows Update services, such as Windows Update, Application Identity, and Background Intelligent Transfer Service (BITS). If these services are disabled, they might be causing the problem in Windows Update. Here’s how to enable them:
Step 1: Press the “Windows + R” keys. Type “services.msc” in the Run dialog box that appears and Hit “Enter” to open the Windows Update services.

Step 2: Find these services: “Windows Update,” “Background Intelligent Transfer Service” (BITS), and “Application Identity.”
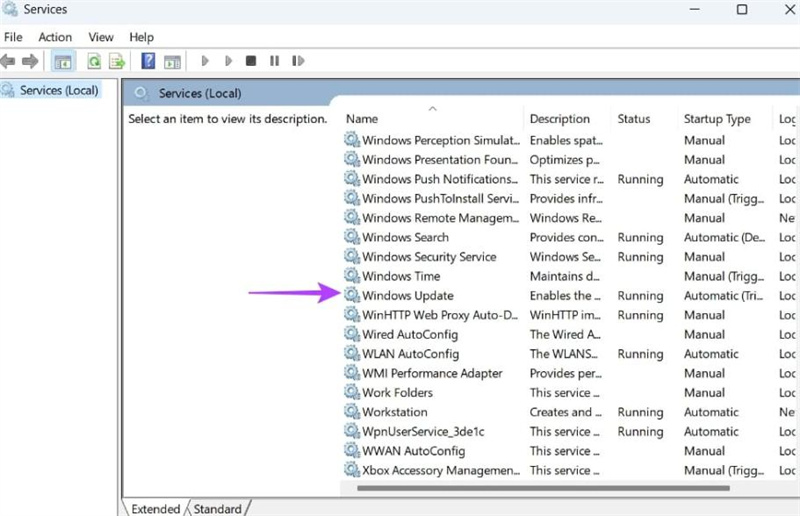
Step 3: Right-click on each service and choose “Properties.” In the “Startup type” dropdown, pick “Automatic.” Click “OK.”
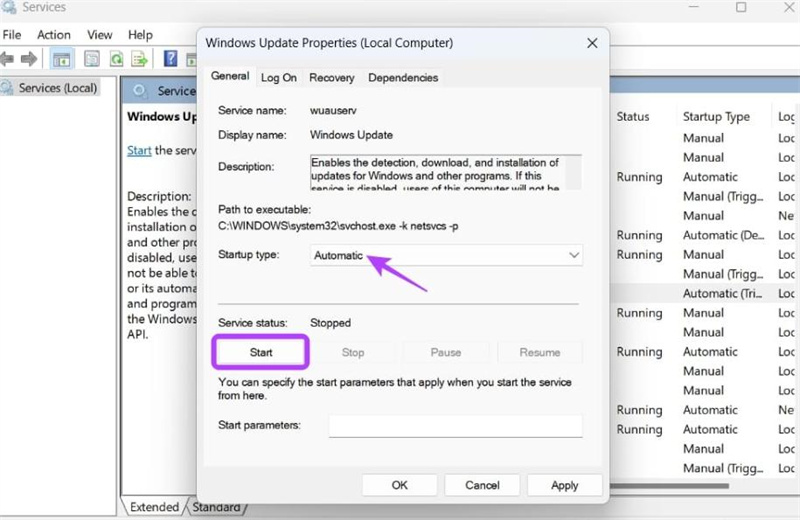
After enabling these services, restart your computer. Windows Update should work as expected.
That's it! You can now rest assured, as you no longer need to worry about install error – 0x800f081f on Windows 11.
Final Words About Error 0x800f081f
Windows update error 0x800f081f can be frustrating for Windows 11 users. But the good news is there are seven effective methods outlined in this blog post to fix it.
Remember, it’s crucial to back up your data and operating system before tackling the 0x800f081f Windows Update error to prevent data loss. Fortunately, 4DDiG Partition Manager makes it easy to protect your valuable data by cloning your entire hard drive.