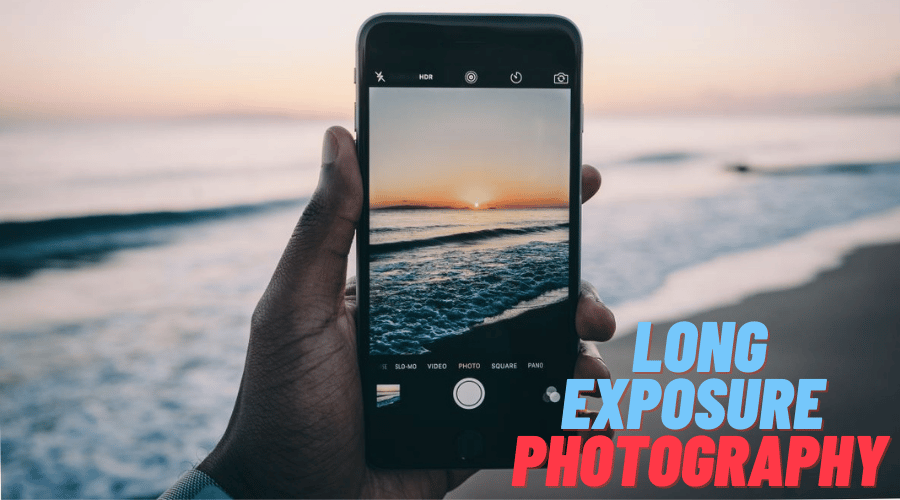
Would you wish to explore deeper into the new photography techniques using iPhone? Long exposure snaps are the next perfect features of dreamy landscape and light trail.
As concerning the previous articles, photography is an advancing field. Many features are being introduced with the view of making the snaps unique. Among them is long exposure photography. The technique has been around and utilized by photographers to get stunning landscape snaps and light trails. But lately, the feature can be imitated through iPhone gadgets.
Thus, there are some of the requirements needed to achieve the long exposure feature. However, our article will guide you through everything you need to know about long-exposure phototherapy. When using the latest iOS devices, you can easily get the long-exposure images in no time. Let us get into more details about the long-exposure photo before guiding you through the steps.
What is a Long Exposure Photo?

To begin with, you need to grasp the concept of long-exposure photos. So, if you have ever seen a crashing wave, and if not, a waterfall that appears silky smooth in the photo, this is it.
In other instances, you might find a snap including an image of a city with multiple moving cars and pedestrians but keeping the background in the grip. Such are the samples of the long exposure photos. These images are snapped in a special condition. That is captured using a slow shutter speed while the tripod minimizes the camera shake. You can also achieve these images even with the DSLR as well as mirrorless cameras.
You only have to make sure to modify the shutter speed to range between 1/15 to 3 seconds. The range wholely depends on the effects you need to achieve in the long run.
Can iPhone Take Long Exposure Shoots?

When you are using the old DSLR cameras, it is still possible to take long-exposure images. However, you have to go and utilize the manual control, which makes sure that your camera shutter maintains a set duration of time open so that camera has enough time to create the long exposure snap.
However, the latest iPhone they do not have this manual control feature. The good news is that there are multiple ways out of this to achieve taking the long exposure snap with the latest iPhone models.
Using these specific methods guarantees your phot capability to simulate the long exposure effects so that instead of using the DSLR camera, it utilizes a different technique.
The fact remains that all iPhones are not designed to keep the shutter open for a long period while snapping a photo. But, you can simulate the long exposure by using the multiple images but with the same scenes, then stitch them so that you can come up with beautiful long exposure photos at the end.
We will guide you and entails in the next section.
How to Do Long Exposure on iPhone?
This section will cover different methods of taking long-exposure photos using an iPhone. In the end, you'll have pretty good outcomes. So, select the one your favorite and guarantees you real scenes and control over the process.
Convert Live Photo to Long Exposure

we previously covered more about live photos on iPhones. So, with that knowledge in mind, you are just a step close to getting to the long exposure phototherapy with your iPhone. Live photo is a 3-second video clip and the best option when you can not record a video using an iPhone camera. Thus, if you have iPhone 6 and above, you can access the live photo feature.
Therefore, if you want to get a long exposure image, you must capture a subject in motion with all set up in places such as a tripod and sturdy surface to avoid camera shake.
When you are done with the setup process, then here are the guides you need to follow:
Step 1: Using your iPhone, launch the camera application.
Step 2: Then click on the concentric circle at the top of your screen to turn on the live photos feature.
Step 3: Set the self-timer. Click on the clock-shaped button on the right-hand side of the live photo icon and set it between 3 to 10s seconds. When you use these features, it helps you minimize the camera shake.
Step 4: Then proceeds by positioning the iPhone on the tripod and ensuring you have framed the shot.
Step 5: Click on the shutter icon to start taking live photos
Step 6: Then when you are done, click on the photos app and locate the live photo
Step 7: Swipe up on the phone, and reveal the effects or options
Step 8: keep swiping to the left and get access to the option saying long exposure effects. Click on it to create your long-exposure image.
Step 9: And hen you are not satisfied with eth outcome, iPhone allows you to reverse back and access the original file by clicking on the live effect options.
Use Long Exposure Apps
If the above method seems demanding or tiresome, you can try using a third-party application such as Slow Shutter Cam, ProCam 8, and Camera+ Legacy. Over, for the sake of this guide, we will utilize Slow shutter cam since it is a cheap premium third-party application.
So, follow these steps to take your long-exposure photo with the iPhone.

Step 1: Assuming you already downloaded the slow shutter cam application, launch it and give it access by accepting the necessary permissions to access the camera roll.
Step 2: Then head to the setting section and tap on the app settings. After that, set the capture to either motion blur, low light, or a light trail. Then, adjust the shutter speed and light sensitivity to ensure that it meets all your snapping requirements.

Step 3: Then also, make sure you mount the iPhone to your tripod and ensure the subject is under the frame and involves one moving subject.

Step 4: If you need to reduce the camera's shake, click on the bottom left menu, select the self-timer, and adjust your needed shutter delay to take the snap smoothly.
Step 5: Then click done
Step 6: Then click on the shutter icon, giving it time to complete the snapping process.

Step 7: Then, click clear retry, edit where necessary if you want to make changes, and tap saves to store the image in the photo library on the camera roll.
Connect a Digital Camera to Your iPhone
The last option to take long-exposure photos using iPhone is to connect the digital camera. This gives you deal services without spending a lot of money on getting the DSLR. Get a digital camera compatible with the iPhone and then connect through mutual control to manage the shutter speed.
A good example of such a camera is the DxO ONE, which is a 20.2MP digital cam with an f/1.8 prime lens and a full HD capable of taking long-exposure images to a duration of 30 seconds.

So, if you want to sue it, here is the guide on the step by step:-
Step 1: First, you need to download the DoX ONE application from the app store, launch it and attach it to the DxO ONEdigital camera using the lighting port on your iPhone.
Step 2: Make sure you grand application access to the camera and images.
Step 3: Then you will see the capture screen displayed on the iPhone. Then click on the capture mode button on the lower right-hand side, automatically setting the camera to the auto mode.
Step 4: And when you want to set the shutter speed, click on the shutter priority mode.
Step 5: Then select the shutter speed found on the left-hand side of your toolbar and adjust it to range between 1/10 to 30 seconds. The duration depends on the end target.
Step 6: Click on the shutter button and take your photo. Equally, you can use the volume button on the earbuds or remove the trigger and capture the long-exposure images.
Tips to Shoot Long Exposures on iPhone
Since you have rough ideas, tap, it is time to perfect the knowledge. We have gathered some relevant tips to help you take your photogprah[ophy to the next level. These practical tips will help you get stunning photos.
Have a Tripod

The main point behind taking the long exposure photos is to have a blur motion. But everything is kept appearing sharp as a tack. Therefore, the use of a tripod has been tried, vetted, and proposed to the best to help you achieve these conditions. Get a pocket-sized tripod for the best results and acceptable scene. Then utilize the tripod whenever you snap long exposure images to attain perfect outcomes.
Use the Self-Timer

Self-timer or sometimes the remote shutter is meant to help you reduce the shakes while taking long exposure photos with your iPhone. and when you are using earbuds for this case, then you can control or take the photos by clicking o the volume button or remote shutter. The best option is to turn on the timer on the camera and decide on the delay time once you click on the shutter and choose a perfect time to take the photo.
So, if you want to set the time, head to the arrow found at the top of your screen, tap on it to open the menu, and get the button above the shutter icon. Then select the clock button and set the shutter timer between 3 to 10 seconds.
Photograph a Crowd of People on a Busy Street
One of the stunning moves to get an excellent long-exposure photo is to snap on the striking o popular landmark as your focal point and then create a blurred image of a crowd motion may be in the street. Make sure the subject, which is the crowd in motion, is either above or below the landmark.
Make sure you take multiple photos since there is an element of unpredictability in the long exposure snaps ins such a condition. After that, select from the list the best images. And to attain the perfect result, you need to frame the subject before shooting with low light. Thus take the snap a few hours before or after sunrise or sunset.
Snap Next Lighting Storm
It is sometimes virtually impossible to capture lighting since it is unpredictable, especially when using the method. Therefore, increase the possibility of attaining a perfect shot by paying attention to the storm's patterns, utilizing the tripod, and snapping continuous photos in a series of your long exposure images in a storm.
This is because you are not just sure when the next lightning will strike, so you should play a role and make it exciting when you shoot the lighting storm.
Try Using Steel Wool Painting

We are sure you have seen steel wool photos on social media platforms and never thought that the mechanism behind this simple. However, it would help if you took safety precautions with the long-exposure photo app. It is fun but avoids it when the outdoor activities are windy and dry.
Thus get a piece of steel wool, and fave the gloves, and you are lighter for safety. have an iPhone standby on the tripod and utilize the above tricks such as timer, light the subject and let it spin rapidly while burning as you take the snaps. Mind your safety.
Become a ‘Ghost' Photographer
The kids will look like ghosts when you try to snap a long-exposure photograph using the iPhone. This is the best technique to utilize the ghost as the closed option. Therefore, for it to successfully capture the subject must be in a slow motion.
Move Camera for a Reason
A deliberate iPhone motion is another perfect effect you can utilize in obtaining a long-exposure photo. For this case, you will not need a tripod. You need to be moving around but with a reason or for a purpose during the exposure session.
You can utilize the up, down, side to side, and slow-motion to obtain good results. Whoever, avoid shaking. Therefore move up and down for r the vertical subjects like trees while the vertical motion to horizontal subjects.
Therefore, before you click on the shutter, start moving on purpose, and even after clicking the shutter, keep moving for a short period. Ensure that you at least capture a video of 1.5 seconds before and after clicking the shutter icon. You'll obtain snaps that resemble impressionist paintings with the technique.
Snap Moving Water

Snapping moving water is also the right condition to get a long-exposure photo. With varying success, you can snap a moving subject like water in a real sense. When you blur the moving ice or water, you can easily obtain a beautiful yet dreamy look at the river as you emphasize the speed at which the river water flows. This also enhances the appearance of a landscape with the moving water as well as the shore and surface waves.
Shoot During the Windy Day
You can also add perfect scenes to your ordinary photo by snapping a long exposure photo during a windy day. Such a day is perfect for snapping this kind of photo. This is because the image also captures the motion to convey a sense of movement. This way, it adds a story to your photo, and with a little breeze, you can have even an interesting effect.
Use the Best Exposure Settings
Immediately after framing your subject, you must choose the correct long exposure settings located beneath the exposure button and close t the shutter button. You must adjust various settings to include perfect capture duration, blur strength, and capture mode.
Snap Light Trails

Other than the above tips, you can also consider the trails. The light trail is one of the best aspects of the long-exposure photo. Thus, you must choose the light trail mode from the exposure settings.
After that, you must couple it with the right light sensitivity value, but this depends on the brightness of the light on your selected scene. Consider all the relevant settings discussed above and get a stunning light trail image. You can even focus on the red taillights. Besides, you can also use headlights. Never use both since headlights are brighter as opposed to the taillights.
Conclusion
photography is a trending profession with advancing technology, many features are being adopted, and even the use of third-party applications is incorporated in obtaining unique photos. And today, you can even snap a long exposure image using your iPhone.
In the article, we have discussed in detail what a long exposure photo is, its relevance, and the conditions under which it must be taken. We have also highlighted the relevant procedure to follow while using iPhone.
Therefore, utilize the above practical tips, elevate your professional photography to the next level, and amaze customers with new techniques. You will need time to experiment and grasp the concept to get it right. You can also obtain stunning long-exposure photos and give your clients a perfect treat.