Do you want to improve your computer's performance? or make it more safer. Try to Flashing BIOS that will help improve its performance. In this article, you will get a better overview of what BIOS is, how to identify, and update it.
What is the BIOS?
BIOS in full means Basic Input Output System. It is usually installed in your motherboard BIOS chip (ROM) program. Simply, it is the computer's special driver. Whenever you turn on your computer, it is the first piece of software to load. On top of that, it also holds the computer's input and output programs, power-on self-test, and system self–boot programs. BIOS is dynamic in that it also has access to hardware and systems.
BIOS is also the program a computer’s microprocessor uses to start the computer system. It also manages data flow between the Operating System and attached devices. It also includes instructions on how to load the basic computer hardware. It also includes the Power on SELF Test that verifies the computer meets the requirement to boot up properly. If it is not, you will hear some beeps.
How to View Current Bios Version and which Can be Updated?
You need to know your current BIOS version. Hence for this, first download the speccy tool to view your computer’s hardware details.
- Once you set up Speccy, run it to get your computer’s details. It doesn’t take long for all the details to be visible.
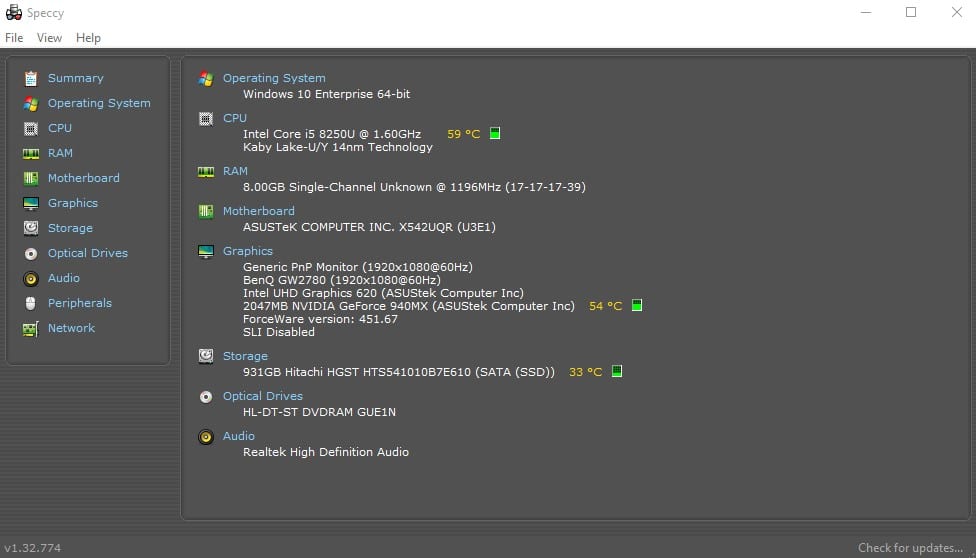
- Once it finishes loading when you click on the Motherboard option in the left menubar. You will see the Motherboard manufacturer, Motherboard model, and current BIOS version.
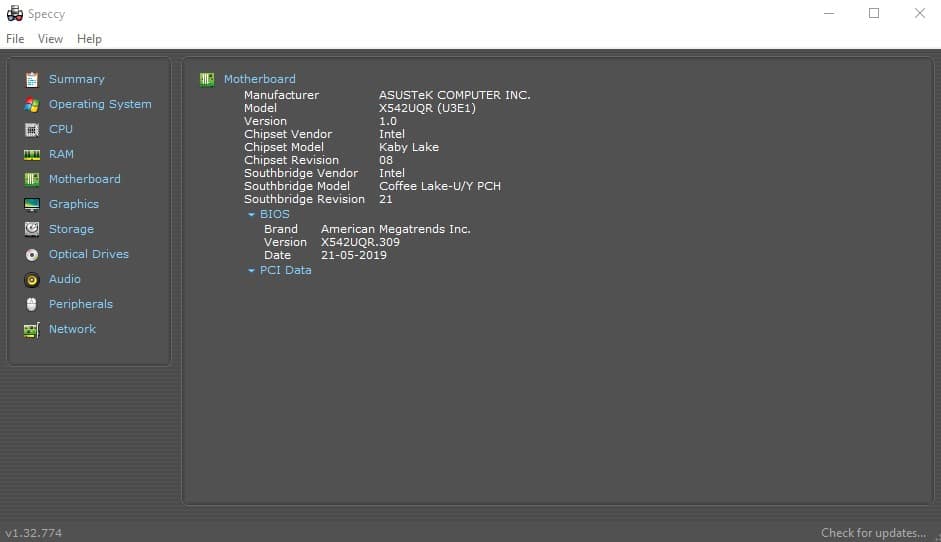
- Once you are sure of the details, go to the motherboard vendor website to look up your motherboard model and download the appropriate BIOS.

The Different Motherboard BIOS Download Pages
- MSI BIOS download page.
- Gigabyte BIOS download page.
- ASUS BIOS download page.
- ASROCK BIOS download page
- Lenovo BIOS download page
- HP BIOS download page
- Intel BIOS download page or official website.
How to Update the BIOS
- Step 1: You need to have already identified the current BIOS you are using according to your computer's device through the speccy software.
- Step 2: Find your device’s BIOS official download page and download the latest one. Copy the file and extract it to a USB flash drive. Also, ensure the Flash disk is secure.
- Step 3: Let's take the example of the Z390 Microstar. Search the computer’s model on the official website, and you will see the updated files.
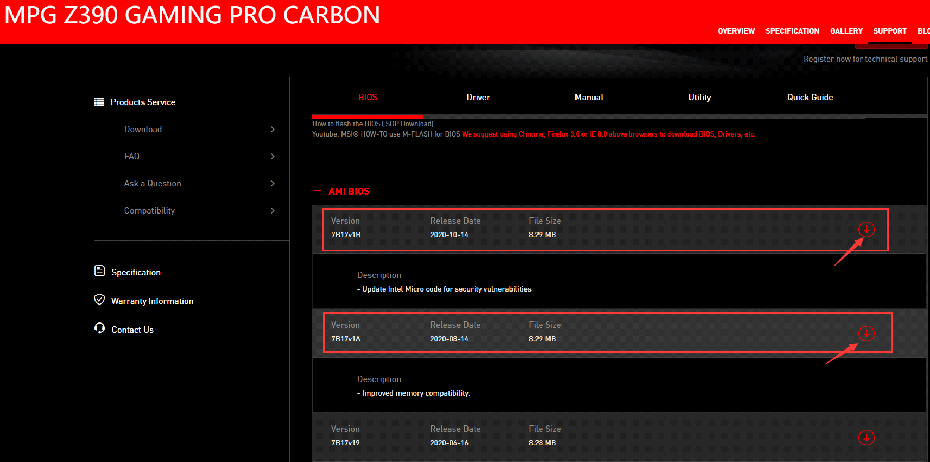
- Step 4: Choose a suitable BIOS update file according to your needs. At times, the latest BIOS may not be too stable, hence choose the most satisfying one. The downloaded BIOS file comes as a zip file and needs to be unzipped before using it.

- Step 6: You will find two files. One is the TXT which is the content of the BIOS version. The other file is the BIOS that we need to update. Now you may bring the new BIOS copy to the flash drive.
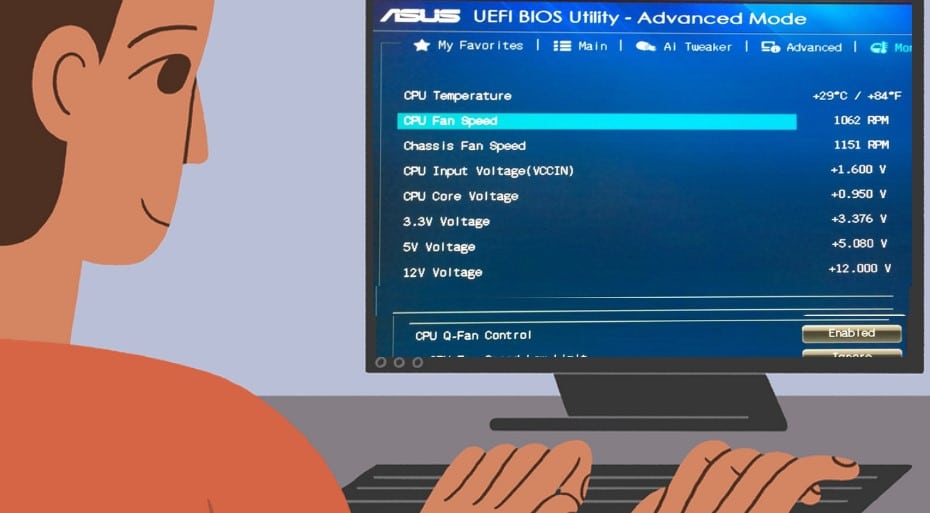
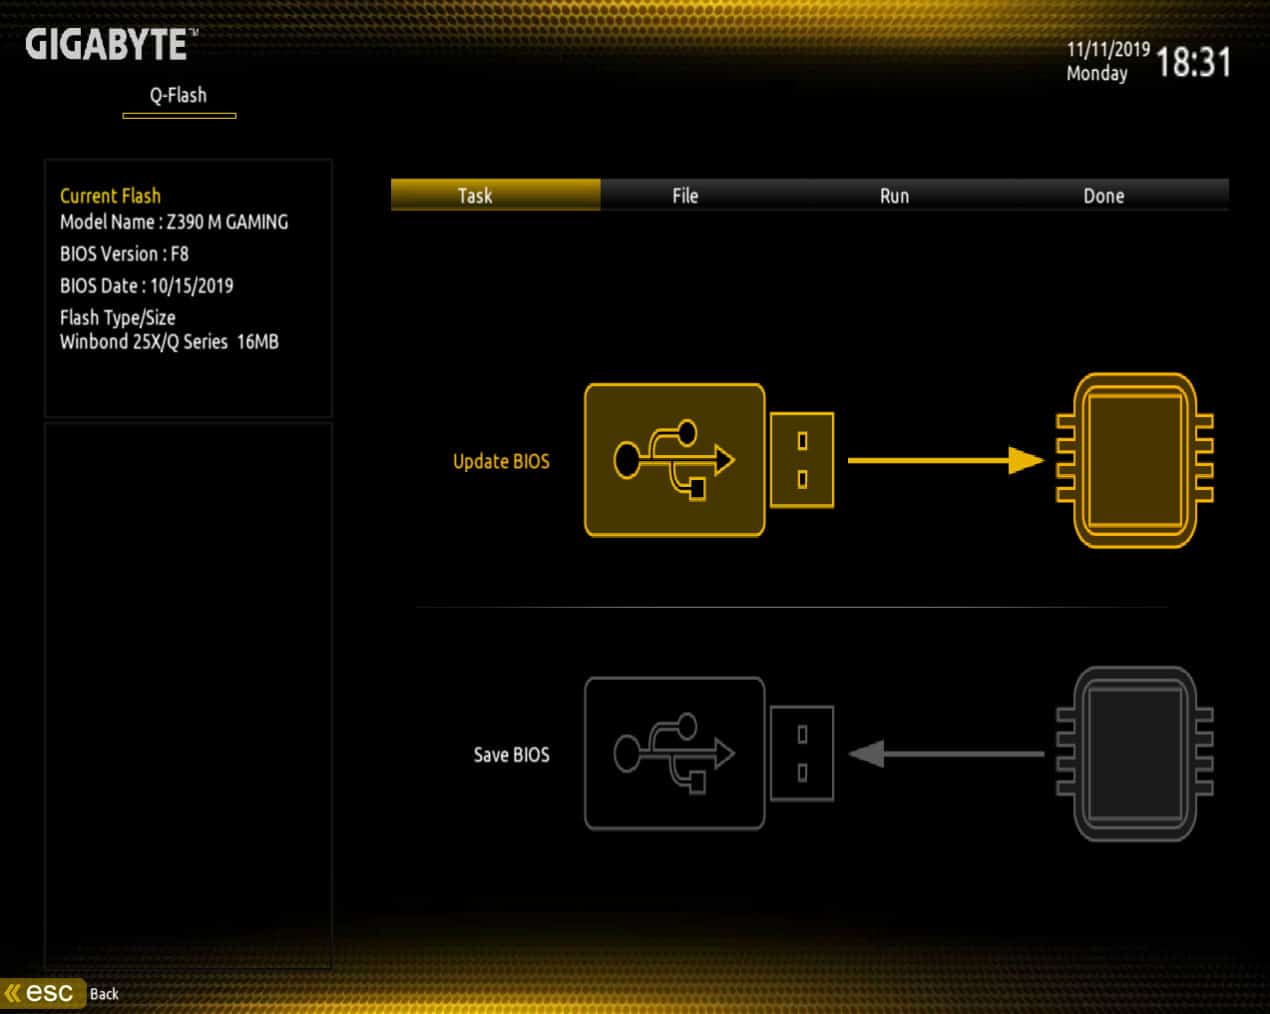
- Step 7: Turn off your computer device and press the Power button to startup. Also, before entering the system, press F2 to enter the BIOS settings. However, the shortcut keys are different for different motherboard manufacturers.
| Computer Type | BIOS key |
| ASRock | F2 or DEL |
| ASUS | F2 or DEL |
| ACER | F2 or DEL |
| GIGABYTE | F2 or DEL |
| HP | F10 |
| MSI | DEL |
| Toshiba | F2 |
| Zotac | DEL |
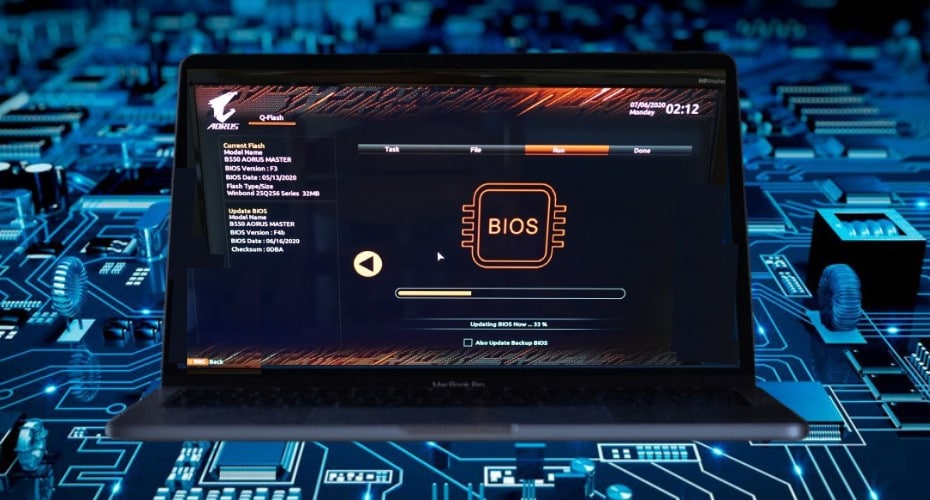
- Step 8: You will find the update option in the BIOS Menu. Also, wait for the flashing process. This is according to the BIOS size, which is approximately between 128K – 10MB. When the update is in process, do not operate on the computer and shut down, or else there will be an issue. You should wait till the update process is done.
FAQ About Flashing BIOS
What are the benefits of flashing BIOS?
For starters, new BIOS updates help the motherboard to identify new hardware correctly. For example, the RAM and processors.
The security updates that come with BIOS updates will help the BIOS to resist tampering and increase awareness of boot sector viruses.
BIOS updates also help to address and fix bugs.
What is the relationship between BIOS and UEFI?
UEFI stands for Unified Extensible Firmware Interface and is a powerful successor to BIOS. The UEFI and BIOS have almost the same features. However, UEFI has more extended functions.
How to recover from a corrupt BIOS?
You can do this through boot blocking your BIOS, getting a new BIOS chip, or hot-swapping; If it cannot be repaired, we suggest you contact customer service and return the motherboard to the manufacturer for repair.
Flashing BIOS needs to be careful
It is essential to make updates on your device. However, updating the BIOS is a major risk. Hence, you need to find the appropriate one that is compatible with your device. The BIOS helps in booting your computer to detect whether it has any malfunctions. Also, if you are not sure of how to update, consult a professional.