Have you ever missed a meeting or an important event because your monitor’s time is wrong? This can cause a lot of inconveniences. Hence, you need to always be keen about your computer's time whenever you reboot it. There are various ways that how to fix windows 10 time wrong.
At times you may boot your computer and realize the time is wrong. Computers tend to be inaccurate sometimes, which can be caused by human tampering with a set or two. For a Windows 10 computer, the time might be wrong if the user kept a wrong time zone or date. One might even miss an important event due to such a careless incident. There are various ways you can ensure that your time is correct.
1. Windows Date & Time
This is a simple setup that does not require much of a computer guru to do it.
- First, press the Windows key + I at the same time. Alternatively, you can go to the bottom right corner and select “Time”.
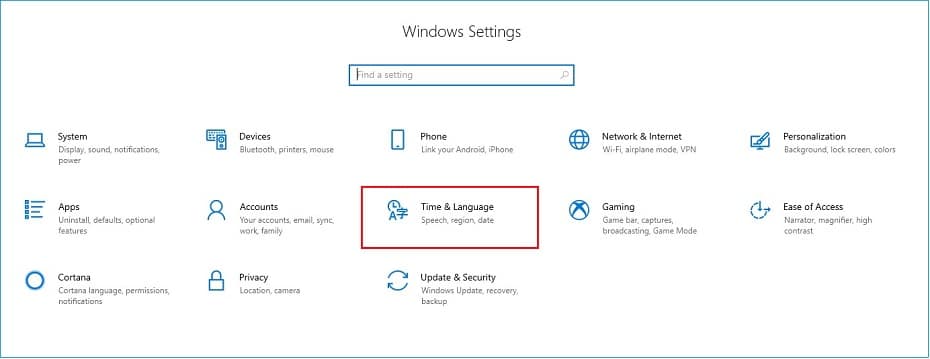
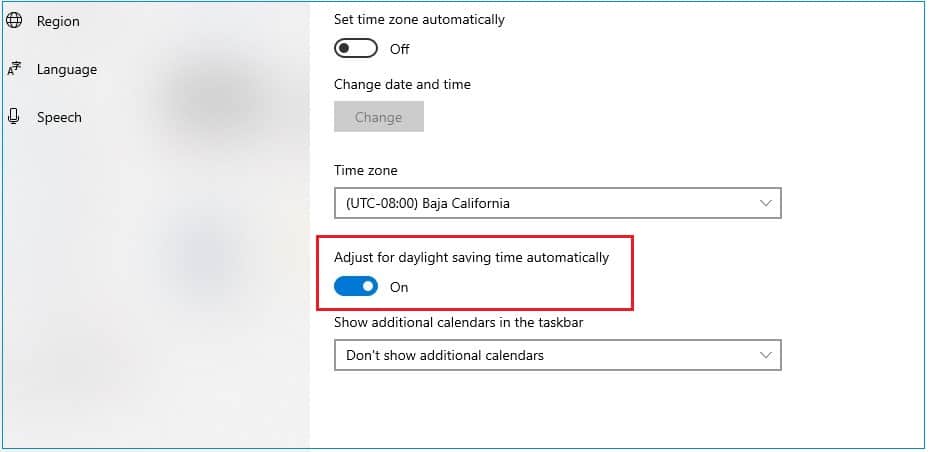
- You should turn on the Auto-Set Time option and Auto Set Time zone option as well.
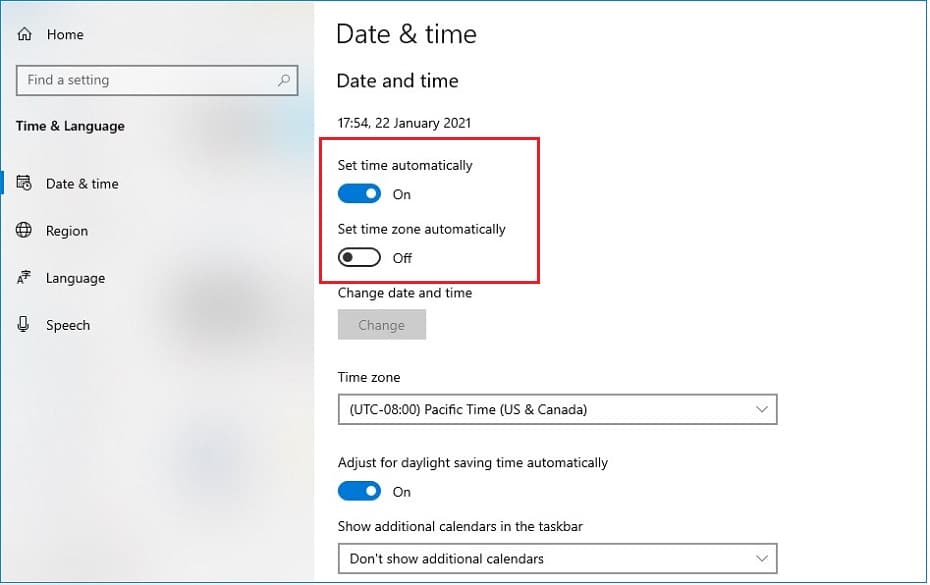
- If you realize that your time zone is not correct, turn off the automatic time zone option and manually select your respective time zone.
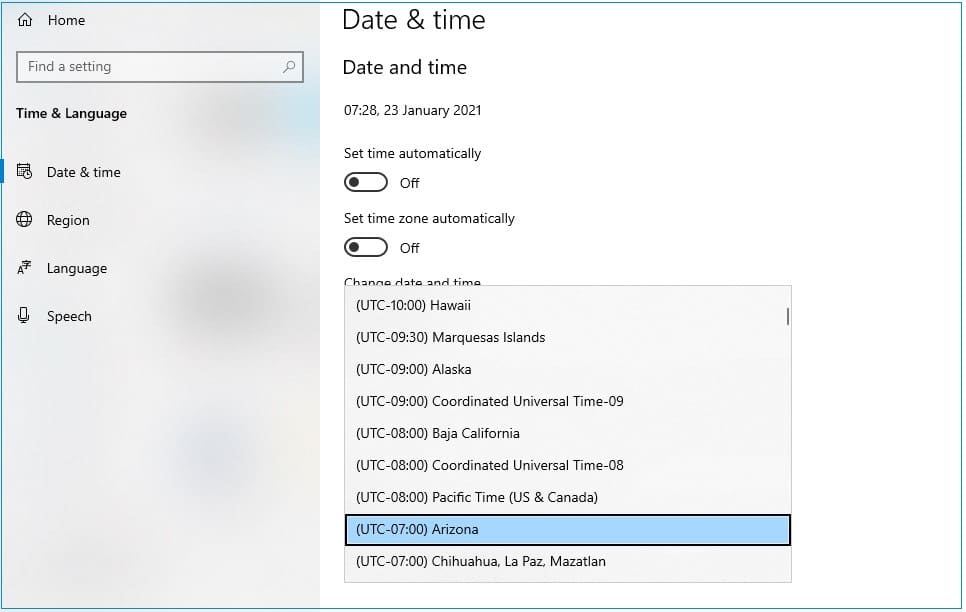
- If the time zone is correct, then remember to turn on the Daylight, saving time.
2. Services Setting
In this method, you have to follow the following steps:
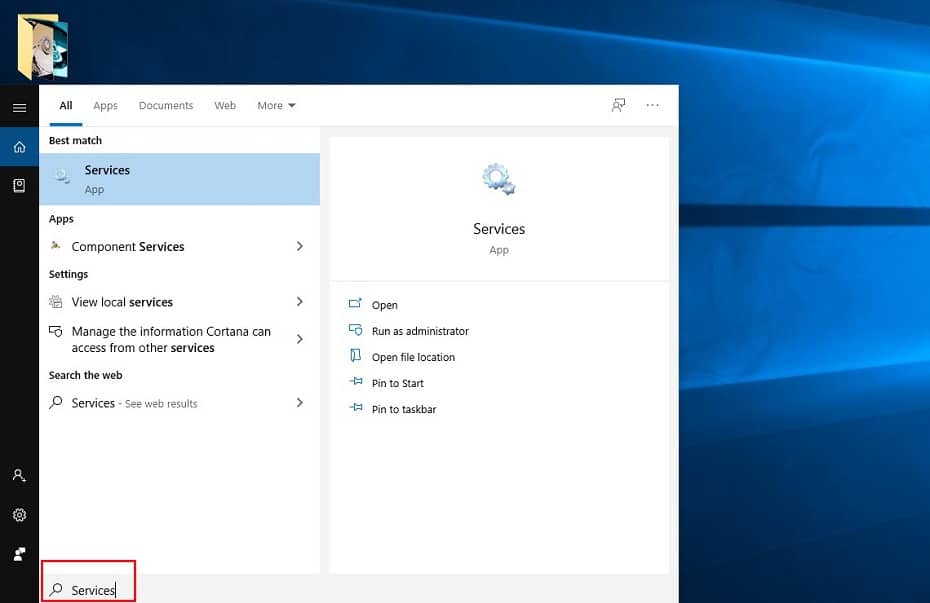
- In your panel, search for “Services”.
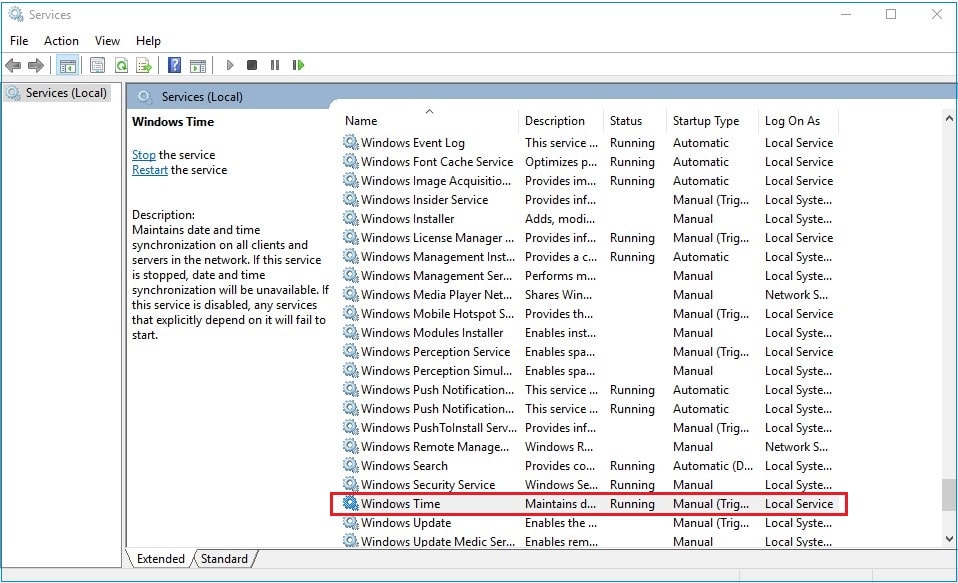
- Go to Windows Time and select it to enter.
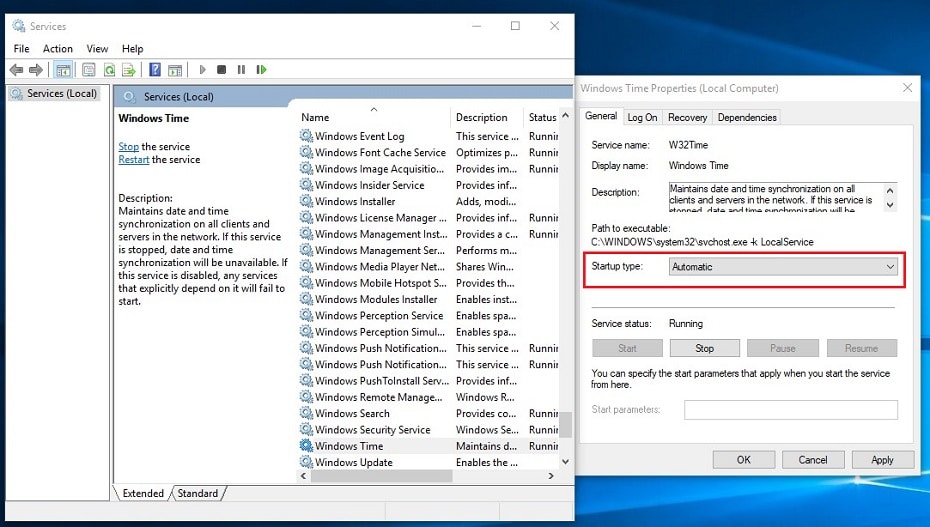
- You should then change the startup type to “Automatic” then click OK.
3. Control Panel Settings
This method requires you to navigate through the Control Panel using the following steps:
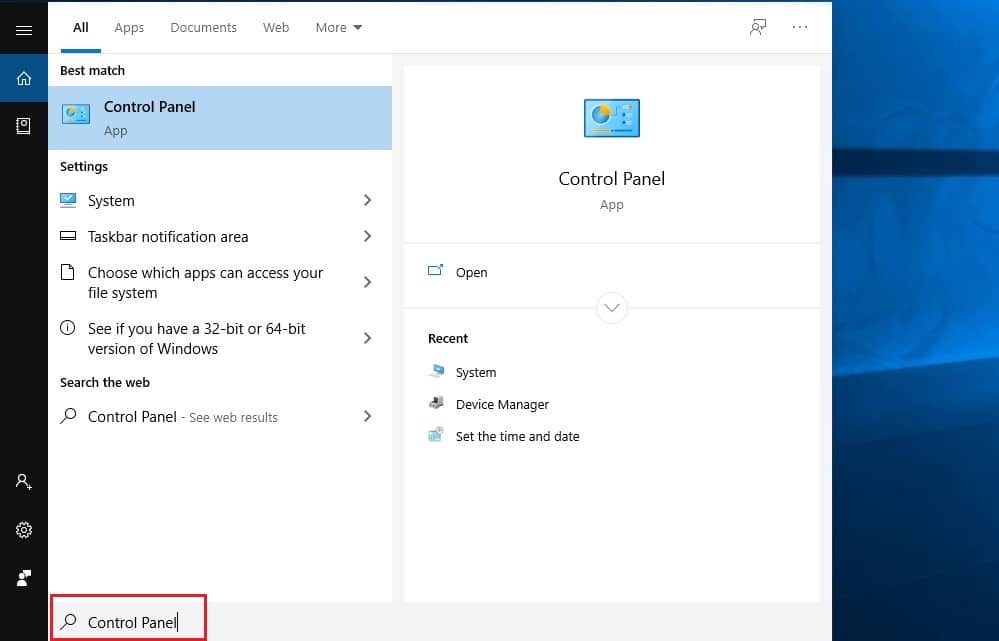
- You first press the Windows key + X to get the search bar and search for “Control Panel”.
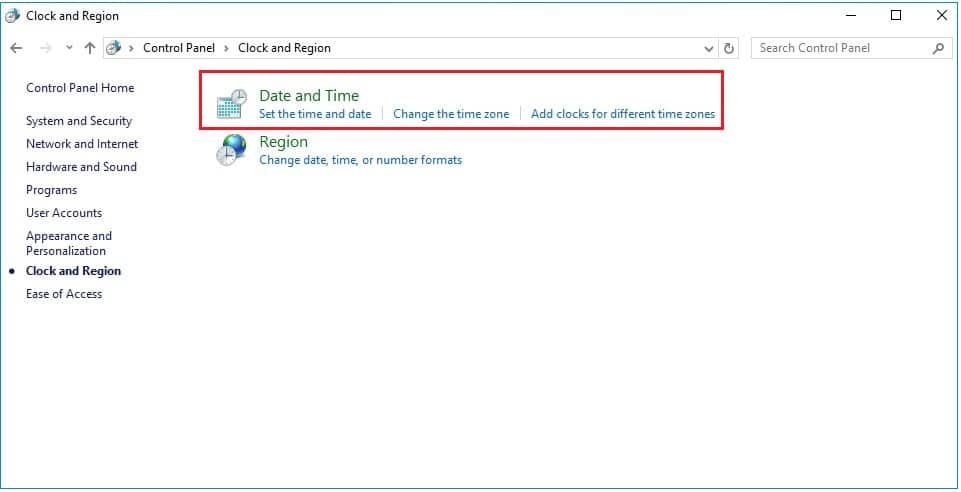
- The Control Panel Windows will then be displayed. Then select the option “Date and Time”.
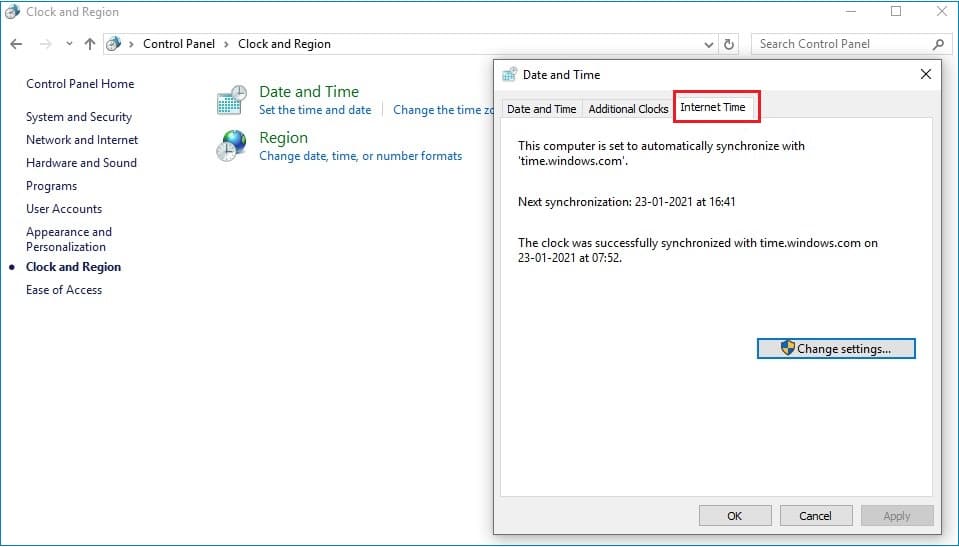
- A small prompt window will be displayed where you will select the “Internet Time” option and then tick “Synchronize with Internet Time Server” to select the time server that synchronizes.
- You are then supposed to choose a server using the drop-down menu.
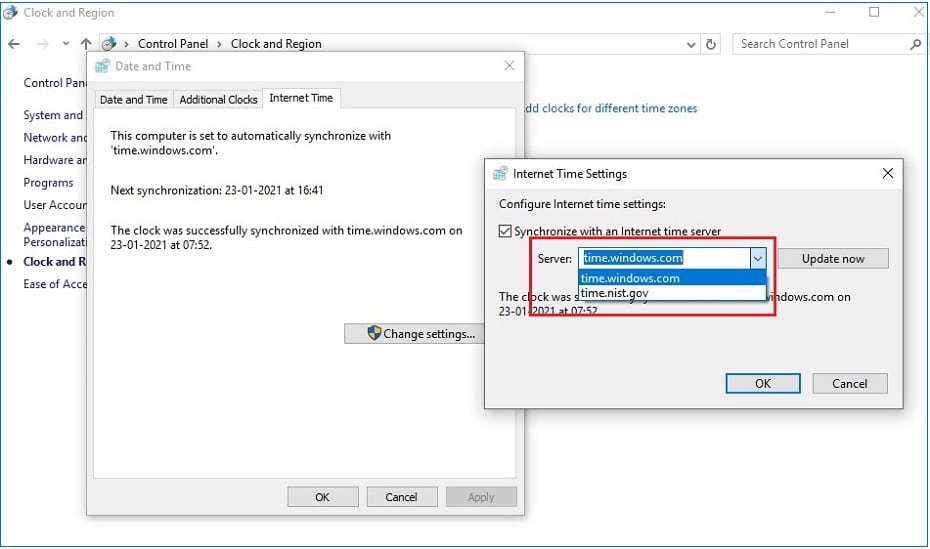
- After selecting the desired time server, click the “Update now” button to synchronize the time with the server.
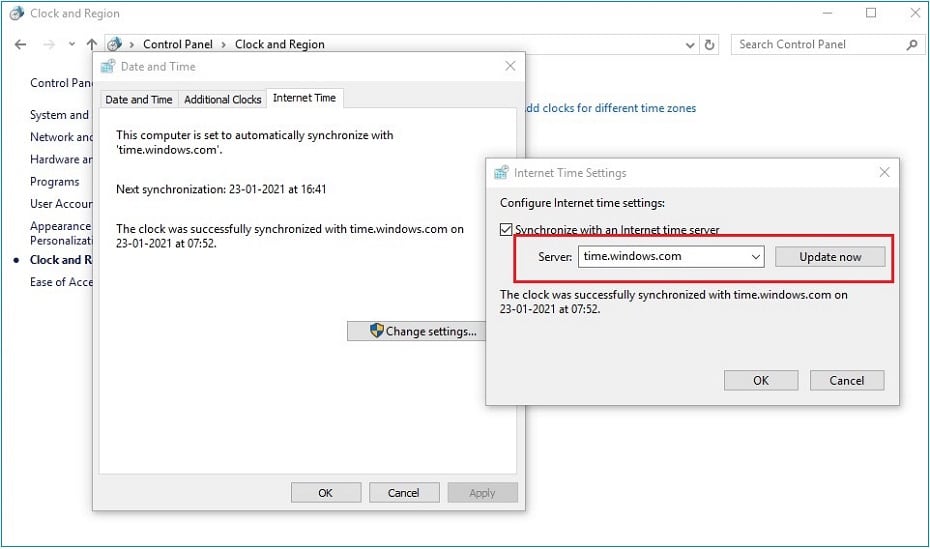
You should know the difference between the two-time servers, which are Time.nist.gov and Time.windows.com. The Time.nist.gov server is the British Standard Time System, whereas Time.windows.com synchronizes with Windows. This is the current time synchronization.
4. BIOS Setting Time
You will first access the BIOS setup by pressing F2 when booting your computer. This interface allows the user to configure the basic settings of the computer, including the time and date. Once you have successfully entered the setup, you will find various options. Try to locate the date and time.
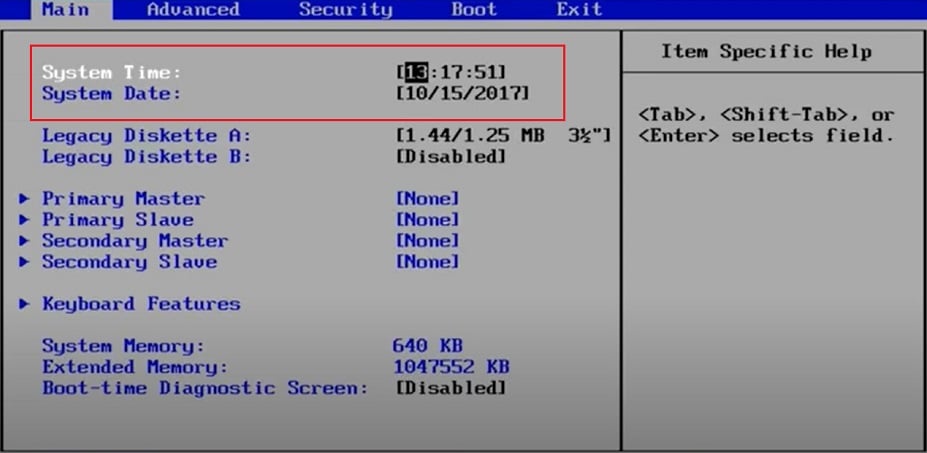
Using the keyboard arrows, you can adjust your time according to your desire. After doing your time changes, you are supposed to save using the key “F10”. If the key does not work, then press the save button on your screen. You should also know that if pressing F2 during the boot process opens a diagnostic tool, then your setup key to open the BIOS setup is likely F10.
5. Update the BIOS
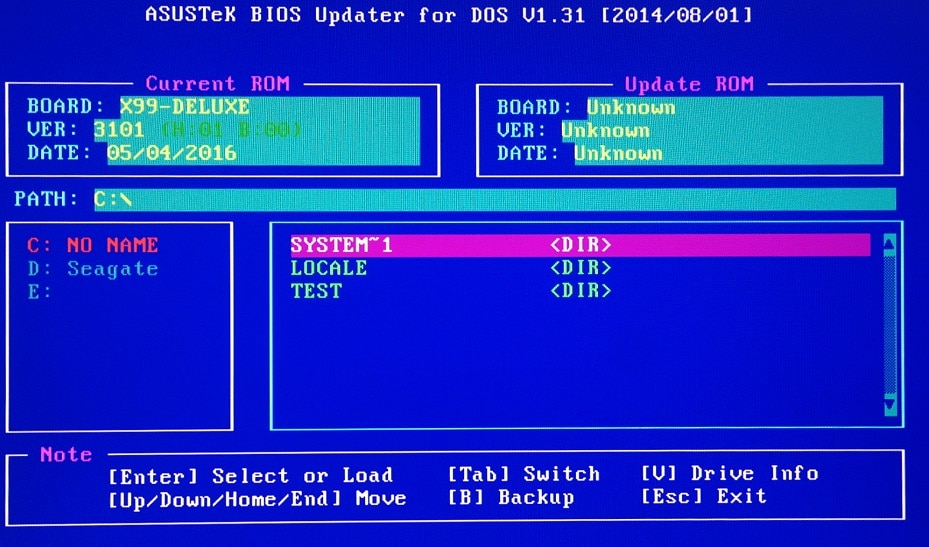
This is done by copying the computer’s BIOS file to an external storage device, either a USB drive or hard drive, then reboot the computer. Press F1 or F2, or F10 depending on one’s computer to open the BIOS setup screen. From there, you are supposed to choose the BIOS updating option and then select the BIOS file you copied to your USB drive. This will result in updating the BIOs to a new version.
6. Replace the CMOS’ Battery
Your time may also be affected because the CMOS battery on the motherboard that is in charge of time and date may be dead. You should therefore replace the CMOS battery. Here is how you can change the CMOS battery:
- Focus on the motherboard, where you will see a big watch battery.
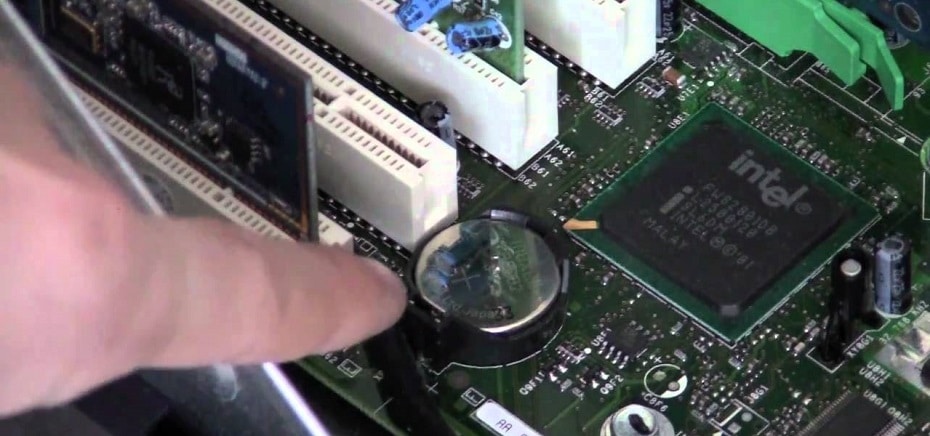
- Push on a little tab to get the watch out of the motherboard and dispose of it immediately.
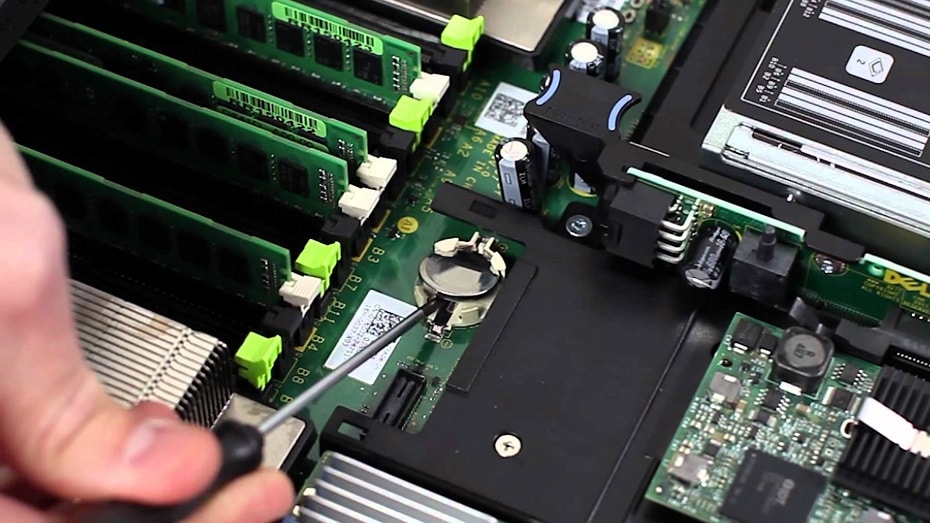
- The watch that you are using to replace should be of the same model and capacity as the older one.

- When inserting the new watch on the motherboard, push it in its spot until you hear a clock to ensure that it has been inserted properly.
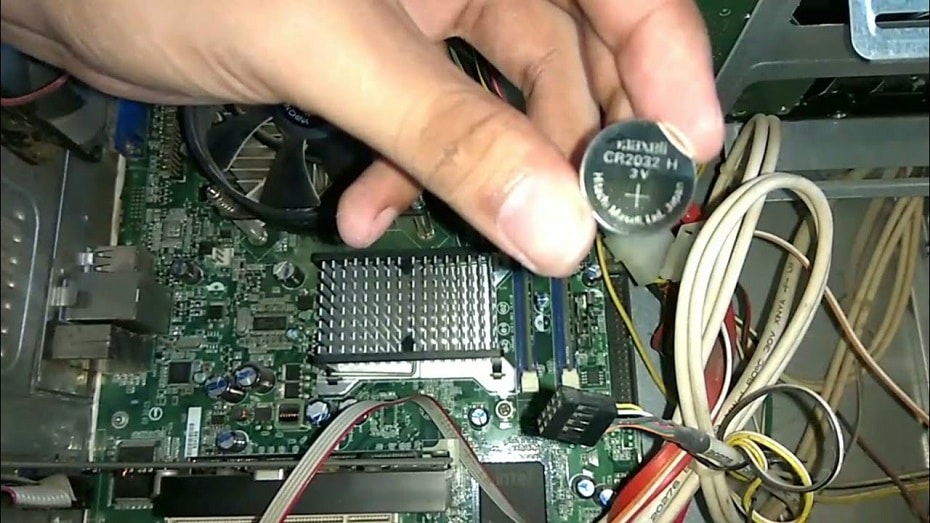
- Close your computer properly, then turn it on and set your time.
Frequently asked questions
How do I set the time on my Mac?
You can have the time and date set automatically using a network time server or set the time and date manually. Here is a simple way:
- Choose the Apple menu and select “System Preferences” where you will then click the Time and Date option.
- Set the time and date
- Set your time zone
- Save the changes you will have made.
How do I set time on Linux?
Setting time and date on Linux operating system is quite different from that of Windows. You should first click on properties to change time, open the terminal to reconfigure the time zone data, which will enable you to select your time zone. After saving the changes, it will automatically set the time and date respective of the time zone.
Conclusion
Always be cautious when setting schedules on your computer. If you have the wrong time on the computer, it may affect your plan. It is good to have a good time system on your computer since when files are created or edited, they stamp the respective time shown on the computer. The emails you send or receive on your computer also use the time shown on the computer.
Software that relies on Internet-based authorization schemes may reject your attempts to use it due to the wrong time on your computer. If you are traveling abroad with your laptop, you should always remember to change the Time zone so that the time is set automatically respective to the time zone. In conclusion, time is an important element in your computer, never assume it.
