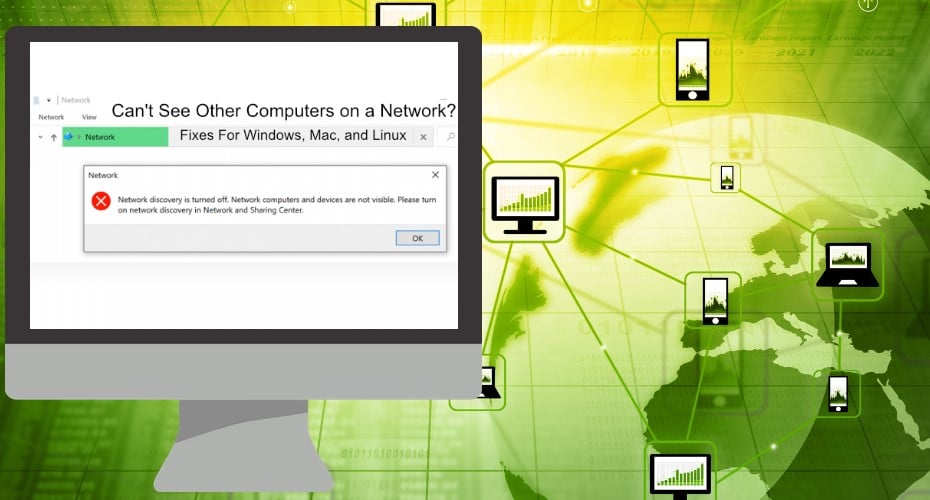
Have you noticed that you cannot see other computers on a network? Here is an easy guide on how you can solve this problem for different devices.
A computer network allows computers to communicate with each other. They allow you to share data and resources with other computers in the computer network. However, you might be trying to send or access files from another computer and notice you can't see other computers in the computer network.
This problem is caused by the wrong settings. Changing these settings is not as hard as you might think. We will give you a quick walkthrough on how you can make setting changes on Windows 10, Linux, and Mac. We will also show you other ways to solve this problem.
Windows 10 Can't See Other Computers on Network
Solution 1. Check and Enabling Network Discovery
The Network discovery is a feature on the Windows Operating system that allows users to see other computers in a network. It also determines whether other computers can see you.
The main reason why you can't see other computers is that network discovery is off. The other reason might be you chose the wrong network profile. Remember that keeping the network discovery on when connected to a public network is not safe.
- Press the window button on your keyboard to display the start menu.
- Locate the Settings icon and press it to open it.
![]()
- Clicking the Network & Internet option will open a new window.

- You will see the Change advanced sharing settings on your left.

- On the Advanced settings window, under sharing option for different profiles. You can check the turn on network discovery option.
- Check the options to Turn on automatic setup and Turn on file and printer settings.

- Save the changes you have made at the bottom.
Solution 2. Enabling the Computer Browser Service

The Computer Browser Service is a feature in Windows that allows users to locate and access shared resources in a network.
The Service is responsible for listing Windows-based domains, workgroups, and computers. Therefore, whenever you expand the Network Neighborhood, you can see all the available resources.
This feature is disabled by default. Before enabling the computer Browser Service you should ensure the Windows Firewall is disabled. You also need to enable Network file sharing.
- Open the Settings app on your computer.
- Select the Network and Internet option.
- Scroll to the Sharing and discover section.
- Enable Network file sharing.
- After turning file sharing on, open the control panel.
- Click Administrative Tools.
- Click on services.
- Double-click on Computer Browser to open a dialog box.
- Set the start-up type to automatic, then click start.
- Save the changes before you exit.
The Solution for macOS Users
Mac computers can share resources when they are on the same network as Windows computers. It is made possible by a feature called Apple Bonjour Network.
The Macintosh computers require you to edit the user privileges to access other Macs in the computer network. For windows computers, all you need to know is the Windows administrator's profile and the workgroup you want to access.
However, this is only possible when you can see the other computers in the network. To solve this problem, you can follow the procedure given below.
- Open the Finder app then press “GO” and select“Connect to Server”


- Type the IP address or hostname for the PCin the Server Address box.

- Following the instructions on the screenthen press “Connect” to connect to the server.
In case you still can’t see other computers, you should enable the option to view.
- Press Finder

- Click Preferences.
- Enable the Connected server’s checkbox in the Sidebar tab.

![]()
The Solution for Linux Users
There are many approaches to make if you can't see other computers on a network when using Linux. You first need to check if your PC can see other devices using the arp-scan network scanning tool. It will list all the devices that are available in your computer network.
- Open terminal by pressing press Ctrl+Alt+T.
- Type sudo aptinstall arp-scan. It will install the arp-scan package to run the scan.

- Type arp-scan -l in the terminal and press enter.

- Alternatively, you can type sudo arp-scan -l.
Running this scan will display a list of devices on your computer network with their IP addresses, MAC addresses, and device types.
The command will enable you to see other computers on your network and connect to them using Linux distribution's file management tool.
Other Effective Ways
1: Configuring Firewall to Allow File and Printer Sharing

The Firewall can block your Windows 10 File Sharing capabilities. Here is a walkthrough on how to allow your computer to see other computers through a Firewall.
- Press the Windows button on your keyboard and search for Run. Open the Run prompt application.
- Type Control Panel in the query and press the Enter button to open the Control Panel.
- Select the System and Security option.
- You will see the Windows Defender Firewall in the System and Security Window.
- Click Advanced settings, then select Inbound rules.
- Locate File and printer sharing.
- Right-click on it, then choose Enable rule.
- Save the changes, then close the window.
- Check if you can see the other networks on the computer.
2: Checking Local Network Configuration

Can't see other devices in your computer network? You may need to check if your computer is properly connected to your local network.
Physically check if the cables are in good condition for wired connections. For Wi-Fi, you should check if the access points are stable.
You can use PowerShell to check your computer connection. PowerShell is an automation tool that has a command-line. You can use the ping command to check if your device is connected correctly to your Computer network. However, you will need information for another computer in the same network.
- Right-click on the Windows Start menu.
- Type Windows PowerShell and click to open the application.
- On the Terminal, type ping hostname.
If you get a reply, you should conclude that the network connection issue is not the problem. The result suggests that there is a different software or network configuration issue.
3: Enable SMB 1.0/CIFS File Sharing Support & SMB Direct Are Installed

This process requires you to properly install the SMB File Sharing Support. It is a built-in component. It is turned on by default on some computers. You should first check if the feature is enabled.
- Open the Run dialog box by clicking searching for it on the start menu.
- Type Control Panel in the query and click “OK” to open.
- Change the view in the “Control Panel” to “Category”.
- Click on “Uninstall a program” under the “Programs”.
- Click on Turn Windows features on or off.
- Mark the checkbox next to the SMB 1.0/CIFS File Sharing Support entry.
- Click OK to save the changes.
4: Reinstall Drivers and Command Prompt Tweaks
You cannot access the network if your drivers are not up-to-date. You can install the drivers to solve this problem. You can use some Command Prompt tweaks that are easy to run and maintain.
- Right-click on my computer, then select the manage option.
- Click on Device manager to view the Device Manager console.
- Expand the Network Adapters field for it to display all the Network drivers.
- To uninstall a driver, Right-click the Network adapter and select the Uninstall option.

- Click the OK button to finish uninstalling the device.

- Use the same process to uninstall all the other network drivers.
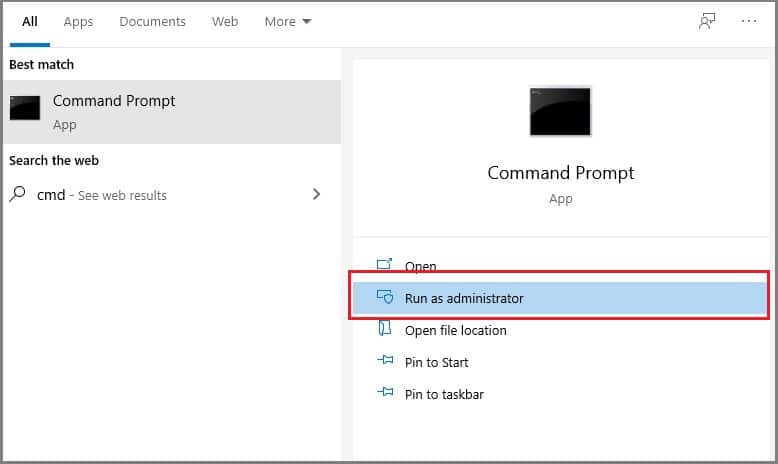
- Open the Command Prompt application.
- Right-click on it, and select the Run as administrator option.

- Type the ipconfig /flushdns command and click Enter.
- Type the ipconfig /registerdnsipconfig /release command and click Enter.
- Type the ipconfig /renew command and click Enter.
- Type the netsh int ip reset command and click Enter.
- Type the netsh Winsock reset command and click Enter.

- Restart your computer.
The drivers will be installed when you restart your computer.
5: Join a Network from System Properties
Manually connecting to a network can be the solution to not seeing other computers on your network. Below are simple steps you can use to do that.
- Click the Start menu icon.
- Select the Settings icon.
- Click on the Network & Internet option.
- Choose Wi-Fi.

- Select Network and Sharing Center.

- Select Set up a new connection or network.

- Select manually connect to a wireless network, then select Next.

- Choose a connection option to manually connect to a wireless network.
- Enter the Network name, then press next.
- Enter the Security type, then press next.
- Enter the Encryption type, then press next.
- Enter the Security key, then press next.

- Start this connection automatically.
- Connect even if the computer network is not broadcasting
- Select Close.
6: Changing the Router and DNS Settings
One situation that could trigger an error in a network is when the DNS servers do not match. It can happen even when you have correctly configured your DNS settings properly by manually changing them.
Some routers have a protective feature that prevents other computers in the same computer network from seeing and connecting to them.
We are going to change DNS settings to configure your router to allow optimal connectivity.
- Open the run dialog box. Search for it on the Start Menu.
- Type Control Panel in the empty box. The Control Panel will be displayed when you press OK.
- Click the View by option.
- Select Small Icons from the list.
- Click on the Network and Sharing Center.
- You will see the Change adapter settings.

- Right-click on the network you are currently connected to, and click on the Properties.

- Click on the Internet Protocol Version 4 (TCP/IPv4), then click on the Properties icon.

- Check the “Obtain anIP Address automatically” and the “Obtain DNS Server Address automatically” options, so that your computer uses automatic DNS detection.

You can change your router’s settings as shown below.

- Open the browser and type in your IP address in the address bar, then press “Enter” to open the Router login page.
- Enter your username and password
- Check for the Client Isolation, AP Isolation, or a Wi-Fi Isolation setting.
- Disable the AP Isolation.
- Save your changes.
- Check to see if the problem is solved.
7: Disable VPN Connection

You cannot use a VPN when you want to be part of a local network connection. Some Windows updates start Virtual Private Connections that prevent homegroup from starting.
You can disable the VPN connection by following the steps below:
- Open the Settings app.
- Click on the “Network & Internet section” in the Settings window.
- Switch to the VPN section.
- Click on the VPN connection running.
- Click on the Remove button.
- Restart your computer to apply the changes.
- Check to see if you can see and connect to other computers in the computer network.
The purpose of connecting to a network is to be able to send and receive data. However, this cannot happen if you cannot see the other devices in your computer network.
The problem is due to the wrong settings. Therefore, the solution lies in changing the settings. The Linux, Mac, mobile phones, and Windows have their ways of changing these settings.
Other methods of solving the network issue include: disabling the VPN connection, changing router settings, manually joining a network, installing a driver or enabling an SMB file sharing support, and configuring a firewall to allow file sharing.
