You might think that flipping images are just horizontal flips or vertical flips, but they have many applications in everyday life, such as creating reflections, or a kaleidoscope effect.Yes, it can all be done in Photoshop.
How often have you wanted to flip an image and wondered how to do it? You can use Adobe Photoshop to flip images both horizontally and vertically.
However, be cautious to prevent the image from losing its original meaning. Here are some of the ways to flip images in Photoshop. The methods are simple and can be used on any kind of image.
1. Flip Horizontally
This is how you can flip an image horizontally on Photoshop:
Step 1: Open Photoshop, click on File > Open and import your photo.

Step 2: Duplicate the photo layer. Good practice in Photoshop is to duplicate layers, which will protect the original image from being damaged.

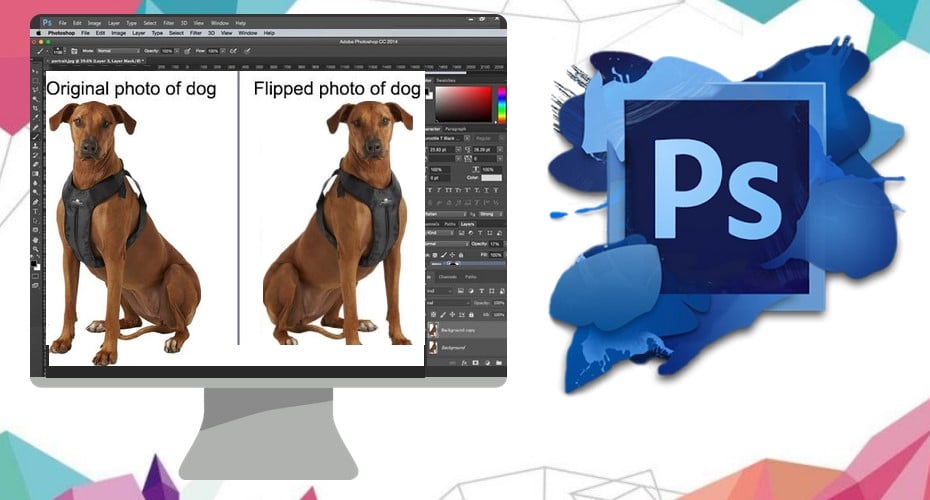
Step 3: On the menu bar, select Image > “Rotate Canvas” and “Flip Canvas Horizontal.” In this way, you get a mirror image that looks like your left and right hands.


Step 4: Alternatively, you can use the “Flip Image” Command, Ctrl + T, then right-click on the image and select “Flip Horizontal.”
Step 5: The other method is by clicking Edit (on the menu bar) > Transform> Flip horizontally.

2. Flip Vertically
This is how you can flip an image vertically on Photoshop:
Step 1: Open Photoshop, click on File > Open and import your photo.

Step 2: Duplicate the image.

Step 3: On the menu bar, select Image > “Rotate Canvas” and “Flip Canvas Vertical.”


Step 4: Alternatively, you can use the “Flip Image” Command, Ctrl + T, then right-click on the image and select “Flip Vertical.”
Step 5: The other method is by clicking Edit > Transform > Flip vertically.


3. Online Tool for Flipping Images Vertically and Horizontally
You can use credible online tools to flip images.
Step 1: Open the official pine tool website.

Step 2: Choose the image that you want to flip under “input image.”

Step 3: Choose whether you want to flip horizontally or vertically.
Step 4: Click on Flip.
![]()
Step 5: The flipped image will show under “flipped image.”
What Can You Do With Flipped Images?
There are various ways that you can use flipped images in art and creativity.
i. Make a Reflection
When making posters of drinks or cosmetics, a reflection is often added to them. This makes the product look more three-dimensional and realistic. For this method, I chose a picture of a Coke drink.
Step 1: Open the image in Photoshop. Duplicate the image and make the background color black.

Step 2: Start working on the duplicate image. Take a crop tool, increase the bottom of the image to accommodate the image’s reflection. Not only do you use a crop tool to reduce the size, but you also increase size.

Step 3: On the left menu bar, select the rectangular marquee tool and use it to make a selection around the extra area you added.

Step 4: Right-click on the image and select Fill, under contents, choose; Content-Aware, then right-click and select the “deselect” option.

Step 5: On the left menu bar, select the “quick selection tool,” adjust the settings to 25px, 100%, and 20%, respectively. Make a selection around the object that you want to reflect on. You will now need to copy and paste that area to make a reflection.

Step 6: Hence, Go to edit > Copy, then go to edit > Paste at a lower part of the image where you want the reflection to be. After that, click on Edit > Free Transform or use the shortcut CTRL + T.

Step 7: Right-click on the image and select “Vertical Flip.” Then move the image and rotate it till it looks like a realistic reflection. Then click the checkmark at the top menu bar.


Step 8: On the layer panel, add a layer mask. Choose the gradient tool and change from black to transparent or linear. Click and drag to make a line, then release, lower the opacity to 20%.
Step 9: Select the brush tool and adjust the settings to round, black, 400px, and 0%, respectively. Brush black in the mask layer to erase certain parts of the reflection that are not needed. Select the reflection layer, then go to Filter > Blur> Gaussian blur at 1px. We are done.

ii. Make a Kaleidoscopic Image
Flipping images can help to create a kaleidoscopic image. The effect is as simple as taking a picture (such as a flower). Take a part of it and then flip it horizontally, then vertically.
Step 1: Open your first image, change the locked layer to a regular layer. Transform the shape to 60 degrees. Drag the image to the end of your working space.

Step 2: To get rid of unwanted parts, use the magic wand tool, then click select > Inverse. Ultimately on the top menu bar, choose Select > Modify> Contract change to 1px.

Step 3: On the top menu bar, choose Image > Crop or select the crop tool from the left menu bar. Use the crop tool to add space to the image. Now you have a kaleidoscope that is 60 degrees on the workspace.

Step 4: Select the layer with the shape, then choose Layer > New > Layer via Copy. On the top menu bar, choose Image > Free transform. Click on the anchor icon to anchor the image on the left. You will get an exact copy. You will now have two layers that look the same. Next, select both layers, then Layer > Merge layers or CTRL + A.

Step 5: To rotate the merged image, choose Layer > New > Layer via copy. Then click Edit > Free transform, rotate it at 60 degrees.

Step 6: Then make Photoshop do it for you. Click CTRL +Shift + ALT + T repeatedly to create a duplicate of your last move. When you press the keys all through, Photoshop will duplicate the layers. This action will form a kaleidoscope. Merge all the layers, then make a duplicate.


Step 7: To resize the duplicate on the original, hold down shift, then resize it and rotate. You can make even three duplicates and do the same. You can adjust the color to hue/saturation through Image> adjustment > Hue/saturation.

That’s how to make a kaleidoscope in Photoshop. In addition, you can use different degree percentages.
Photoshop is a great tool that you can use to flip images and use them in various ways. This is also important when you want an image to have a different look from the original one. In posters, brochures, and other artistic elements, you can use this editing to make things look great. You can also use Photoshop to change the canvas size of certain images.