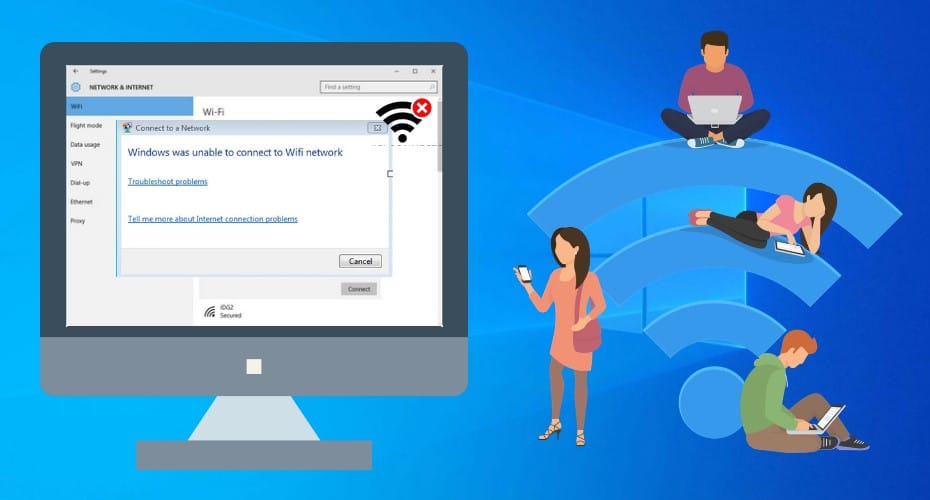
Is your laptop unable to connect to the WiFi network at home? Is the router down, or another issue? Read on to know the way out.
Introduction
Many issues may be the reason for your computer’s inability to connect with the WIFI. As a result, the remedies for this issue are also numerous. In this article, we will examine some of the different things you can do when your computer fails to connect to the WIFI.
Network Service Restart
The first option is to restart the network. Although this is a simple process, it is very effective in dealing with this issue. The steps involved in this process are as follows;
Step 1: Right-click on “This Computer” to enter “Administration”.
Step 2: Locate the WLAN AutoConfig in the “Services” panel at the bottom, select it, and restart
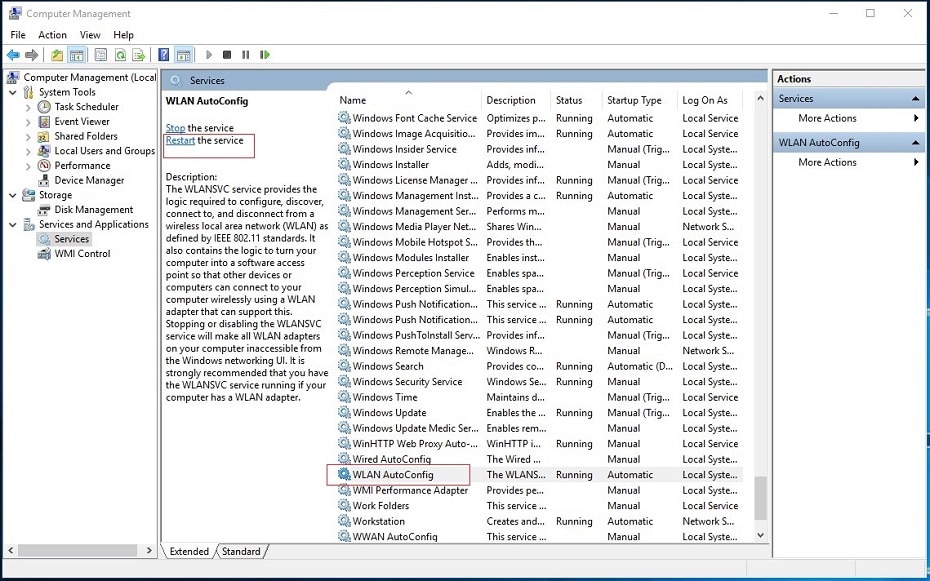
Step 3: Restart the wireless network service again. After the reboot, the network can be connected
Change the Network Adapter and Reset
You can also change the network adapter in use and reset the whole connection. The steps involved in this process are as follows;
Step 1: “Settings”, “Network and Internet”, “Change Adapter Options”
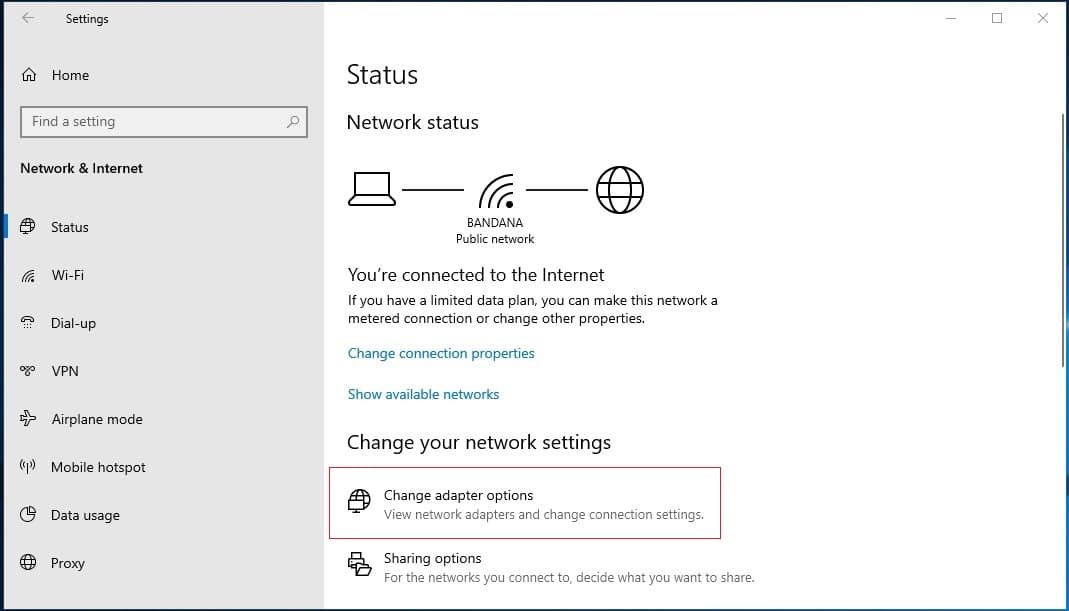
Step 2: Check if your WLAN service has been turned off. Right-click to enable it
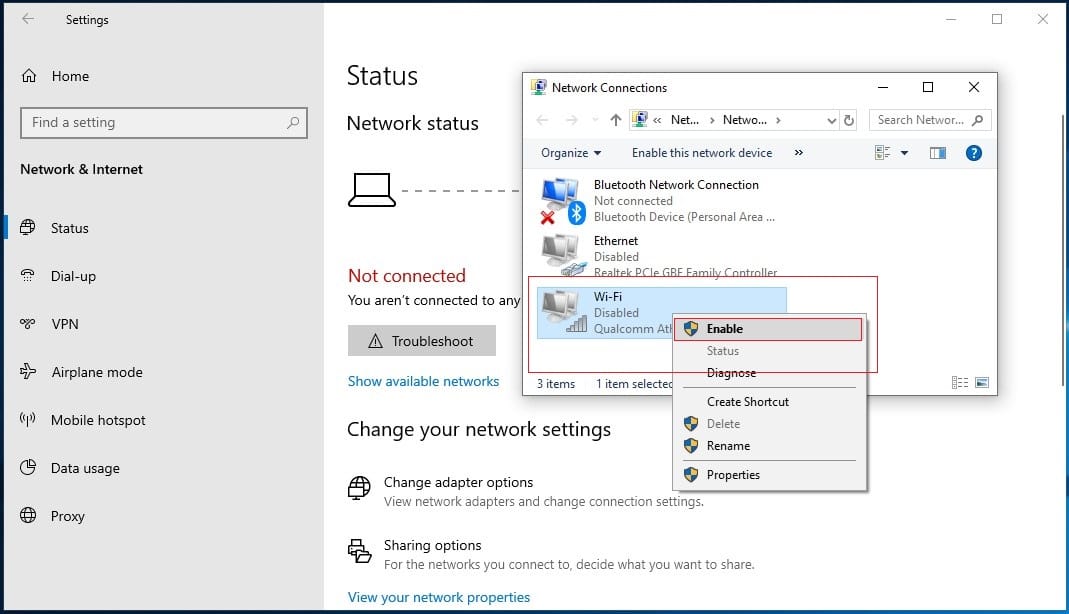
If you can't fix the problem, reinstall all your Network adapters with a “Network Reset.
Update Network Adapter Drivers
The failure of your computer to connect to the WIFI can be due to the outdated network adapter drivers in use on your computer. Try to update them and see if the situation changes. This is how you update the network adapter drivers;
Step 1: Go to “Computer Administration” and locate Network Adapters in “Device Manager”
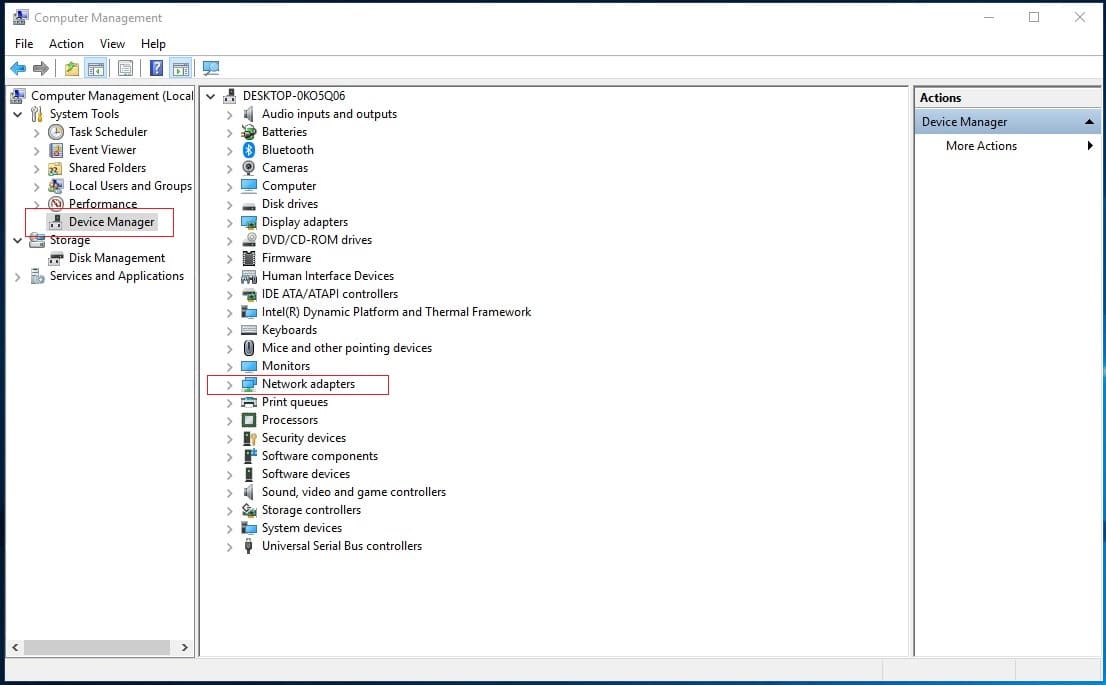
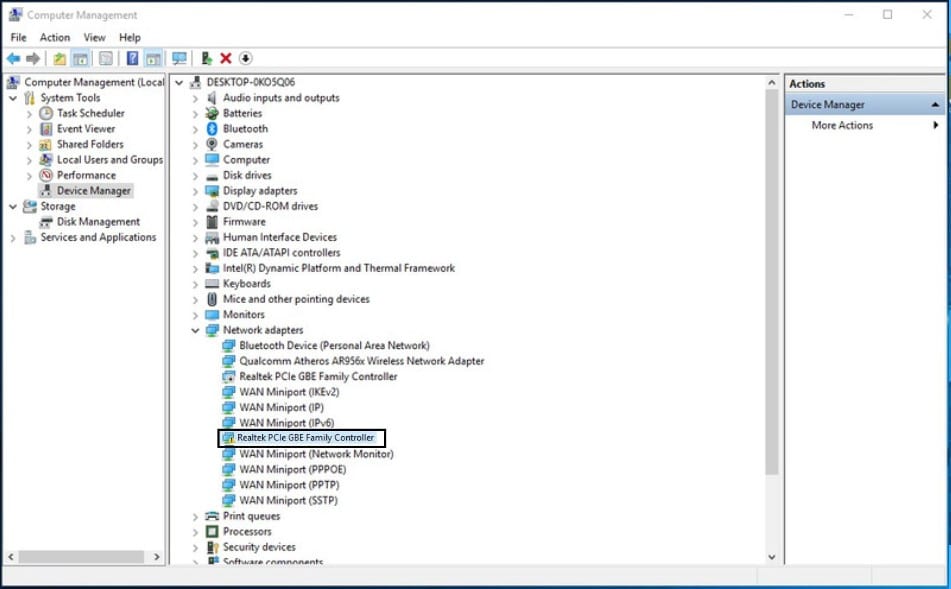
Step 2: Check to see if any network adapters are having problems, with a yellow triangle in front of them
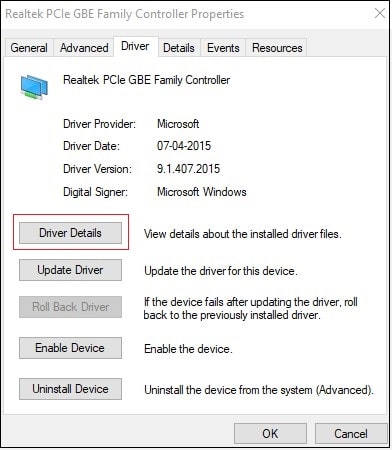
Step 3: Select to update the Device Driver
Network Troubleshooter
You can also troubleshoot the network to see if there are any problems. Running diagnostics on the network requires the following steps;
Step 1: Select your network icon in the lower right corner of your computer, right-click “Troubleshooter”
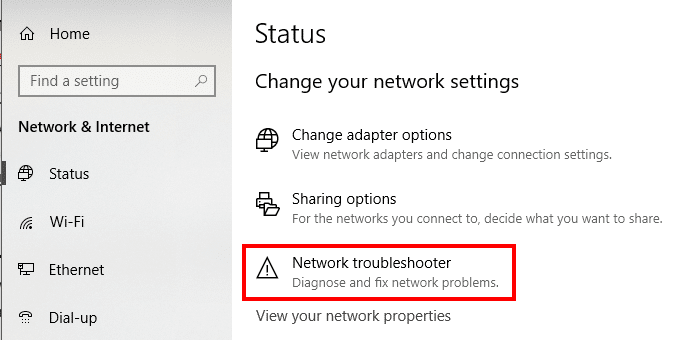
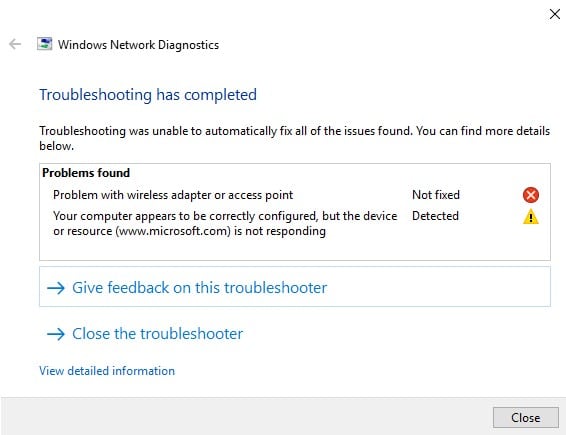
Step 2: Click the “Next” button, automatic Network Diagnostic will prompt you to repair
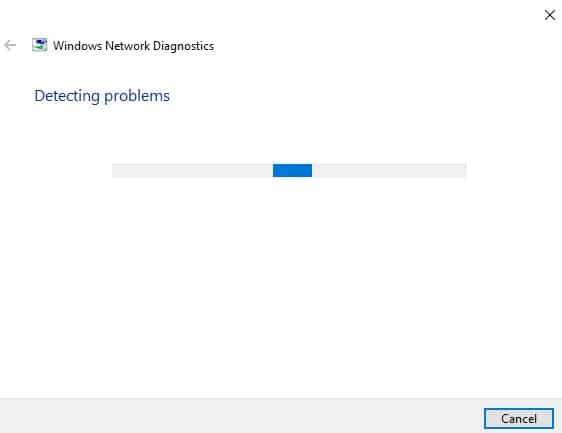
Step 3: Fix the problem according to the test
Command Prompt Repair
Alternatively, you can fix the network issue from the command prompt. The steps are as follows;
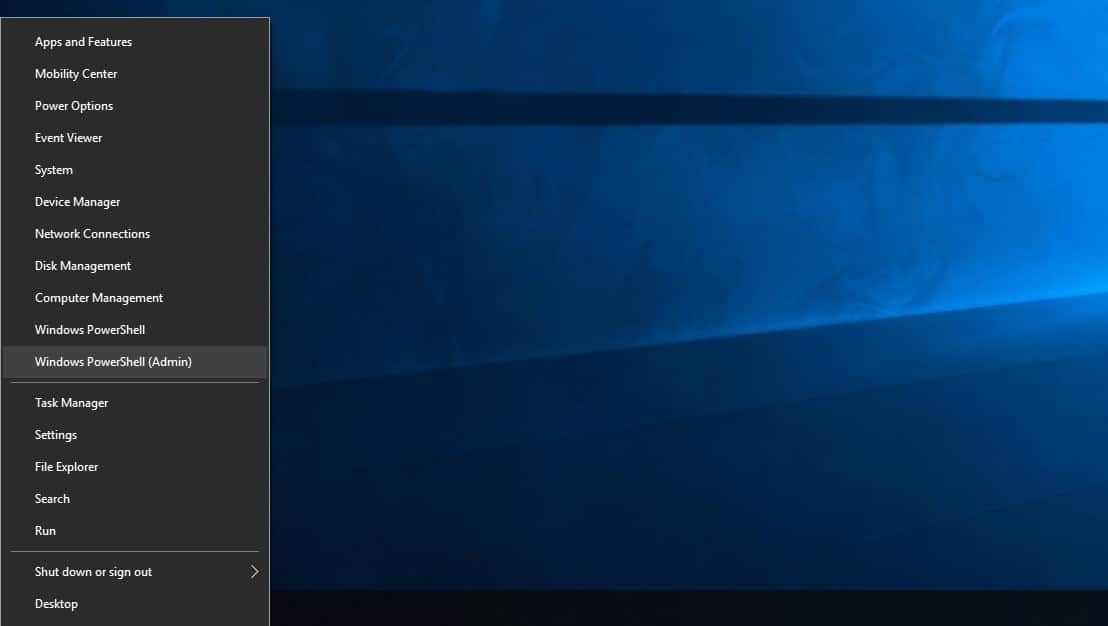
Step 1: Win + R, or PowerShell
Step 2: Enter netsh int ipv4 reset respectively
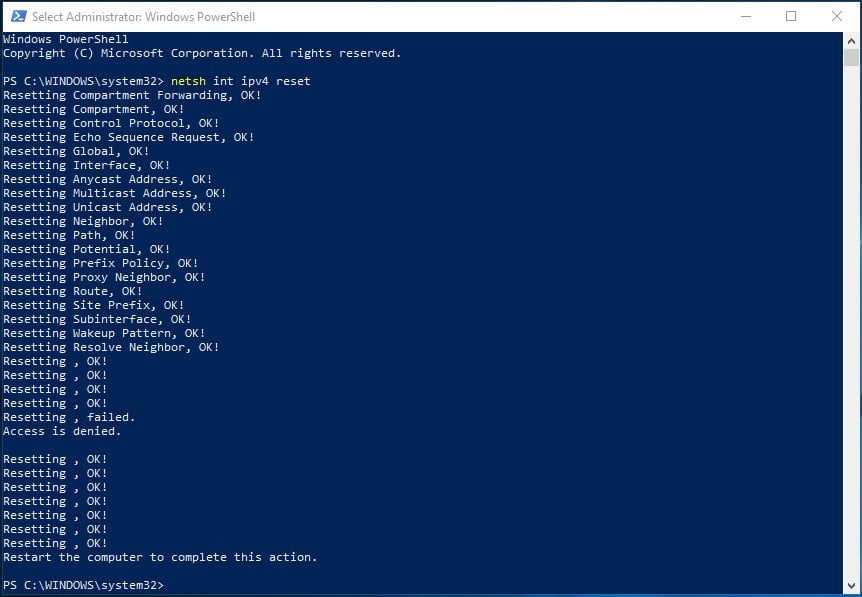
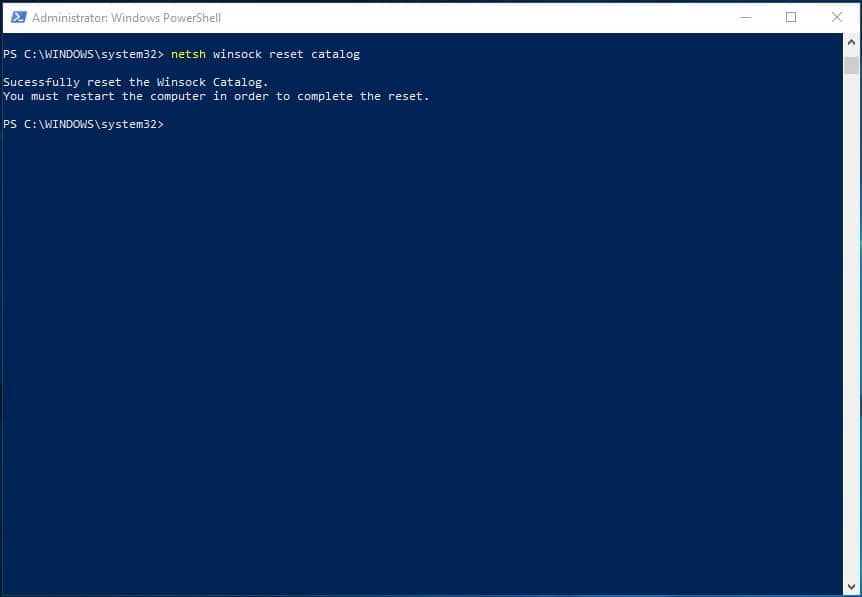
netsh winsock reset catalog
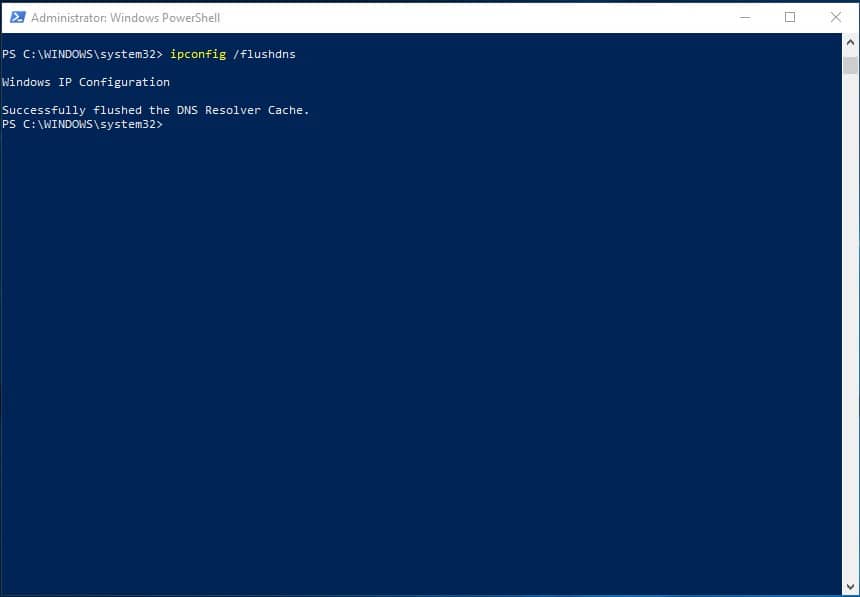
ipconfig /flushdns
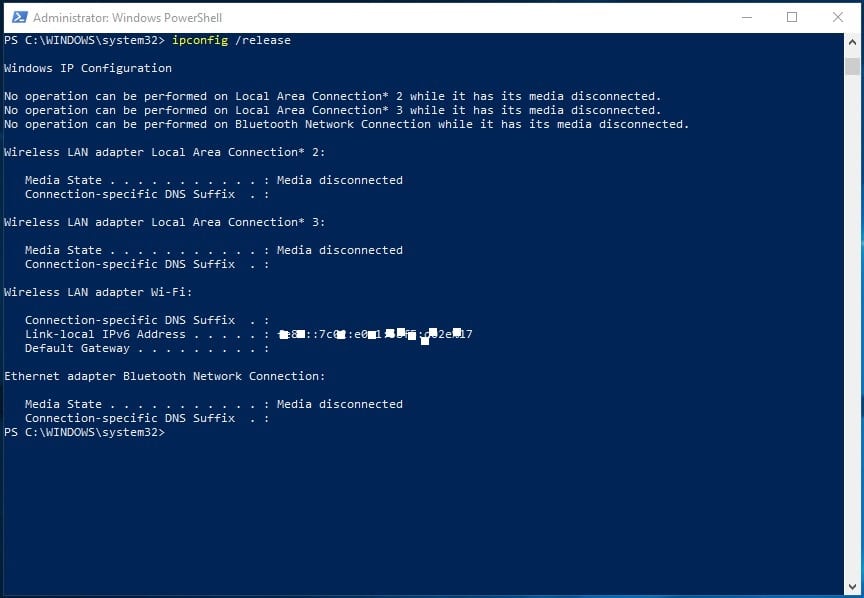
ipconfig /release
ipconfig /renew
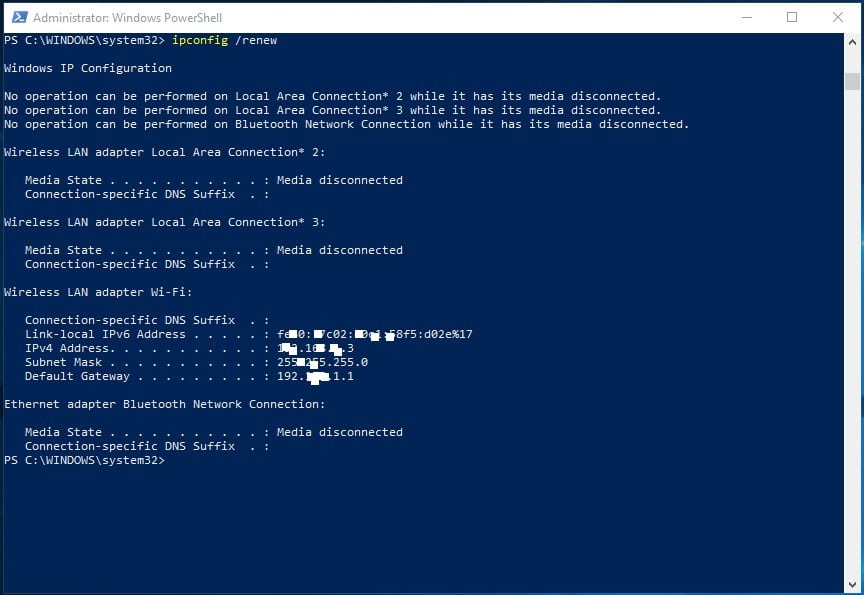
Enter is executed for each command
Step 3: Check whether the network is automatically restored
Close the IPv6
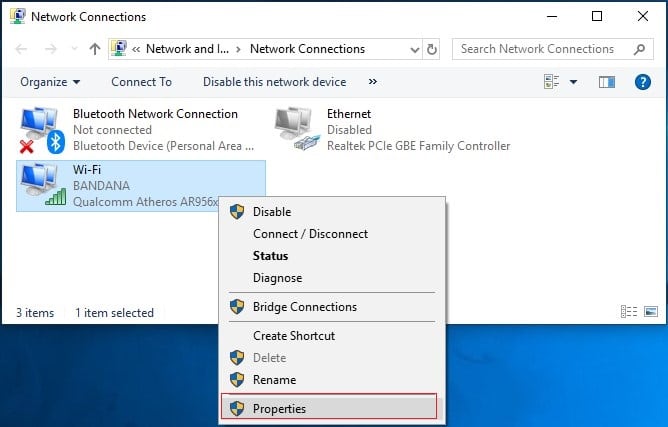
Step 1: Locate “Wireless Network Adapter” and click on the property
Step 2: Uncheck the box before “IPv6”
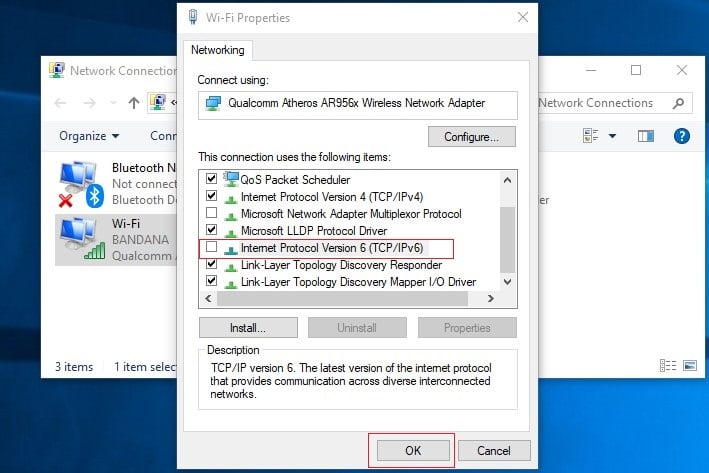
Step 3: Click “OK” to see if the problem has been resolved
Restart Wireless Connection
Another way of solving this connection problem is to disable and enable the wireless connection. Here is how;
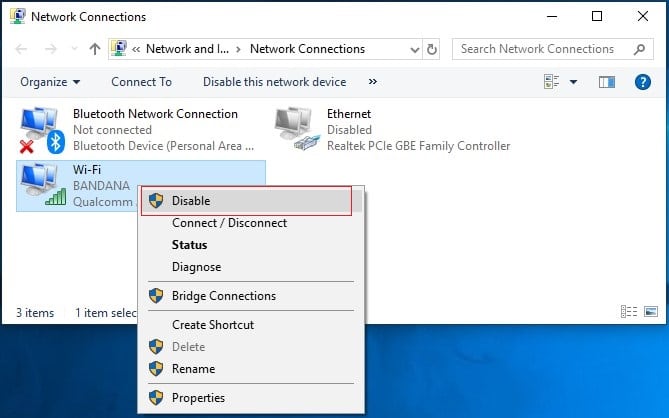
Step 1: Open the network connection window, under Windows Settings. Click on the wireless adapters and disable them
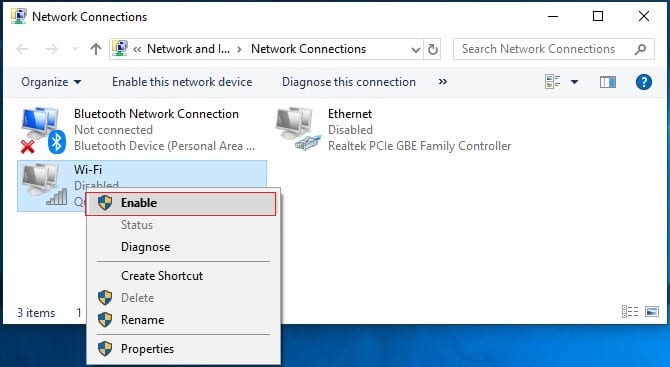
Step 2: After some seconds, enable the adapter and check if your computer can connect to WIFI now
Check for Router and Adapter Security
One of the things that could cause the connection problem is the disparity between the security type of the router and adapter. Examples of security types that we see in WIFI connections and routers include WPA-PSK and WPA2-PSK (both AES). thus, whichever of this security type the WIFI router uses must correspond with that used by the adapter to ensure smooth and normal connection.
The steps involved in ensuring this inlcudes;
Step 1: Check the router’s manual to confirm the security type used
Step 2: Proceed to the Network Sharing Center and choose the Manage wireless networks
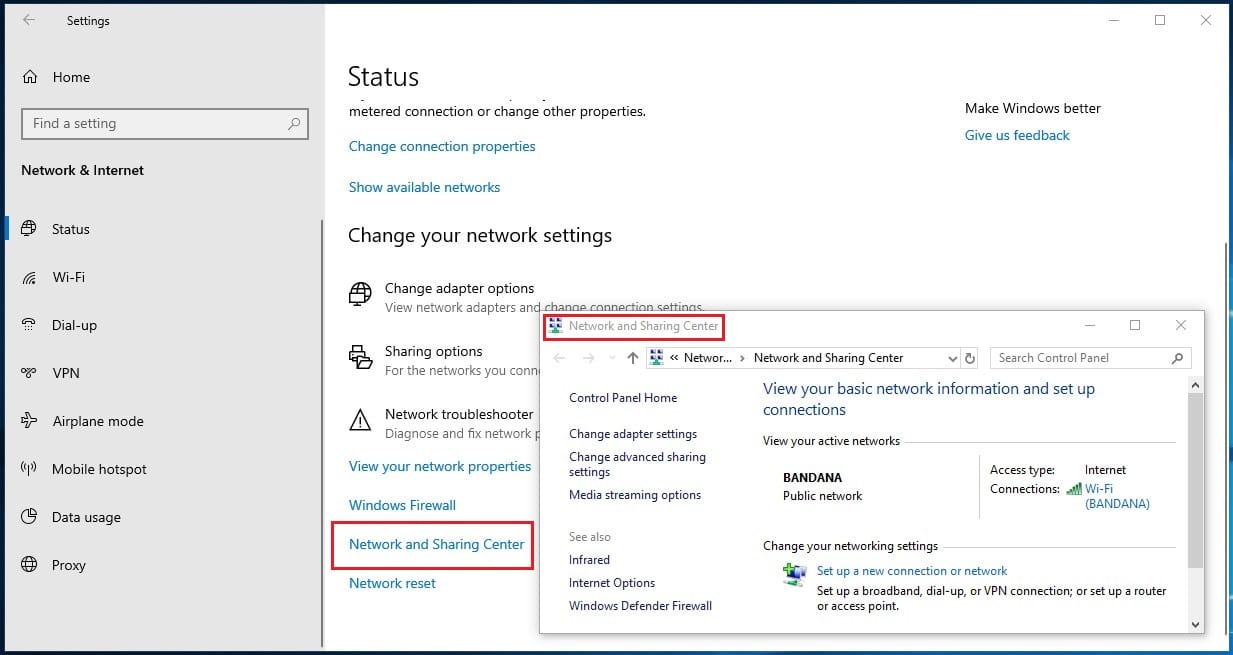
Step 3: Right Click your wireless network to check its properties
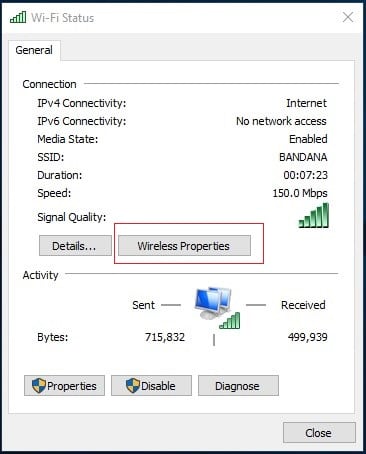
Step 4: Check the security tab and choose the corresponding security type from the options tab
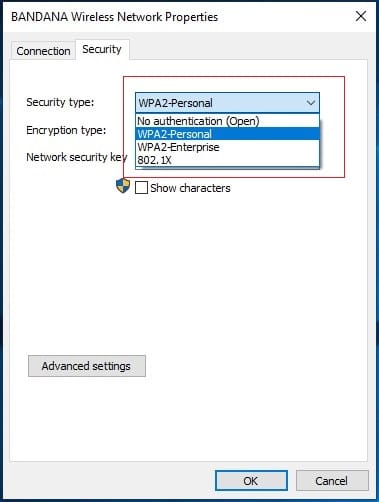
Step 5: Click OK to save the changes
Step 6: Reconnect the computer to check if it works
Check WIFI Profile
You may also want to check your computer’s WIFI profile settings when fixing internet connection issues on your computer. Sometimes simple changes in the WiFi profile is the reason for the computer’s failure to connect with it. In this case, you need to “forget” the WiFi profile and try to reconnect with it. The steps involved in this process include;
Step 1: Click on the WiFI icon on the taskbar and choose the Network and Internet settings
![]()
Step 2: Choose WiFi and proceed to “Manage Known Networks”
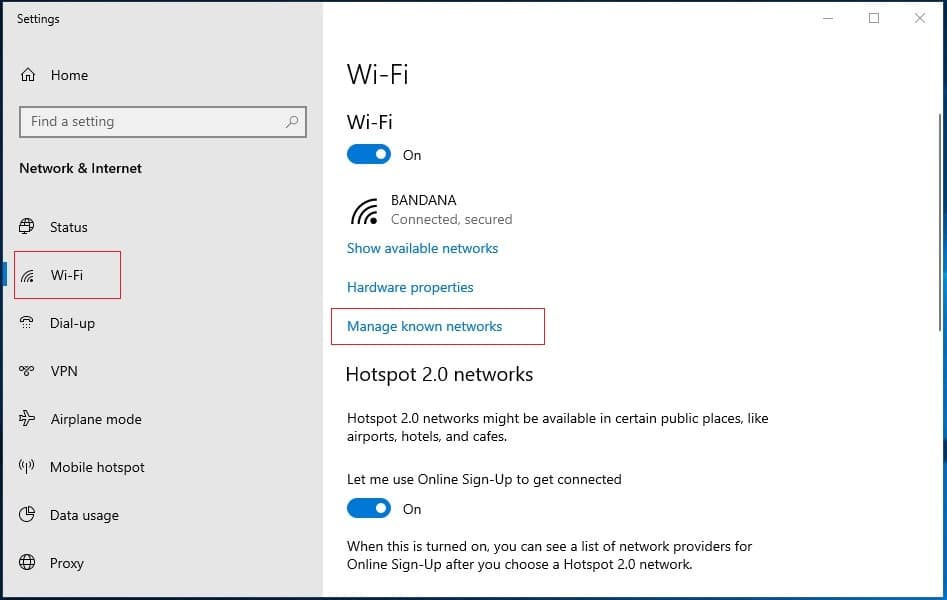
Step 3: Select the network you want to forget and click on the Forget option
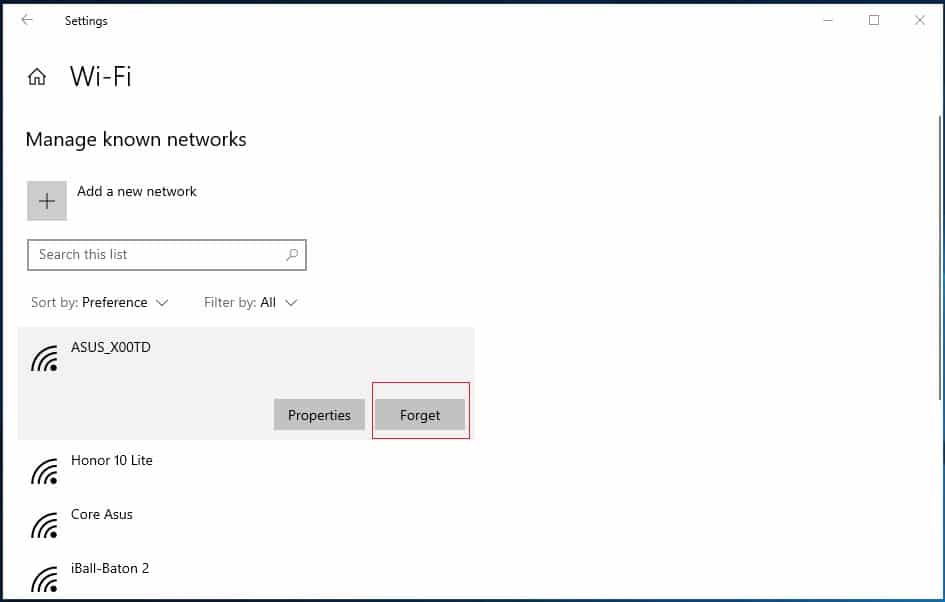
Step 4: You can then try to reconnect with the WiFi network and see what happens.
Conclusion
The possible reasons for the failure of your computer to connect to the internet through WIFI are numerous. Therefore, the resulting processes for fixing the problem are also plenty. Try any of the listed processes to repair the network and connectivity issue.
