
Is your PC showing a blue screen or a constant pop up alert that “Your PC ran into a problem”? Well then you’re lucky because this guide will solve these and related computer errors. Read on for the details.
Once in a while, your computer might malfunction. A typical way the PC shows a system malfunction is to show a blue screen or show a pop-up alert that “Your PC ran into a problem”. If you’ve handled computers for some time, you must have come across this and a couple of other related problems associated with PCs.
That being said, how exactly do you fix the blue screen and the pop-up alert? Let’s find out. Here are some workable solutions, recommended by top IT experts, that you can use to fix this problem.
Method 1: Complete Hard Disk Scan
Bad disk sectors and corrupt file systems are a possible cause of the “Your PC ran into a problem and needs to restart” alert. To fix this, you need to check the hard disk. Follow these steps:
Step 1: Head over to “This PC” then right-click on any drive like “C” the select “Properties.” In the pop-up dialog box, select the “Tools” tab.

Step 2: Next, click “Check” then in the next window, choose “Scan drive”. The selected drive will be scanned for file system errors.

Step 3: Repeat the process for all the other drives till you weed out all the possible file system errors.

If your PC is still showing a blue screen with an alert, try the next method.
Method 2: Boot You PC on Safe Mode
Starting your computer on safe mode comes with plenty of perks. Some of these include allowing access and repair of faulty system files, uninstalling troublesome files and software, removing viruses, etc.
Just in case you were wondering, Safe Mode works by minimizing the number of active programs and services. That way, it’s a lot easier to diagnose and fix system errors. That said, there are different methods of booting your PC on safe mode.
Direct Option
Step 1: Click “Start” then “Settings” then “Update & Security” then select “Recovery”.

Step 2: In the next window, head over to the “Advanced startup” then click “Restart now”. That should restart your PC.

Step 3: As the PC starts, select “Troubleshoot” then “Advanced Options” then select “Startup Settings” then choose “Restart”.


Step 4: Next, you’ll see 3 safe mode options to choose from: “Enable Safe Mode with Command prompt”, “Enable Safe with Networking”, and “Enable Safe Mode”.

Alternative Way
For this option, you’ll use CMD or PowerShell.
Step 1: Once you can access CMD or PowerShell type “msconfig” then hit enter.

Step 2: In the next dialog box, choose “Safe Boot” then under “the” Boot option, click “OK”.

That will give you options for restarting your Pc; immediate or later. Opt for an immediate restart.
Note that either options will start the PC in safe mode after which you’ll revert to normal boot procedure to power on your PC.
If the erroneous system files are fixed successfully, the blue screen should be gone. Also, you won’t see the “Your PC ran into a problem” error alert on your screen. Going forward, your PC should be able to boot properly. However, if the problem still persists, try the next method.
Method 3: System File Checker (SFC) Scan
Another great way to fix ‘your PC ran into a problem and needs to restart”. It’s pretty straightforward with the help of CMD or PowerShell. Here are the steps:
Step 1: Press the following keys: Windows + X. That will open a menu with many options. Choose “Command prompt (Admin)”. Alternatively, you can choose PowerShell (Admin) if the “Command Prompt (Admin)” is not one of the options in the menu.
Step 2: Assuming you chose “command prompt (Admin)” above, type this command without the quotation marks “sf /scannow” then hit enter. Once you do that, wait some 15 minutes or less as the SFC scan progresses.

When the scan is done with, any corrupted files should have been fixed and you won’t see any more blue screens or “your pc ran into a problem” alert.

If for some reason, the SFC scan wasn’t completed successfully, then I guess you might want to consider the DISM scan instead. The procedure is the same except for the command itself. Follow these steps to run DISM scan on your PC:
Step 1: Press the Windows + X key on your keyboard. That will open a list of options on the extreme left side of your screen. Choose the “Command prompt (Admin)” option. If that’s not an option in the list (which is very rare), then choose “PowerShell (Admin)”.
Step 2: In the command prompt window, type the following command without the quotation marks then hit enter.

The scanning will begin right away. It should take no more than 20 minutes. Be patient till the process completes successfully.

Whichever type of scan; DISM or SFC, the blue screen and “your pc ran into a problem” alert should be gone. Not yet? Then the next method will definitely fix it once and for all.
Method 4: Tweak the Memory Dump Settings
Sometimes the reason your PC is misbehaving, showing a blue screen with annoying “your pc ran into a problem” notification is a problem with the system’s memory dump settings. So how do you do that? Well, very simple and easy. Follow these steps.
Step 1: Hit the Windows key or click the start button then type the following without the quotation marks “View Advanced System Settings”. Click the topmost option that appears on the window. That will open a small window with 5 different tabs.

Step 2: Click on the “Advanced” tab then under “Start and Recovery” select “Settings”. That will open a new window.

Step 3: In that Window, uncheck “Automatically Restart” then in the dropdown menu select “Complete memory dump”. Once you’re done with the settings, click “OK” to save the changes then restart your PC.

After a successful restart, check to see if the error alert is still showing on your screen. If yes, then try the next method.
Method 5: Uninstall Software from Unknown Sources
Maybe you didn’t know about it yet, but software from unknown sources can paralyze your PC. There are a number of reasons for this one being that such software may contain suspicious codes which may be incompatible with the Windows operating system leading to death error alerts.
By simply uninstalling these softwares, you could very well have fixed the blue screen and the incessant “your pc ran into a problem” error alert. To successfully uninstall any malicious software from unknown sources, follow these steps:
Step 1: Click on the start button then type “Control panel”. That will open a window for “All control panel items.”

Step 2: Click on “Programs and Features”. That will open a window with all the installed programs on your PC.

Step 3: Identify and uninstall all the suspicious programs that you installed recently and the ones from unknown sources.

You can still uninstall any suspicious programs on your pc using command prompt. Follow the steps highlighted in any of the methods above to access the command prompt window then type in this command “appwiz.CPL” then hit enter. Next, use the dropdown menu to uninstall the offending software.

After that, you may want to restart your PC to check that error is fixed. If not then try the next method in our list.
Method 6: Disconnect External/ Peripheral Attachments

Another reason you PC might be showing you the error alert could be that it’s overloaded with peripheral attachments.
Flash drives, external hard disks, Bluetooth speakers and headphones, printers, scanners, USB drives are just a few of the common external attachments users may add to their pc.
While it is okay to have all these devices connected, in some cases they over work the computer to the extent it shuts down or worse still crushes.
So, if you’re seeing “your pc ran into a problem and needs to restart”, consider removing all the external attachments then restart your PC. If it powers on successfully after removing the peripherals, now you know the culprit. You may want to add just a few external equipment instead of all of them together.
In some cases, the problem could be the result of outdated drivers for the external devices such as hard disks, flash drives and USB drives. I’m saying this because I’ve ever had a similar issue with my external hard drive. Whenever the drivers for any of the attached devices is out of date, Windows may send error alerts.
To fix this, you might want to remove all the attached devices and reattach them one after the other until you find the offender then update its drivers. Also, you may choose to update drivers for all devices using third party utility programs. After doing that check to see that the error is no more. If it’s still showing on the screen, proceed on to the next method.
Method 7: Update your Windows OS
A common issue that many users may overlook but which is crucial for the health and wellness of computers is Windows update. That’s the only way your PC gets the latest set of features to ward off new security threats and also improve upon the functionality of the operating system.
However some users knowingly choose to disable Windows updates either temporarily or permanently thereby making their PC prone to virus attacks and system malfunctions. If you suspect this to be the cause of the error on your PC, the fix is easy. Just update your PC’s Windows. Here are the steps for that:
Step 1: Click on the start button then type “Windows update settings.” That will open a screen for Windows update. On the left pane, you’ll see a number of options.

Step 2: Click the on “Check for updates” in the middle section of the screen. Your PC will then download and install the latest security and system features to improve on its functionality.

Remember to turn on “Windows Automatic update” in order to receive any feature updates. There’s also the option of manual Windows update.
Method 8: Perform System Restore on Your PC
“Your pc ran into a problem” error alert can be fixed by simply performing a system restore on your PC. As the name suggests, “system restore” reverts your PC’s system to a previous more stable one prior to the error alerts. To do that, follow these steps:
Step 1: Click on the start button or press Window + S keys then type “system restore”. That will open a window with a few options.

Step 2: Choose “Create a restore point” from the options. That will open a “system properties” window with some 5 tabs.

Step 3: Under the “System Protection” tab, click on the “System restore” button. That will open a “system restore” wizard. Click “Next” to proceed accordingly.

Step 4: Select your preferred restore point then click “Next” to proceed as prompted till your PC’s system is restored.


You can also do a system restore for your PC by making use of command prompt or PowerShell. On the CMD screen type in “rstrui.exe” then hit enter. From there proceed on to choose a “restore point”.

Tip: It’s important to remember that “System Restore” won’t delete your pictures or documents. Therefore, you can do it with peace of mind.
When you’re done, check to confirm that the error is fixed. If not, you may want to try the next method in our list.
Method 9: Use the Tripartite Blue Screen Repair Tool
There are countless Blue Screen of Death (BSoD) utility tools you can use to fix “your pc ran into a problem” error alerts. Here are some of the best of these utility software:
Tweaking Windows Repair
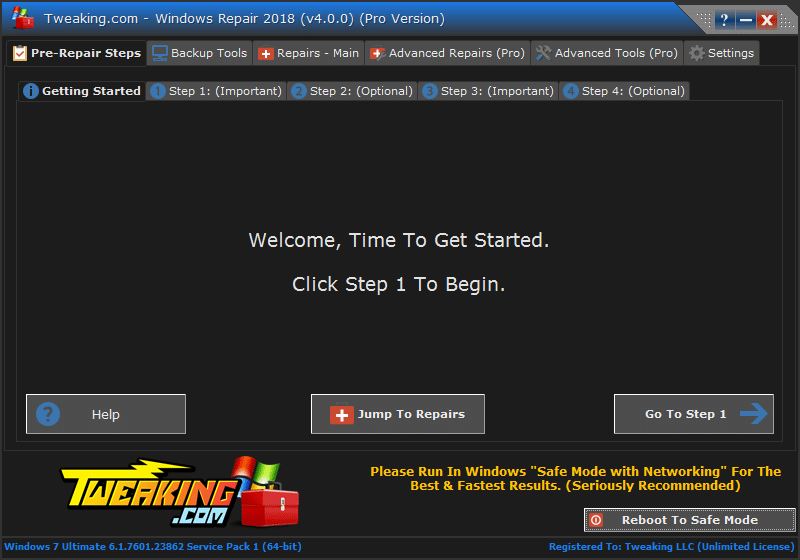
Features
- Available Windows Firewall clean up entries
- Access to Windows services
- Supports files unhiding for malware detection
- Supports backup & restore of registry files.
Professional Blue Screen of Death Fixer Utility

Features
- Automatic drive scanning and repair
- Easy installation and use
- Supports drive optimization
- Supports file unhiding and scanning
WhoCrashed

Features
- Supports dump file scans
- Suggest possible causes of system crash
- Bug codes, error messages, and file path of offending files
- Supports symbol resolution analysis
Wondershare Recoverit

Features
- Recovers lost audio & video files and photos
- Supports data recovery from hard drive, flash drives, recycle bins, etc.
- Supports file unhiding and scanning
1. What may have Caused the Blue Screen of Death?
There are a number of causes of Blue Screen of Death. Some of the common one include missing DLLs, hardware failures and incompatibilities, or even corrupted registry files.
2. How to Avoid Computer Blue Screen
To avoid a computer blue screen error all it takes is routine scanning of system files for malware, and incompatible files. Also remember to update drivers for all attached peripheral devices besides creating a system backup and restore point.