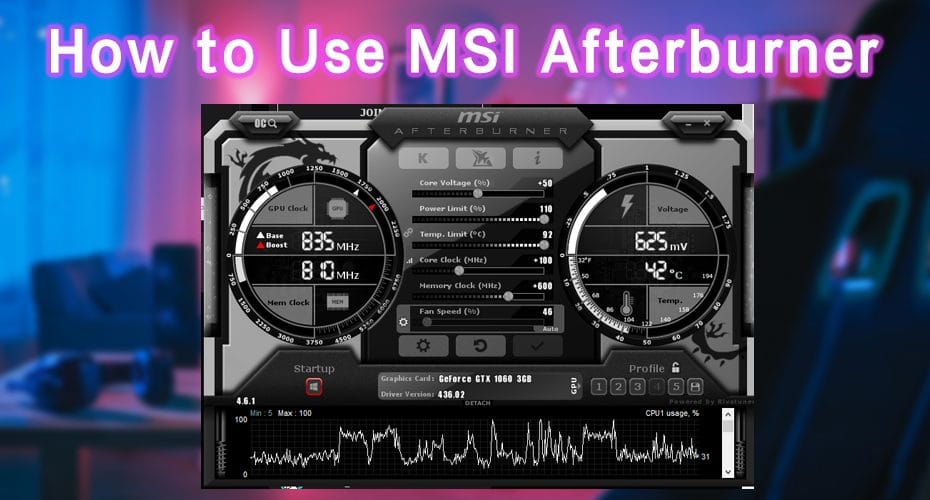
If you are an experienced gamer, you know that overclocking your graphics card can improve your game experience. In this article, we will teach you how to use MSI Afterburner to overclock your graphics card and get a smoother gaming experience.
MSI Afterburner is one of the most used graphics card software. A fantastic thing about it is that it can work on any card, even if it is a non-MSI. While using MSI afterburner, you get complete control, and it allows you to monitor your hardware in real-time.
The overclocking tools provide easy and precise access to your graphics card settings. It also helps to increase your GPU’s clock frequency and voltage. The fan speed control will also enable you to find the perfect balance between performance and temperature.
MSI Afterburner Features
- OC Scanner helps to find the highest stable overclock settings for your card. It will help provide a free performance boost for a smooth gaming experience.
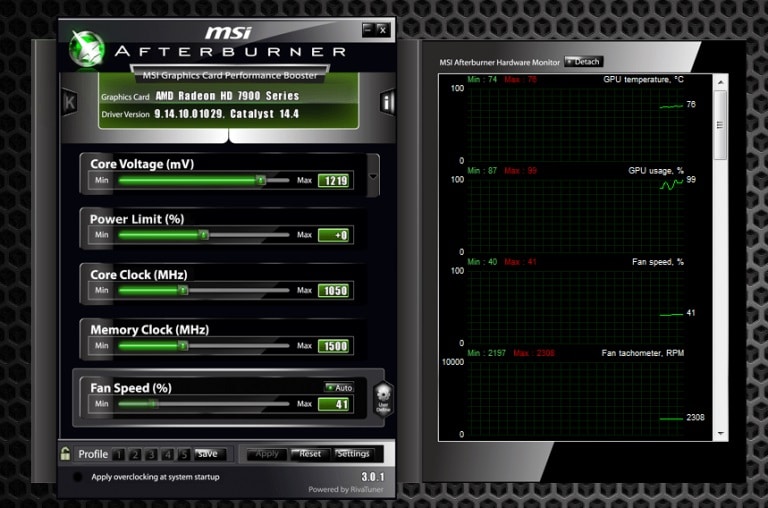
- ON screen display appears at the corner of the screen and helps provide real-time information on your system's performance.
- The hardware monitor shows the critical hardware information in real-time. This includes temperature, usage, clock speed, and voltage.
- The custom fan profiles help you customize a predefined fan speed curve that helps to determine cooling performance all the way.
- The Predator allows you to record your best performance in games or overclocking without missing a single frame.
- Dragon center helps you get the most out of your MSI products. You get to monitor, tweak and optimize in real-time. It also has predefined profiles per game in which you can apply optimized settings to ensure a great gaming experience. The MSI Gaming LAN Manager automatically classifies and prioritizes the latency-sensitive applications for online games.
1. Install the MSI Afterburner
This MSI afterburner tool allows you to overclock other manufacturer’s graphics cards on the market.
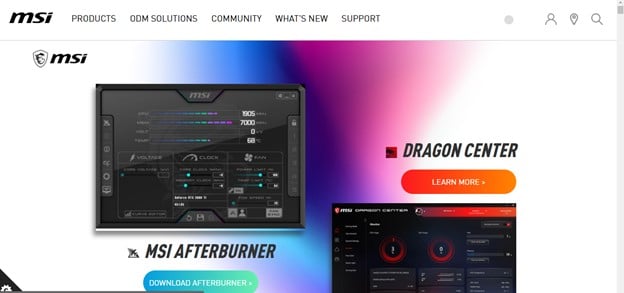
Step 1: The MSI Afterburner is readily available on the official MSI website, where you can download it freely. It downloads as a zipped file. Once downloaded, unzip the download and click on the setup to install.

Step 2: When installing, remember to check the option – “Rivatuner statistics server”; otherwise, some features may not work fully. The Microsoft ® DirectX® components will also be installed to add more functionalities.
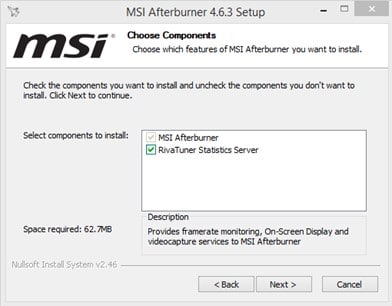
Step 3: Follow all the steps in the installation process. Accept all the licensing terms and ensure you choose an appropriate destination folder for installation. Once done, the MSI afterburner software will automatically start.
2. Interface Information
This is an overview of the interface information of the MSI afterburner. Check the number on the diagram and seek the interface explanation below on the same number.
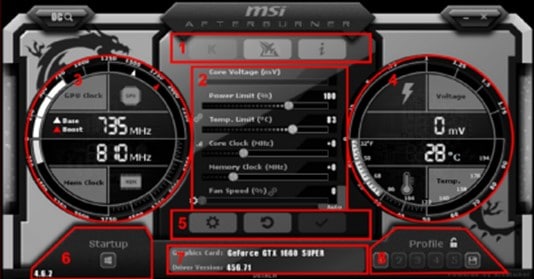
- We will start naming from left to right. The first is the Kombustor Toaster Program (access to download here), a help icon, and hardware and software information.
- We will start naming from top to bottom: core voltage increment, power limit, temperature limit, the core clock, the memory clock, and fan speed. At the bottom right corner is the automatic fan control/manual.
- The white arrow illustrates the basic frequency, and the red arrow illustrates the boost frequency. The top number is the current core frequency, and the bottom number is the video memory frequency.
- The number at the top is the core voltage, and the bottom number is temperature.
- We will name from left to right: settings, restore default, and application settings.
- This is the automatic application’s settings after boot.
- In that section, the number on top represents the name of the video card, and below is the driver version.
- It represents the preset solutions.
- Monitoring Tab: Real-time information about the computer hardware, including RAM Usage.
3. Graphics Overclocking
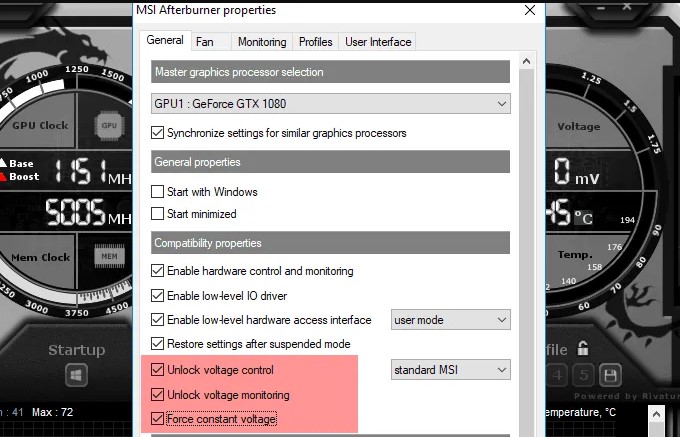
Step 1: Open your MSI Afterburner and click the settings icon. Next, you need to click on the General tab and check to unlock voltage control, unlock voltage monitoring, and force constant voltage. Once done, click OK and restart your PC for the settings to work.
![]()
Step 2: Set the Power limit and the temperature limit sliders to the maximum. This helps make the Graphics processing unit (GPU) more power efficient to perform better.
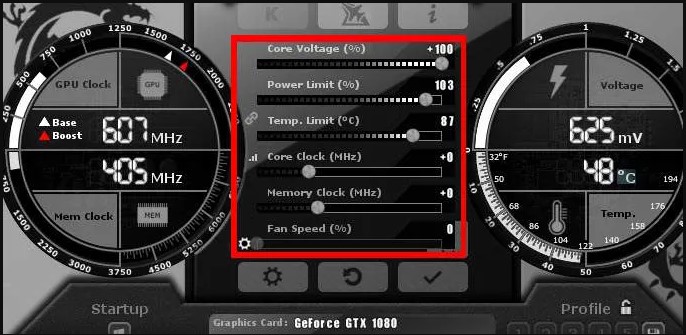
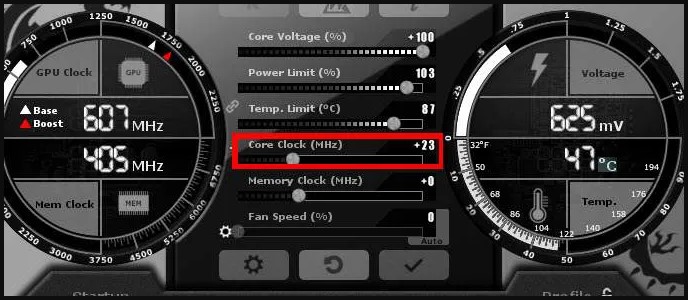
Step 3: Start increasing the core clock speed slider by small steps. Each unit on the slider references a single MHz. Increase slowly by increments of 50MHz till you reach your desired core clock speed. Also, after each increment, is sure to hit the apply button for the changes to work.
Step 4: To be on the safer side, you can have the Kombuster running in the background. This helps to monitor how your GPU is handling the overclocking.
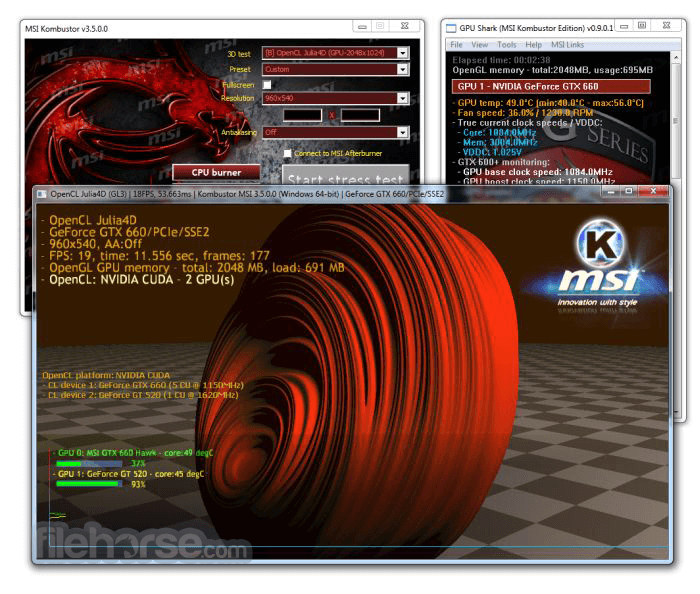
Step 5: Once the Kombuster is stable, try running a game or stress the graphics card to see its behavior. If it handles it well, you have successfully overclocked your GPU.
Step 6: You also need to overclock the memory clock speed. It is the same method as the core clock. However, you increase the memory clock speed by 50-100MHz. If you get errors like for the core clock in the Kombustor, reduce the memory clock speed and increase the speed by 10MHz until stable.
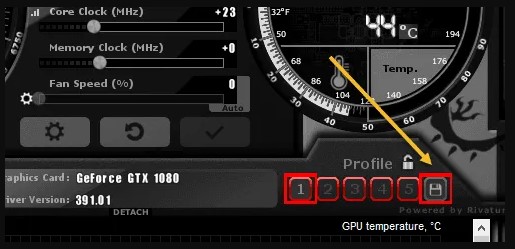
Step 7: Run the Kombustor for a minimum of ten minutes to monitor the performance of the graphics. If all goes well, save the settings as a profile on the floppy disk icon.
4. Fan Speed Control
Overclocking of the hardware will increase the temperature. However, if there is no adequate cooling, it may cause permanent hardware damage.
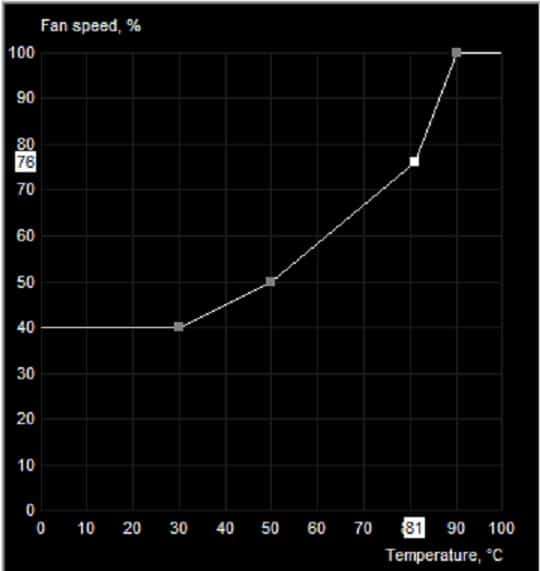
Therefore, the fan speed should be increased according to the rise in temperature to be on the safer side. We recommend you use Preset Fan Speed to help regulate the temperature.
5. Other MSI Afterburner Settings
Other parameters can also be set in the settings. These are;
- Framerate limit
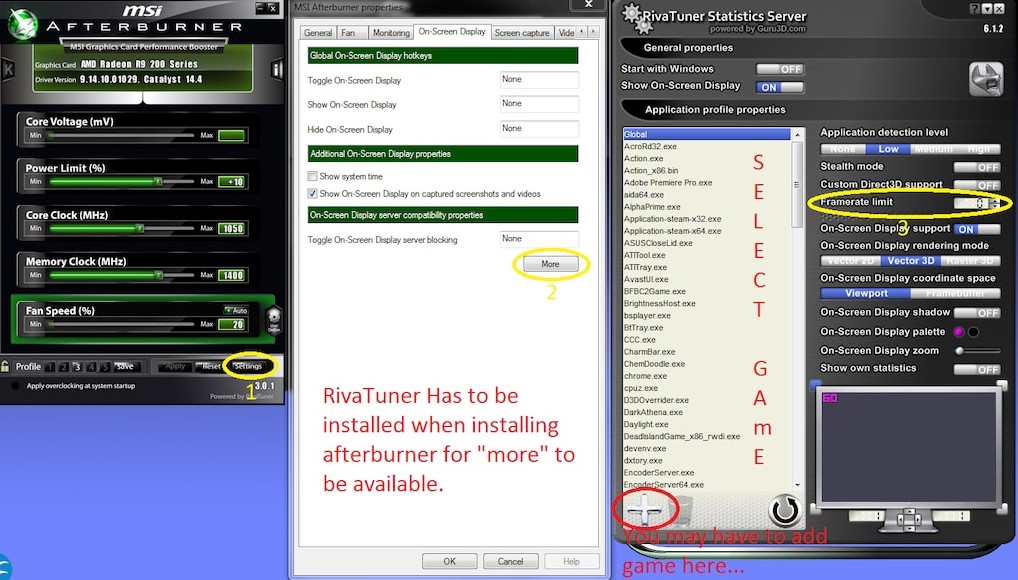
To locate the framerate limit, go to settings, click on the screen display menu bar. Click the spanner icon at the top right. you will see the fps limiter. Capping the framerate can help reduce energy consumption, heat production, and noise. Also, the Frame rate limiter is found in the RivaTuner, not on the MSI afterburner. No wonder you need to check it when installing the afterburner.
- Video capture
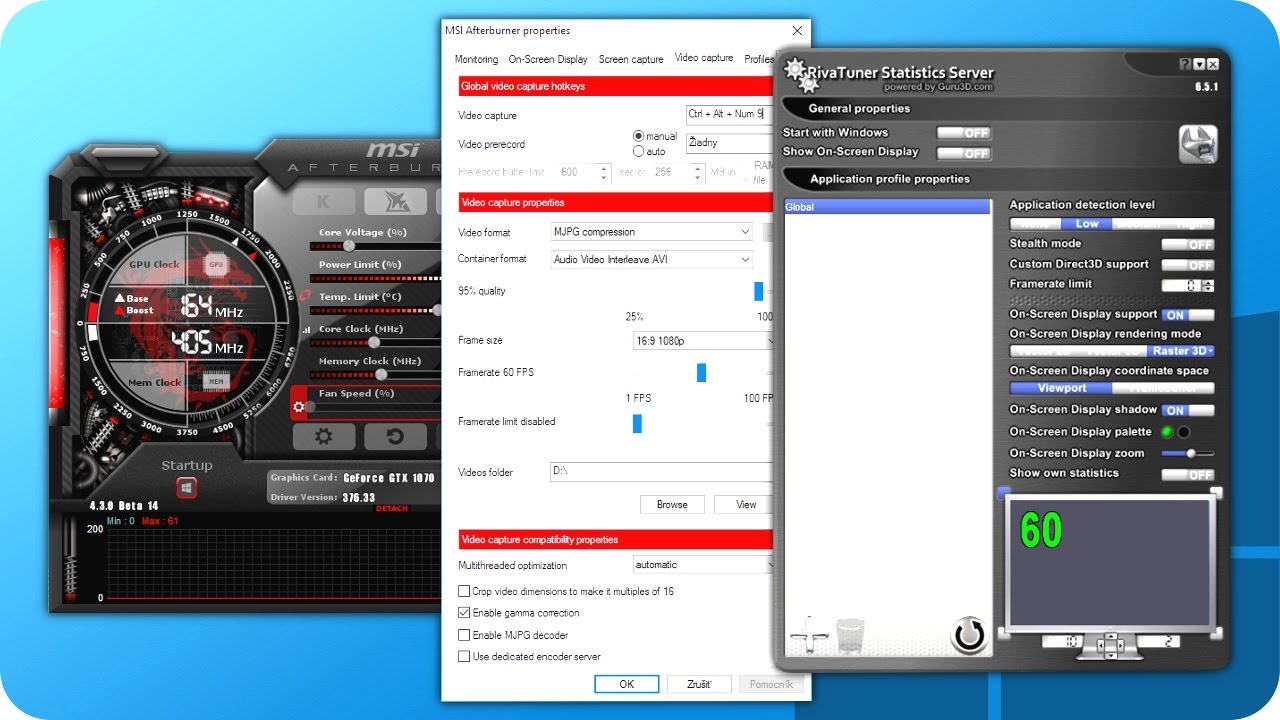
The Predator feature allows you to record your best performance in games or to overclock without missing a single frame. It also supports the H.264 codec and multiple file formats, sizes, and quality to capture your match. This will help you share your achievements and become famous.
- Default skin
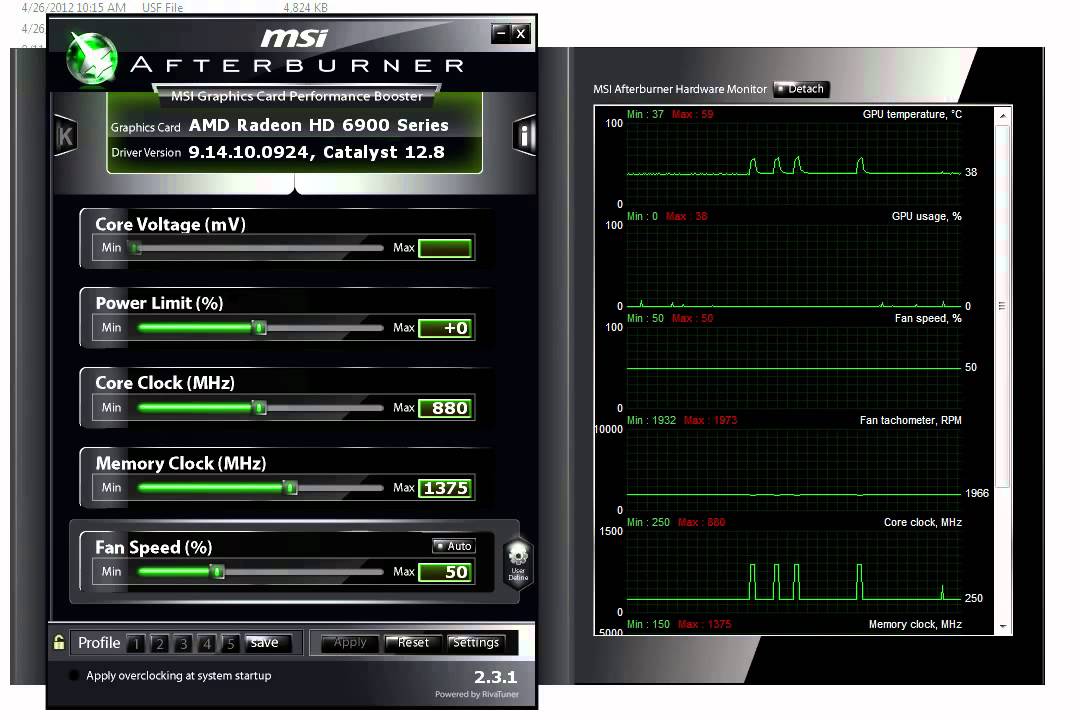
It allows you to choose the look and feel that you like best. The MSI Afterburner comes with a selection of different skins that dynamically change how the program looks.
- Game screenshots
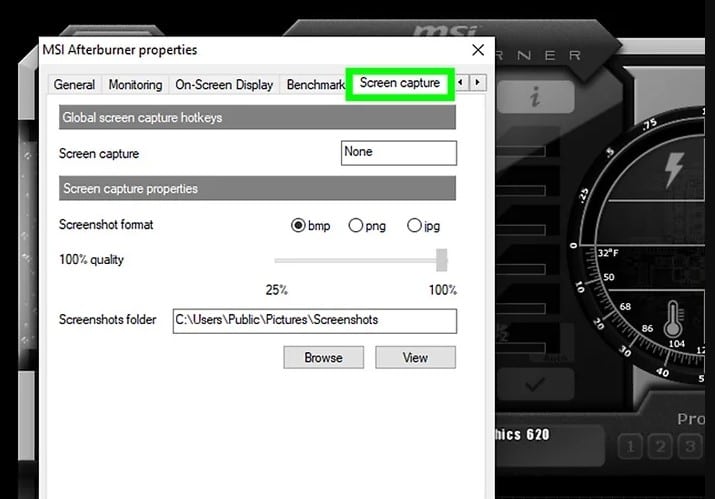
You can launch the MSI afterburner and click the settings button near the bottom of the main display. You should then select the screen capture tab. It allows you to set the screen capture key, screenshot file type, and folder where you have screenshots. Press the key while the game is running to take screenshots.
6. Fault Handling
Here are the two troubleshooting procedures:
- Computer black screen processing
If while overclocking the computer, the monitor’s screen becomes black, do not worry. Just restart the computer, and you need to reduce the core clock limit or memory clock limit.
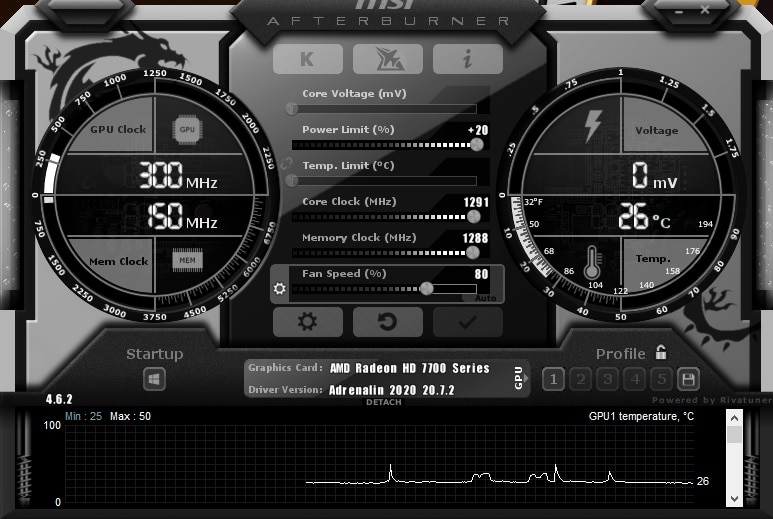
This is because you may have reached the maximum that your GPU can’t handle. Hence for the core clock, reduce in intervals of 5MHz, while for the memory clock, reduce in intervals of 10MHz.
It may be that the number that just overclocked is your graphics card's absolute limits. Therefore, it is recommended not to exceed that range.
- The interface value is displayed as 0
If this happens to your MSI Afterburner interface, go to Settings, click ‘General’ and check these two options. This will help to solve the issue.
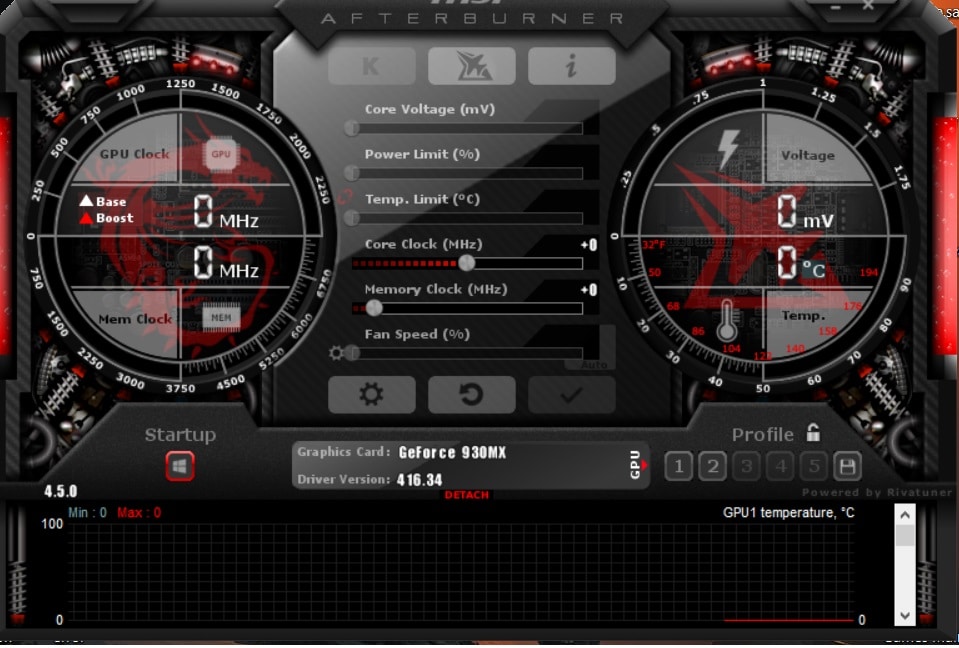
Also, enable the low-level IO driver when you try using the MSI afterburner on some games, and it doesn’t work as you intend it to. Also, it gives access to the most detailed information about your graphics card.
Well, leaving the graphics card in a fully loaded state for a long time will significantly reduce the graphics card's service life. Also, do not try to increase the rated voltage of the graphics card because it can quickly burn the graphics card.
When you notice any flickers, blackouts, glitches, or crashes, know that something is not okay. Hence, you can revert to the default settings and start the process again with different settings.
