Did you know that you can use your Apple Music subscription on Windows? You can listen to your music online using a browser, iTunes, or through virtualization on your Windows 10.
At times, I think other music software functions are too redundant. That’s why I still like to use Apple Music to listen to songs because it only does one thing – play music. What more could you ask for?
You won’t have to worry, even when handed a Windows computer, and you want to listen to your music playlist. Listening to your music can make you feel relaxed and psyched up. If you have ever had trouble accessing your Apple Music, this is what you can do.
1. Log In To The Apple Music Official Website

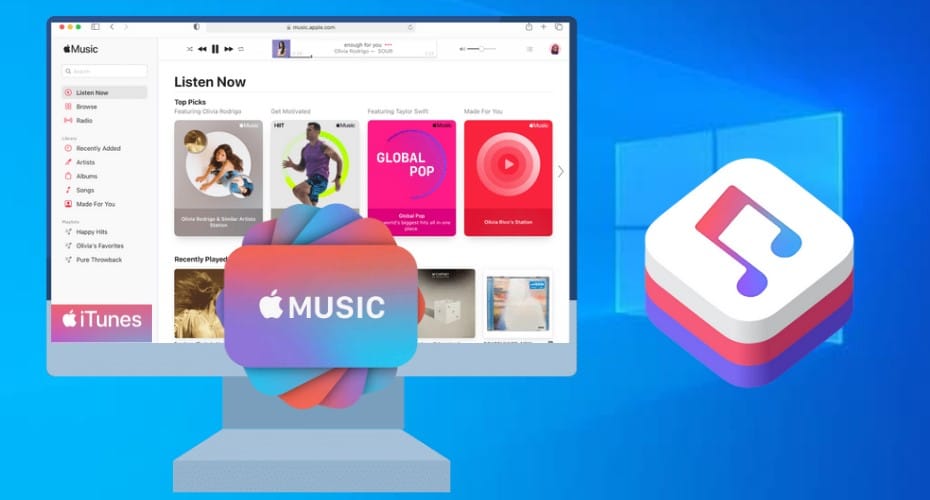
Did you know that you can listen to Apple Music online? Thereby, you can even listen to music from anywhere and not just from your Mac, iPhone, or iPad.
Step 1: Open your preferred browser, visit the Apple Music player website and sign in. The CTA is located in the top right corner of the website.

Step 2: Make sure to enter the right Apple ID and password for your music subscription. Remember to enter the two-factor authentication and the code you received on your device.
Step 3: When prompted to trust your browser, click “trust.” However, with time, you can change your mind and click “not now” or “don’t trust.”

Step 4: Once you successfully sign in, navigate to the left, choose a playlist or click the entire music library.
Step 5: Once done, you can sign out by clicking your profile photo in the top right corner and selecting “sign out”
Enjoy your music!
2. Install iTunes

There is another way to listen to Apple Music on Windows, using iTunes. Fortunately, it can be installed on your Windows Operating System.
Step 1: Go to Microsoft's official website.
Step 2: Search for iTunes.

Step 3: Click on iTunes to download and install it. However, you will first need to sign in to your account to access all features.

Step 4: Once done, you can install it on all your devices.

Step 5: If you don’t have the Microsoft Store pre-installed, you can download and install iTunes from the iTunes store. iTunes features millions of songs that you will enjoy listening to.

Step 6: That's it! Now you can listen to Apple Music from all your devices.
3. Use A Virtualizer
There is another way you can use to listen to your Apple Music through a virtualizer.

Step 1: First, open your web browser, go to vmware.com, click on resources and product downloads. Under “desktop and end-user computing,” click “VMware workstation 16.22 player for Windows” version. Click on download now; once done, install.

Step 2: Download macOS image and convert it to ISO. (You will need to have a Mac computer prior). You can even get ISO images on the internet. To get it on your own, go to App Store, search and download macOS Catalina. Be patient till the download is finished. Once downloaded, click on macOS Catalina, then right-click and choose utilities.
Some Catalina commands include:

Step 3: Once you are done with the procedure, you must transfer the ISO file to your Windows 10 PC. Open your web browser, go to this GitHub source, and click on “unlocker latest” on the left sidebar.

Step 4: On the next page, click on unlocker.zip. Once it downloads, right-click, select extract, extract all, then right-click “win_install.cmd” and click run as administrator. Pick yes if prompted. Could you wait for it to finish the process?

Step 5: Start your VM player and click “create a virtual machine.” On the “choose or install disk image” option, browse your ISO file and click open. Choose macOS as the operating system. Leave everything else as default. Continue with the process till you are done.
Step 6: Locate your virtual machine, click the “vmx file” in your macOS files, and open with notepad. You need to add a parameter for it.
Step 7: Click on the virtual machine; it will start on the ISO file. Select your preferred language and continue with the installation. Follow the procedure till done.
Remember also to install the VMWare tools to ensure you can resize your macOS display. The macOS will restart on its own.
You can get more insights from this YouTube video
Cancel Or Renew

You may get tired of your Apple Music subscription and want to cancel or renew it. This is how you can cancel subscriptions from Apple on your Windows computer.
Step 1: Open your Windows pc, and open iTunes.
Step 2: On the menu bar at the top of the iTunes windows, choose “account” then “view account.” Remember to log in with your Apple ID.
Step 3: Near the settings, next to subscriptions, click “manage.” Consequently, edit the subscription you want.
Step 4: Click cancel subscription. If you don't see a cancel subscription, it is already canceled and won't renew.
Step 5: Alternatively, click change to select another plan and click done. Enjoy your favorite music at ease.
Even with that, you can still make other purchases in the future.
Listen to your Apple Music Playlist Every day
No more worries about listening to music that doesn’t interest you. You can use any of these methods to listen to your Apple Music on your Windows 10. They are all ideal.
However, you can still try to use other music apps to diversify the kind of songs you listen to. Music is a great way to relax your mind and give you psyche. Happy listening!