
Sometimes, you may need to change the name of the administrator on your computer. If you use a Windows 10 computer and need to change the name of the administrator, this article is for you.
Easy Ways to Change Administrator Name on Windows 10
There are many methods that you can use to change the name of the administrator on your computer. They include;
Method 1: Computer Management
This method includes the use of basic computer management approaches. It is the simplest method of changing or renaming the administrator in a computer system.
Step 1: Start by searching “computer management” on your computer.

Step 2: Once the result is shown, Locate and click on “Local Users and Groups”. This will take you to an options page where you see the “Users” option. Click on it and proceed to, “Administrators”


Step 3: While on “Administrator”, click the right mouse button and select the rename option.

Step 4: Input the new administrator’s name and press enter to save it.

Method 2: Command Prompt
In this method, you have to use the command prompt. While this method is also easy to use, you may need to have some advanced knowledge of computing to pull this off. The following are steps involved in the process.
Step 1: Press the Windows button + R, enter “cmd”
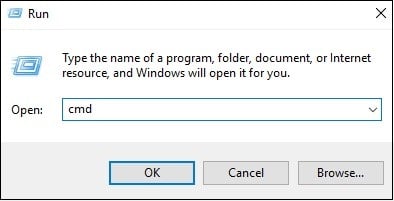
Step 2: Once the command prompt opens, type in the following command

Step 3: Press enter and you will be required to enter the new name. Once you do this, close the command prompt. The administrator’s name is effectively changed.
Method 3: Windows PowerShell
This method is similar to the previous one. The only difference is the use of Windows PowerShell instead of Command prompt. The process involved includes;
Step 1: Press the Windows and X buttons simultaneously, and run as an administrator to open the Windows PowerShell.

Step 2: After opening PowerShell, enter the following command:

XXX = oldname, YYY = newname
Step 3: Input the new administrator name and enter. Close the PowerShell and check to confirm that the new administrator’s name has been effected.
Method 4: Group Policy Editor
This is the last method through which you can change the name of the administrator on your computer. The steps involved in the process are listed as follows;
Step 1: Press the Windows button and search for “Group Policy Editor”

Step 2: Open the Group Policy Editor and go to “Windows Settings”. Under this option, proceed to “Security Settings” and then, “Security Options”. Under the “Security Options” menu, click on “Account: Rename Administrator Account”

Step 3: Double-click, make changes and then click “Apply”

How to Change an Administrator on Windows 10
If you transferred your computer to another person, you may want to consider changing the administrator, to allow them with full and unrestricted access to the files on the computer.
The following are methods that you can use to change the administrator on a Windows 10 computer;
Step 1: Search for Control Panel in the search bar

Step 2: Launch it and click on User’s Accounts option

Step 3: Click on the user you want to change and change the account type to administrator.

Step 4: Click on change account type to finalize and effect the settings.

How To Reset Administrator Password in Windows 10
Lastly, you may need to reset the administrator’s password for your Windows 10 computer. Remember that the administrator account gives unrestricted access to the computer and its settings.
Through Settings
Step 1: Press the Windows button
Step 2: You will see the Settings option in the list of menu the button brings. Click on Settings

Step 3: Click on Accounts, and click on My Info

Step 4: This will lead you to a page where you should choose the Manage My Microsoft Account option.

Step 5: You should proceed to More Actions and Edit Profile


Step 6: Click on Change the Password on the top window of the page

Step 7: You will be required to provide both current and new password on this page

Step 8: If you don’t have the password, you can click on Forgot Password and this will take you to another process of recovering your password.
Step 9: Click on Save after providing the new password. You can then restart the computer and sign in with the new password
These steps will help you change the administrator password.
These are the four different methods for changing the name of an administrator on a Windows 10 computer. These methods all work effectively and you can choose any of them as long as it works for you.