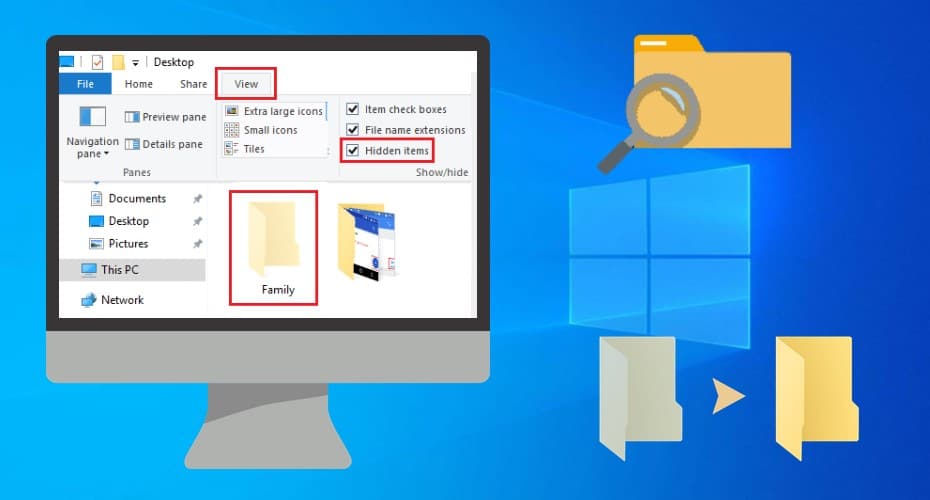
Show hidden files and folders in your windows with our tricks and get a quick access to them. Get solution for inaccessible files with hidden attributes.
Ways to unhide the hidden files and folders in your Window 10 PC
Windows 10 hides many files important files vital for its smooth functioning to ensure that users do not delete or tamper with them. You may need to access these files for various reasons but not knowing the ways to do it can bring serious distress. Prevent your operating system to protect you from yourself like a baby and use the methods we are suggesting today to unlock the hidden files on your Windows 10 operating system.
Unhide the Files Using the This Computer Application
It is the easiest way to get access to the files which are hidden on your PC. To use this option you can follow the below steps:-
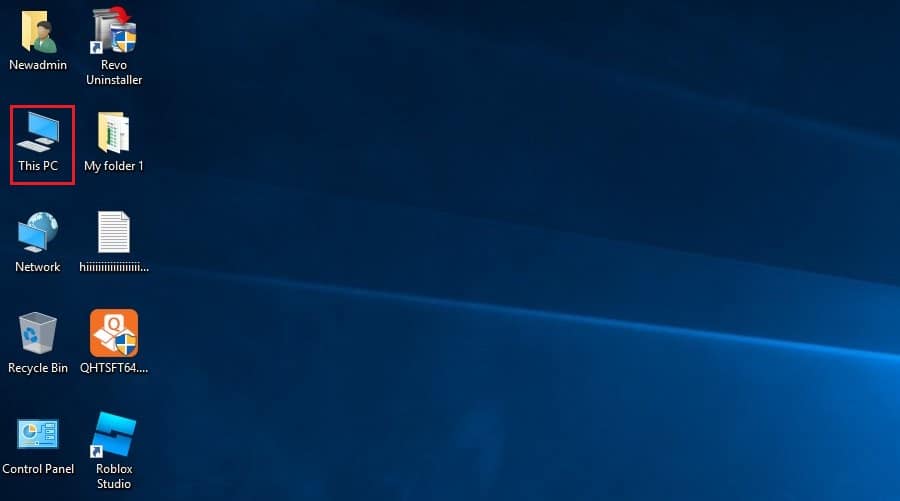
Step 1: Click on the window explorer or press the Win + E keys together to find the option “this computer”. Click on it and it will lead you to the list of all drives on your computer. Find the directory where your file is hidden for example C Drive, D Drive, or any other drive which you had created on your PC.
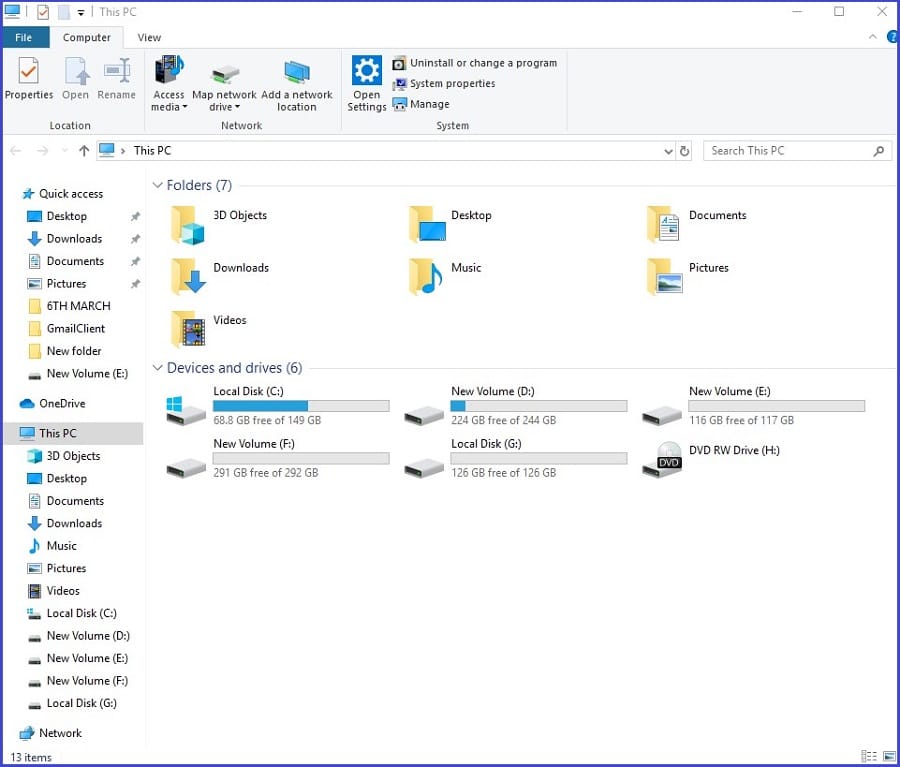
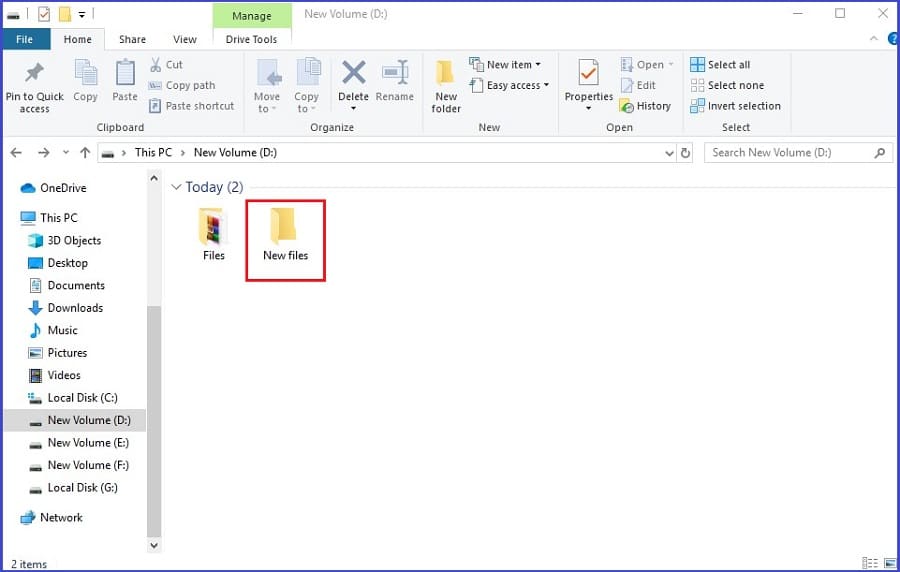
Step 2: Once you find the relevant directory you can search for the View Button on the toolbar and click on it. After you do this you will be presented with an option of Hidden Files. Your system will be displaying the hidden files in a light yellow icon.
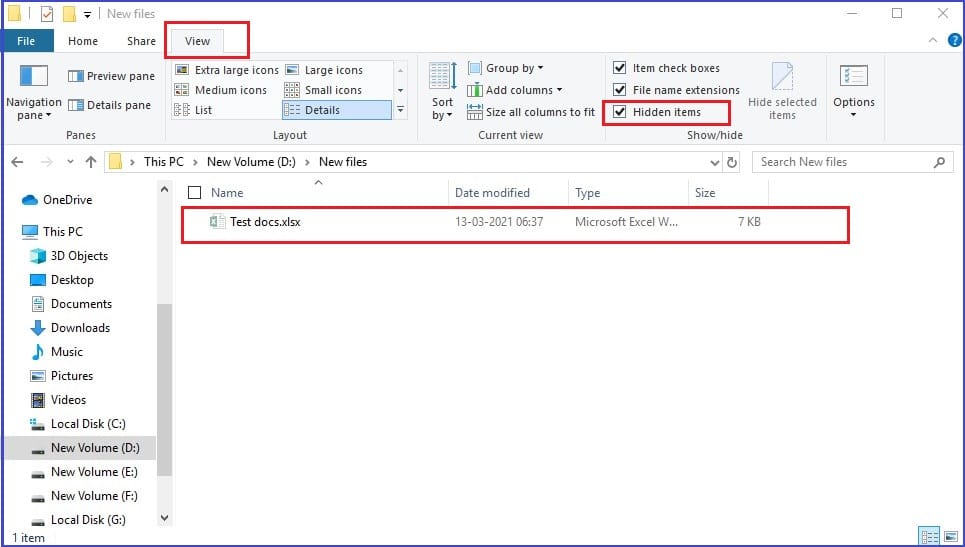
Step 3: You can check the Hidden file option to view all files which are marked as Hidden on your computer. It is very easy to distinguish the hidden files as their icons are slightly different in color from the rest of the files and folders in that directory.
Unhide the Files by Using Control Panel
You can also take the help of your control panel to locate the hidden files or folders on your PC. To do this you can follow the below steps:-
Step 1: First of all, you need to go to your control panel by searching for it in the Cortana search box and locate the File Explorer Options among all control panel items presented to you and click on it.
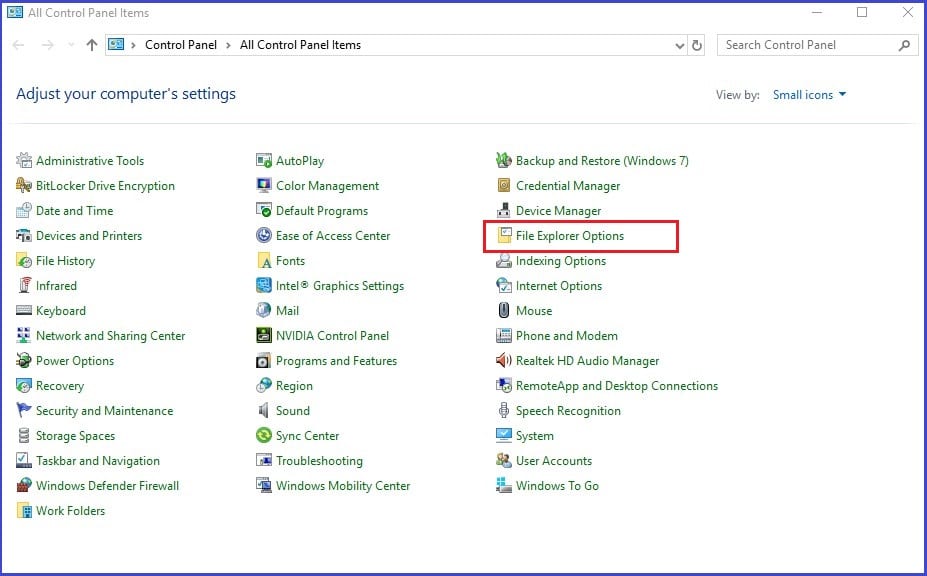
Step 2: Once you click on File explorer options you can find the view tab and click on it to find the folder options dialog.
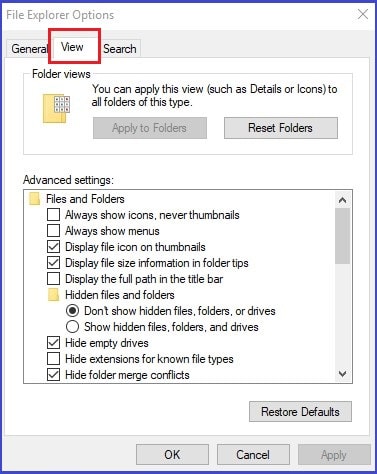
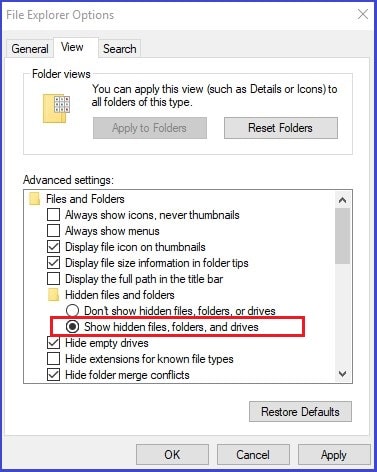
Step 3: Locate the Hidden files and folder option under the advanced setting and select the option stating Show hidden files, folders, and drives. After you select this option click on apply and you can get access to all hidden files and folders on your Windows 10 PC.
Accessing hidden files by editing a Registry Key
Though this method to explore hidden files is not common with Windows 10 users but it is indeed a very effective solution to make hidden files visible in your file manager. Follow the below steps to use this method:-
Steps to unhide files using Registry Key
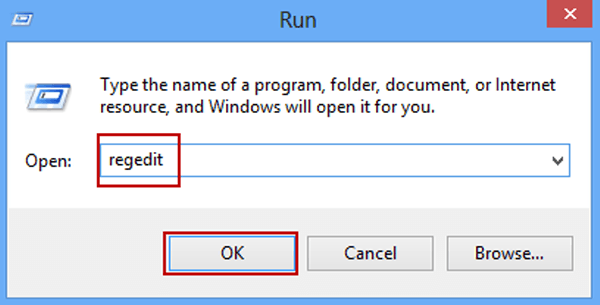
Step 1: Click on Window key + R key at the same time to open the RUN option and type Regedit in the box to enter the registry editor.
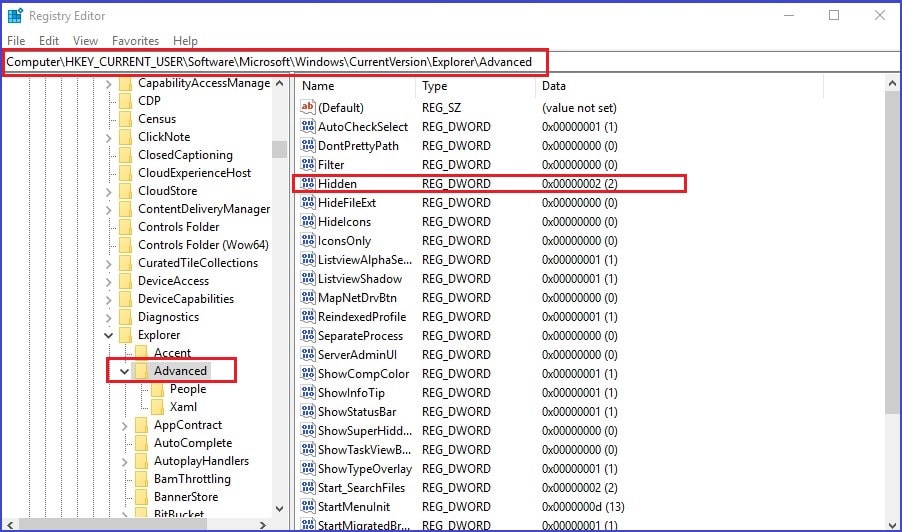
Step 2: Once you enter the editor you can navigate the following path to find the relevant settings. Double click on the option which says, Hidden from the options displayed on the screen to open it.
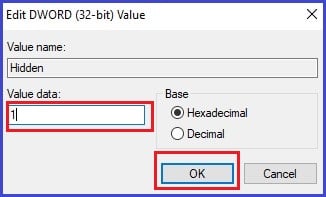
Step 3: You can notice that the default value for hidden files will be 2 and all you need to do is to modify that value to 1 and click the ok button.
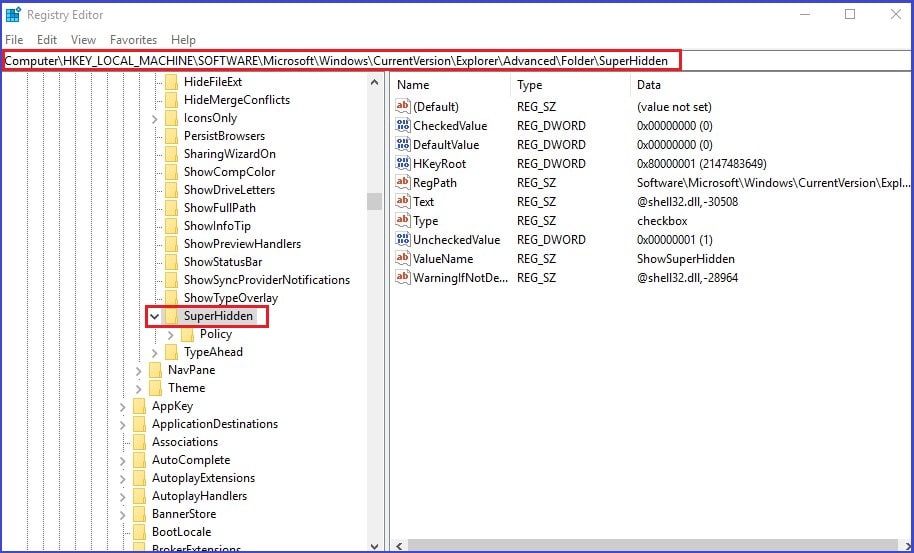
Step 4: If you are looking for the files which are hidden by the operating system then you can do this modification in the SuperHidden folder.
Show Hidden Files Using Command Prompt
This method is suitable for finding hidden files which are done either manually or any kind of infection from the malware. his flags the file as a command file used only by DOS. Below are steps to use it for unhiding the files.
Step 1: Press the Window key and X Key together and open the command prompt. Make sure to enter the command prompt as an administrator to execute this process. You can also open it by searching for the command prompt in the search box of your Windows 10.
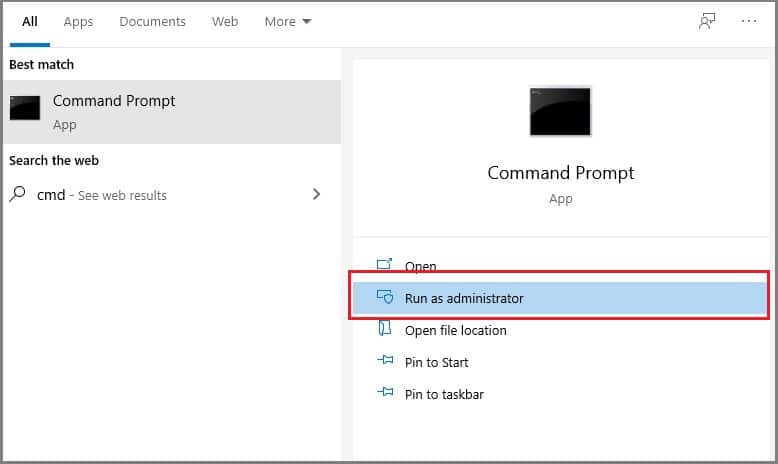
Step 2: Check for the drive where your files are hidden to recover them using this technique. It is very important check only the relevant drives so be very cautious while perfroming this step.
Step 3: Type the Attrib syntax -s -h -r /s /d *. * and hit the enter button to unhide the files and folders from that drive. Be very careful with any kind of mistakes with this attrib syntax as it will not work for you unless and untill it is used in the given format.
Step 4: Use the +H option to set the HIDDEN attribute of a file to hide it from listing and use the -H option to do vice-versa. Similarly use the +S option to set the System attribute of a file. If you want to turn off the System Attribute then use -S.

Now we can hope that finding the hidden files on Windows 10 will not be a fuss for you as these methods will surely help you with this problem. Don’t worry if you are using the other versions of Windows as except the first one all other methods are effective for the all popular versions of Windows.
1. How do I set up hidden folders on a Mac?
To set up hidden folders on a Mac you can go to the terminal and type chflags hidden. Hide the folders or files by dragging them into the terminal window.
2. How can I secure my files?
The best way to secure your files is to use good antivirus software to protect them from malware attacks. You can also choose to use encryption for your files and folders to keep them safe from unauthorized access. BitLocker is one of the best software for it as it is highly recommended by the users and tech-savvy geeks for the protection of your files and folders.
3. Is there any limit for the number of files and folders I can hide?
No there is no limit to the number of files you can hide. No matter which method are you choosing to hide the files and folders in window 10 you can hide an unlimited number of files.
