Are you considering replacing your PC’s hard disk drive with an M.2 SSD drive? Awesome! In this article, you’ll find a step by step guide for installing M.2 SSD. Also, you’ll learn the difference between SATA slot and PCle slot M.2 SSD models. Keep reading for the details.
If you’re following tech trends, you might have noticed that more people are transitioning from the use of traditional mechanical hard disk drives (HDD) to Solid State Drives (SSDs).
The reason for this shift is largely attributable to the superior performance, durability, and reliability associated with SSD drives. For instance, PCs leveraging the Non-Volatile Memory Express (NVMe) protocol connected via the M.2 PCle slot have a faster loading time for the Operating System, software, and games. That’s a clear departure from their traditional mechanical hard disk drive counterparts.
Types of M.2 SSD Models
Currently, there are two main types of M.2 SSD drives available. They include:
- The PCle M.2 SSD
- The SATA M.2 SSD
A major difference between the two models is in their design i.e. PCle slot (M key) features 5 gold connection pins while the SATA slot (B key) has 6 gold connection pins. Simply put, the opening direction of the two is completely different, it is easy to distinguish

It’s also worth mentioning that PCle M.2 SSDs have a comparatively faster performance speed than SATA M.2 SSDs. Specifics of the differences in transmission speeds between the two SSD slots will be covered in a separate article.
Pre-Installation Compatibility Checks

Before buying an M.2 SSD drive for your PC, you may want to do a few compatibility checks.
Why Compatibility Checks?
Well, three reasons.
First, not all PCs support SSD drive storage. Only PCs with the latest generation of motherboards support SSD storage.
Secondly, SATA and PCle SSDs are incompatible. Meaning, one can’t take the place of the other.
Thirdly, the PC’s M.2 connector slot may be compatible with M key drives, B key drives, or M+B key drives.
Lastly, all types of M.2 SSD drives differ in performance. For example, NVMe M.2 drives are comparatively faster when compared with SATA M.2 drives. The need for a pre-installation compatibility check cannot be emphasized enough.

With that said, here’s how to do PC SSD drive compatibility checks. On the motherboard, try and locate the M.2 connector slot; a horizontal slot labeled PCle of SATA or both. Remember the M.2 SSD that you buy should match what’s indicated on the motherboard’s M.2 connector slot.
You’ll need to verify the size of your PC’s motherboard- this info is available on the PC or motherboard manual. The ideal sizes that are compatible with SSD storage drives are 2242, 2260, or 2280.
How to Install M.2 SSD on Your Desktop PC
Assuming your PC meets the minimum M.2 SSD drive set up requirements and that you already bought the right M.2 SSD drive that matches your PC, next up is installing the new storage onto your computer. Follow these steps to get that done hassle free:
Step 1: Now that you have the M.2 SSD drive with you, the first thing you want to do is ensure it won’t heat up while in use. To do that, you’ll need to attach a heatsink to it. Be sure to use a thermal heatsink paste to improve the heat dissipation efficiency and lifespan of the heatsink.

Step 2: Locate the M.2 slot on the motherboard. In most models, the M.2 slot sits midway between the CPU and GPU. However, some PC models have the slot situated at the lower right hand side of the motherboard. In some motherboards, the M.2 interface is concealed under a metal plate to keep it cool.
Step 3: Put on your anti-static wristband on then proceed to open the cabinet to release the static electricity and also give access to the M.2 slot.
Step 4: Once you find the M.2 slot, unscrew and remove the mounting screws. Install the riser/ standoff screw.

Step 5: Having removed the mounting screws and installed the standoff/ riser screw, it’s time to insert the M.2 SSD into its place – M.2 slot. For some motherboards, you might have to remove the Graphics card or Memory Module blocks in order to install the new SSD drive with minimal effort. For PC motherboards with more than one M.2 slot, install the SSD drive on the slot nearest to the CPU first.

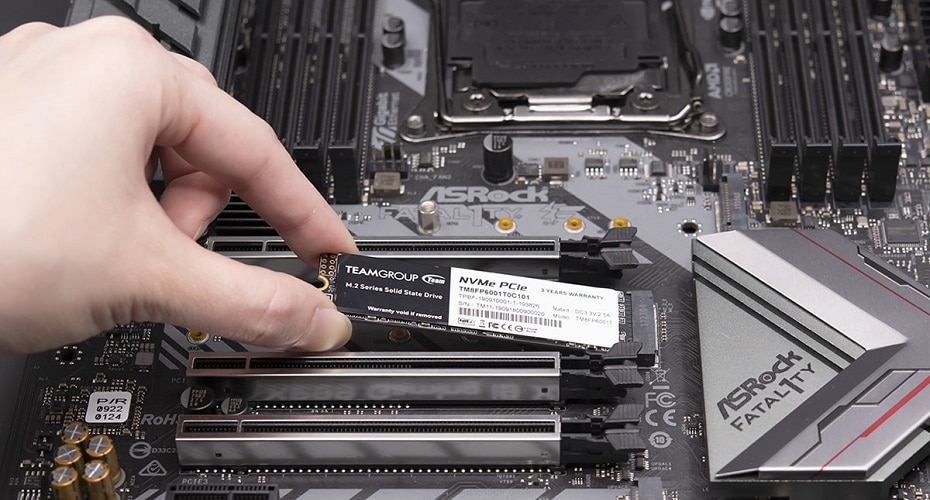
Step 6: Slide the SSD drive into the M.2 slot at 30 degrees while pushing it gently till it fits into the slot. Notice that after insertion into the M.2 slot, the SSD drive inclined angle to the motherboard.

Step 7: To ensure it’s flush with the motherboard, press the M.2 SSD drive till it sits on the standoff/ riser screw then lock it in place using the mounting screws. If you removed the graphics card and memory module blocks during the installation process, remember to slide them back in place.

That’s it for the hardware bit of the process. Congratulations! Now, let’s handle the software aspect of M.2 SSD installation.
Step 8: Power up your PC and enter the BIOS to check that your M.2 SSD drive is detected and can be read normally. If it’s detected, proceed to the last step. However, if it’s not detected, then you probably need to double check to confirm that it’s installed accordingly.

Step 9: With your new M.2 SSD drive detected, one last thing you need to do is change the PC’s boot sequence. To do that, install your preferred Operating System and set M.2 SSD as the first boot disk.
That’s all! Congratulations! You have successfully installed the M.2 SSD drive on your PC.
How to Install M.2 SSD on My Laptop
The procedure for installing SSD on a laptop is very similar to that for a desktop except for a few differences. If your laptop has an existing M.2 slot, all you need to do is open the back cover and slide in the NVMe SSD in the M.2 slot. The steps are a little different for PCs without an inbuilt M.2 slot.
Installing NVMe M.2 SSD on a Laptop with an M.2 slot
Step 1: Before commencing the installation process, you might want to back up some of your important files to an external drive for easy access. Remove the battery and the back cover then proceed to access your PC’s innards. Check the manufacturer’s manual (on the official website) for instructions on how to open your laptop’s backside to access the motherboard.

Step 2: Use a magnetic screwdriver to unscrew the standoff and the mounting screw. Note that some laptop motherboards do not have a standoff/ mount and screw. For such, you can buy a mount and screw separately; you’ll use them to secure your SSD drive in place.

Step 3: Next, locate the M.2 slot on the motherboard. Ensure it matches your SSD drive. Remember that B key SSD drives have a single right side notch while M key SSD drives have a single left side notch. Also worth noting is that SATA SSD drives have both left and right side notches.

Step 4: Upon locating the M.2 slot and verifying that it supports NVMe M.2 SSD interface, go ahead and install the drive. Do that by inserting it into the slot at 30 degrees then punching it gently until it’s lodged into position; at a slightly inclined angle.

Step 5: Press the inclined SSD card till it rests flat on the standoff. With your screwdriver, screw the mounting screw to secure the M.2 SSD in place.


That marks the end of the hardware bit of M.2 card installation on a laptop. Next up, turn on your computer to confirm that the drive is properly installed.

Step 6: Install the Operating System on the newly installed SSD drive and then access your backup files and from the external drive.
That’s all. Enjoy unmatched system performance courtesy of the newly installed NVMe M.2 SSD drive.