Import the videos from your last trip into Premiere Pro, edit them carefully, set them to music, and prepare them for social media release. Wait, how to export the edited videos from Premiere Pro? What Settings should you pay attention to when exporting?
I used to feel the same way too when I was just starting off with video editing. So, you’re lucky to have me! In this guide, I’ve shared some hand-on tips and tricks that will help you export videos from Premiere Pro much faster and easily.
Whether you’re a professional or novice video editor, you can attest to the thrill, or perhaps terror, that comes with exporting a video from Adobe Premiere Pro. However much you may think of the process as being too complex and time consuming, the truth is that the procedure is actually very easy once you get the hang of it. Follow these steps to get your video(s) exported from Premiere Pro in no time…
Step 1: Choose the Export Sequence and Period
After you’re done with the hard work of editing the video in Premiere Pro, it’s time to export and share it with friends. First you need to select the part of the video that you wish to export. To do that, simply follow my lead.

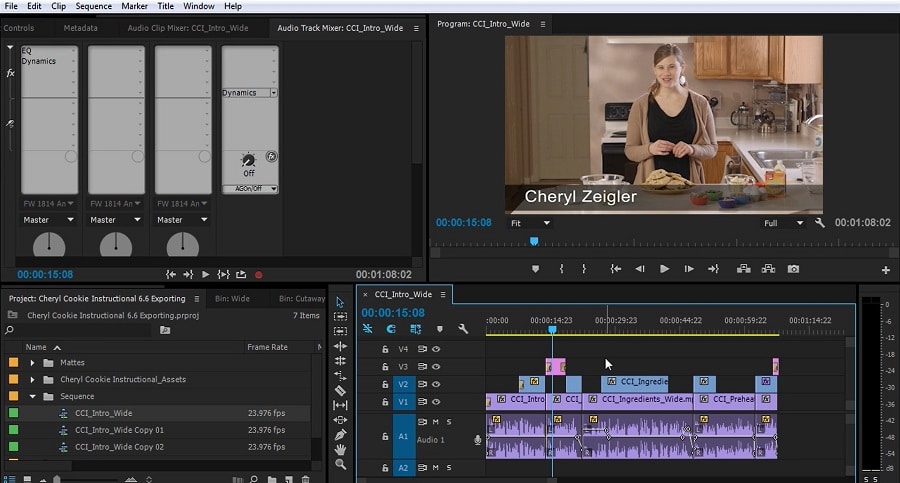
On the Premiere Pro timeline, click and drag the blue slider till it’s at the place you want the video to start then on the keyboard, press “I” to set the video entry point. Next, continue dragging the slider to your desired end of the video then set the video exit point by pressing “O”.
Step 2: Launch the Export Window
With the video sequence and period set, it’s time to launch the export settings window from where we’ll tweak the video some more. Here’s how to do that.

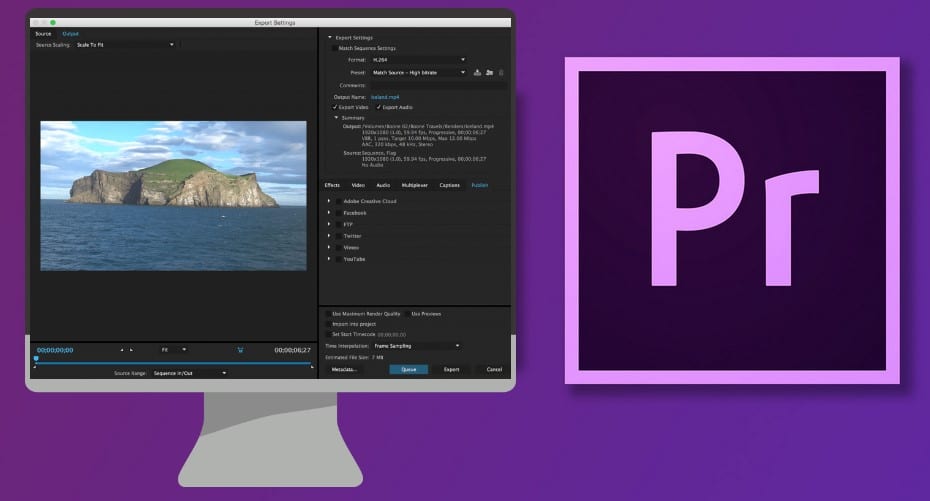
On the upper left corner of Premiere Pro user interface, click on the following tabs sequentially: File then Export and then Media. Alternatively, you can use these keyboard shortcuts for PC and Mac respectively: Ctrl + M or Cmd +M. That will open the Export Settings dialog box with all the necessary presets that you’ll use to adjust the video before exporting.
Step 3: Customizing Video Export Options
Before making any selection in the Export Settings window, you should have an idea of the particular outlet for displaying or hosting your video. It could be for YouTube, Vimeo, or maybe cinema. That decision is yours to make.

Remember, knowing your video’s intended hosting platform affects parameters like files size and the overall quality specifications of the video.
That being said, let’s continue customizing. Now, in the Export Settings window, go ahead and choose your preferred video codec under the Format menu. We recommend using H.264 format because it’s not only compatible with most of the hosting platforms, but it’s also very popular.

In fact, close to 85% of all the videos processed and exported using Adobe Premiere Pro use the H.264 format. In case yours is a video for YouTube or Vimeo, then it’s advisable you go with one of their preformatted choices located within the same Format Menu.
If you’re comfortable with the sequence of the video and would love to use the same setting in the format, then check the box for “Match Sequence Settings” on the top right corner of the export settings window.
Step 4: Codec Preset Selection

Next, still under the Export Settings dialog box, select your preferred codec preset. That’s to be found under the Preset menu. Here, your choice should be informed by where you intend to host the video. Premiere Pro offers a number of presets and playback quality options that are compatible with most popular video hosting platforms. From our experience, under preset we recommend choosing Match Source- High Bitrate.

Tip! Setting the video quality too high may actually distort the exported footage, especially when there’s a mismatch between the file and footage resolutions.
Step 5: Set your File Name & Export Location
After successfully choosing a format and preset for the video, you need to name the video file. To do that, open the Save As dialog box by simply clicking on blue Output Name.

Name your video file appropriately and remember to choose an export location then click Save. Oh, and don’t forget to check the Export Video and Export Audio checkboxes. That way, your exported file will have both video and audio.

Step 6: Video and Audio Settings

Premiere Pro allows you to fine-tune the video and audio settings to your liking. That ensures the final video is of the finest quality. To do that, start by selecting the Render at Maximum Depth checkbox. Next up, proceed to adjust the bitrate (the size of the export video file). For the best video quality, high bitrate is recommended. However, if you need a smaller video, then you may want to trim the bitrate a little bit.


Step 7: Exporting Your Video
Now that you’re done with the seemingly “hard part”, it’s time to export your final video. Adobe Premiere Pro has two options for this:
i) Using the Export function

This option is immediate and makes use of your selected format and preset features. All you need to do is click on Export and your video will be exported and saved in your pre-selected destination.

Note that this option won’t allow you to undertake any other operation on the Adobe Premiere Pro UI during the video file exports process.
ii) Using the Queue

This export option is suitable if you want to export multiple sequences concurrently. If you click on it, the video file will be sent to the Media Encoder and the associated sequence will be added to a queue. Once that’s done, simply press the Green Play Button and your file will be exported. Also noteworthy is that the queue export feature allows you to execute other operations on the Premiere Pro interface while the video file(s) export.


Step 8: Watch or Share Your Video

Congratulations! You have successfully completed exporting your video(s) using Adobe Premiere Pro. Now you can share the fun with friends and family. Happy watching!!!
1. How do I download and install Adobe Media Encoder?
That’s super easy. All you need to do is click on this link: Click Here then click on the Download Adobe Media Encoder button located somewhere on that page.
2. What’s the best format to export from Premiere Pro?
As to what format is best largely depends on the intended purpose of your video- how and where you want to use the video. Check out this table for a quick rundown of the best video formats to export from Adobe Premiere Pro.
| Video Format | Purpose (best for…) |
| 1. H.264 | Online MP4 or 3GP videos (YouTube, Vimeo, etc.) |
| 2. Quicktime MOV | High image fidelity at a reasonable video file size. |
| 3. AVI | Maximum image quality at maximum file size. |
| 4. TIFF Sequence | Large and long video files |
